Benefit Eligibility Review
This window will list the health insurance benefit records for all employees. You can apply various filters (located at the top of the window) to display entries that match the criteria that you specify.
Benefit records may either be entered manually on individual employee accounts or created automatically by the ACA Hour Eligibility Report when employees are determined to be full time and thus eligible for insurance coverage.
When the ACA Hour Eligibility Report creates a benefit record, it will assign the employee to the insurance plan that you have indicated is the default plan.
Note If an employee’s coverage is not continuous and they become eligible for a health benefit again, the program will automatically deactivate any active record for a prior date range before creating a new record. The program will also copy all of the settings from the prior enrollment record including the plan (in case the employee did not enroll in the default plan) and spouse and/or dependent coverage.
Go to Health Insurance > Benefit Eligibility Review.
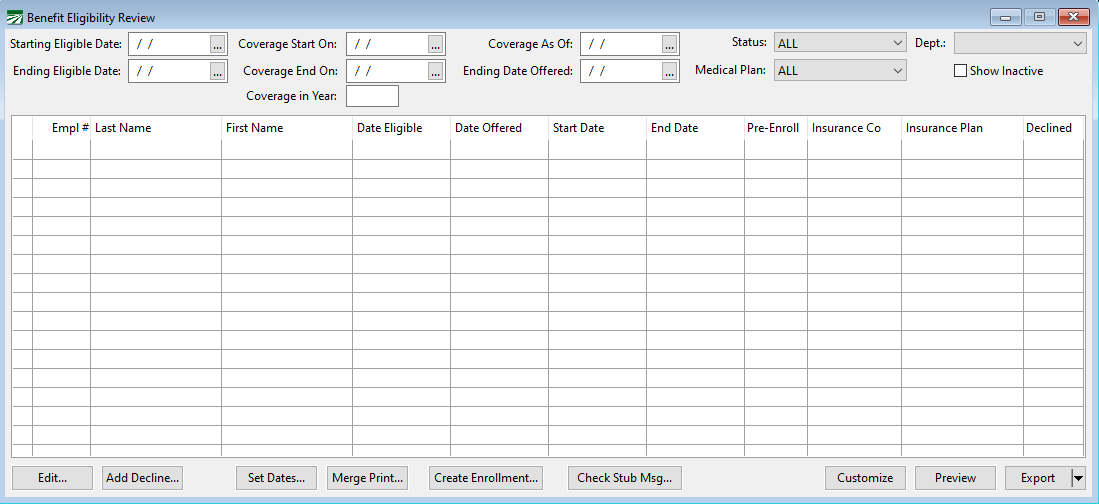
From this window you can edit the information for each benefit record, record employees that declined coverage, override the dates for coverage, create an enrollment file, and add a message to print on the eligible employees stubs.
The filter settings at the top of the window determine which entries from the benefits files appear in the grid. You can filter entries based on the starting and ending eligibility dates, specific starting and ending coverage dates and a specific year.
The Status setting at the top also filters records depending on the status of each record. The following options are available:
-
ALL: This will display all active benefits entries.
-
Accepted: This will display will active benefits entries that have a starting coverage date and that do not have the Declined Employee Coverage box selected.
-
Declined: This will display all active benefits records that have the Declined Employee Coverage box selected. This will also allow you to filter by decline dates. It will change the Coverage As Of and Ending Date Offered boxes to Starting/Ending Date Declined boxes. This can be useful in finding which employees have decline records. For more information on doing this, see the section Finding Decline Records Using the Benefit Eligibility Review.
-
Pre-Enrollments: This will display all benefits records that have the Pre-Enrollment box selected. These are entries that have been set up to reflect the employees’ plan selections before they have qualified for coverage.
-
No Plan: This will display all active benefit records that do not have a specific medical plan selected. (Medical plans are selected by clicking Select Plan… in the Enter Insurance Coverage window.)
-
Not Offered: This option will display all records that do not have a date offered.
-
Offered/No Response: This option will display all records that have a date offered, but do not have a starting coverage date or the Declined Employee Coverage box selected.
The Benefit Eligibility Review window only lists employee accounts. Employees who have opted for spouse or dependent coverage will have the spouse and dependents added to the enrollment file; they will not appear on the Benefit Eligibility Review window.
Create Enrollment
Click on this button to create an enrollment file. An enrollment file consists of a record for each employee that has accepted coverage along with a record for each covered spouse and dependent. The enrollment file then can be exported in a file to be sent to your insurance company.
Before creating the enrollment file, you should enter the ending coverage date and select Accepted for the Status at the top of the window. This will ensure that only employees who are eligible for coverage through the ending date and who have accepted coverage will be included in the enrollment file.
When the enrollment file is created, several checks are made for valid data. If there are any actual or potential problems, an exception report will be generated listing these items. You can then make adjustments as needed.
For example, if you have indicated that an employee has opted for spouse coverage but no spouse record was entered on the employee’s account, an exception will be generated.
Missing data such as addresses or date of birth will be reported on the Exception Report. If you do not have the information, you may need to submit the file with the information missing. Each insurance company or third-party administrator may handle missing data differently. For instance, it may be impossible to enroll an employee with a missing address because the insurance company doesn’t have anywhere to send the insurance card or other plan documents. An employee may be enrolled without a date of birth, but may be unable to fill prescriptions because the data of birth is required by the pharmacy.
The enrollment file can be created more than once. If you have exceptions that need to be corrected, you should make those corrections and click on the Create Enrollment button again to recreate the enrollment file. Once all errors have been corrected you can then proceed to export and upload your enrollment file to your insurer.
Dependents Report Export
To export a dependents report:
-
Navigate to Health Insurance > Benefit Eligibility Review.
-
Filter to the records you want to display.
-
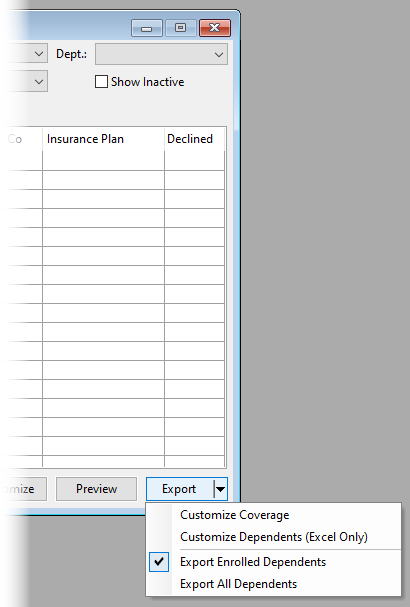
Click the Export button’s drop-down to access additional options for exporting the report.
-
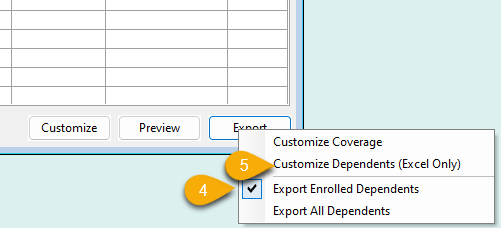
Select between Export Enrolled Dependents or Export All Dependents.
-
Click on Customize Dependents (Excel Only).
-
Click Columns to select the information you want to export.
-
Use the Add or Remove buttons to edit the fields.
-
Click OK.
FreedomCare Export
If you have selected FreedomCare for the Enrollment Export Format on the Export Enrollment Data window, the Create Enrollment button will create an Excel file containing new enrollees and employees whose coverage is being terminated. You will not use the Export Enrollment Data window to create the enrollment file.
The FreedomCare enrollment file works differently than most other insurance enrollment files. Under the FreedomCare system, employees are enrolled until you tell them to terminate coverage. This means that you only need to submit enrollment information one time for each employee, on each employee’s starting date. You do not need to submit a complete list of all employees that should be enrolled for a given month each month.
Before you click on the Create Enrollment button, you must first enter a Coverage Start On date. The enrollment file will contain only those employees that are starting coverage on that date. Employees who coverage ends on the day prior to the coverage start on date will also be included in the file with a termination code.
The program will ask for a file name to store the enrollment information after you click on the Create Enrollment button. After the data has been exported to this file, it will be opened automatically in Excel.
All of the employees who are staring coverage as of the starting date will be listed first. All of the employees whose coverage is terminating will then be listed. The first column of the spreadsheet will have an Add/Remove code to indicate whether an employee is being added to coverage or being removed.
Finding Decline Records Using the Benefit Eligibility Review
This window can be used to quickly generate an Excel spreadsheet that can determine whose decline records are still in effect. This report will be similar to other Excel reports generated by this window except it will have an additional column that includes the “Decline Expires” date.
Follow the steps outlined below to generate this report.
-
Set the Status on the Eligibility Review to Declined.

-
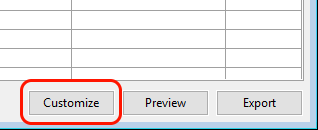
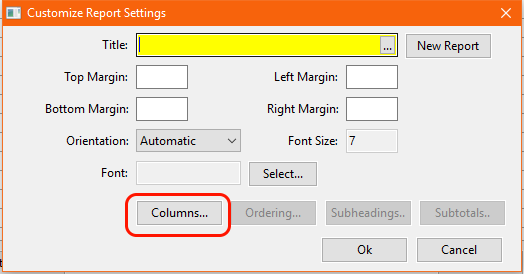
Click Customize at the bottom of the page.
-
That will bring up the Customize Report Settings window. This is where we can add extra columns to the report. Click Columns.
-
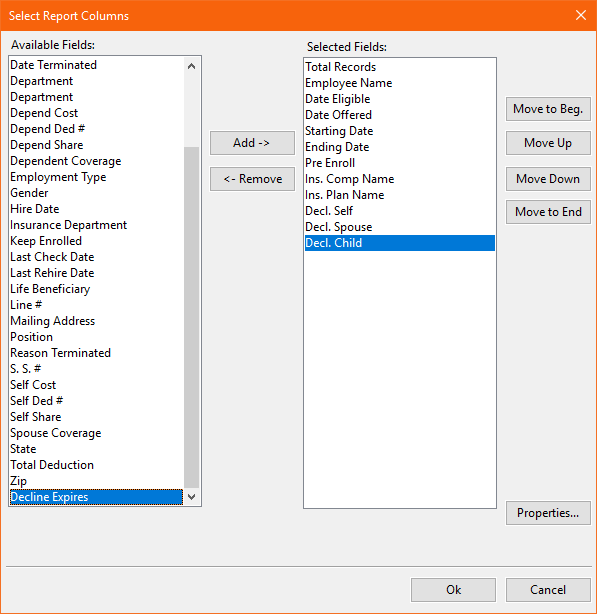
This will open the Select Columns window. Select the “Decline Expires” column by clicking on it in the left-hand column.
-
Add this column to the report by clicking Add.
-
Press Ok to save. Do this for both windows that were opened.
-
Click the Export button and enter a file name to generate the report.
After the report is generated, you can view and interact with it just like any Excel file. Therefore, you can sort by decline expiration date to find the employees that you need.