EZ$avings4U Plan Setup
EZ$avings4U is a payroll deduction Individual Retirement Account (IRA) with automatic enrollment. It is similar to CalSavers but gives the employer more control.
To set up EZ$avings4U:
-
Go to Retirement > Plan Setup.

-
Enter a Plan ID to represent EZ$avings4U (up to 6 characters).
-
For the Description, type EZ$avings4U.
-
For the State, enter CA.
-
Enter the Deduction #, you will need to create your own deduction in Miscellaneous Deductions.
-
Leave Loan Deduction # blank.
-
Select Payroll Deduction IRA from the Export Format drop-down.
-
Select or enter 0 for Vendor #.
Since employees choose their own IRA, there is no Vendor for this plan. There is no singular bank, company, etc., the employees are choosing for their IRA.
-
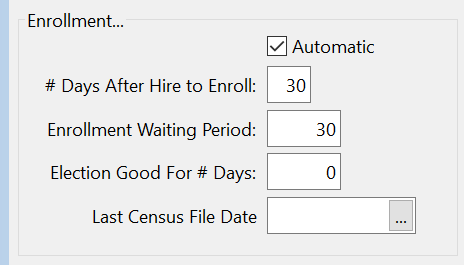
Under Enrollment:
-
Select Automatic to enroll employees automatically.
-
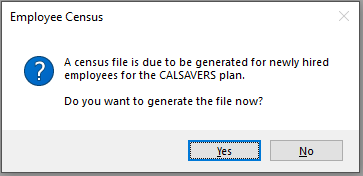
Enter # Days After Hire to Enroll. This prompt acts in a similar way to the New Hire Report reminder. The software will record when an Employee Census was last generated. If a census has not been created in 25 days since the last one, you will start receiving reminders that the Census should be generated.
For the EZ$avings4U program you should upload/enroll employees within 30 days of hire.
This setting does not control employees that are included in the Census file, which will be covered in the Census Export section.
-
The Enrollment Waiting Period is the number of days from when an employee is eligible to when they will start enrollment. For EZ$avings4U, the employee will be auto-enrolled after 30 days from this point if there is no action taken to opt-out.
By entering 30 days here, the program will calculate an initial Contribution Start Date when the retirement record is created. When importing your Employee Data (Contribution information), if a date is reported in column E – “Eligible for Contribution”, this date will be updated on the retirement record.
-
Election Good for # Days is not used at this time.
-
Last Census File Date will store the last date the export was generated. The software will check that the census has been run at least every 30 days to update the date stored here.
-
Under Generate Exceptions for Electronic Enrollment when Employee has, select any exceptions for enrollment:

-
Missing/invalid/temporary Social Security #
-
Missing Date of Birth
-
Missing phone number
-
Missing/ incomplete address
-
Missing/incomplete street address (i.e. no P.O. Boxes)
-
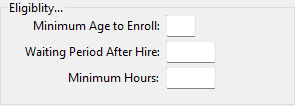
Under Eligibility:
-
Enter the Minimum Age to Enroll. For EZ$avings4U, this is 18.
-
The Waiting Period After Hire and Minimum Hours settings are not used for state run plans, since all employees are eligible to participate. These settings may be used for other retirement plans that have eligibility parameters including length of employment and an hour requirement the employees must meet before becoming eligible to participate in the program.
-
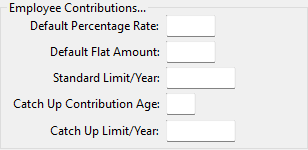
Under Employee Contributions:
-
EZ$avings4U does not use Default Percentage Rate.
-
Enter the Default Flat Amount for the plan, 10.00.
-
For Standard Limit/Year, enter the annual maximum contribution an employee can have withheld for the plan. The software will stop contributions if they have met this limit.
-
If the plan allows for employees over a certain age to contribute a higher amount, enter that age and respective amount under Catch Up Contribution Age & Catch Up Limit/ Year.
-
For example, in 2023 the maximum ROTH contribution an employee under 50 can make is $6,500. Employees over 50 can contribute $7,500.
Note For EZ$avings4U, Employee Contributions are flat amounts
Employer Contributions
The state run programs do not allow for employer contributions. This area would be left blank if setting up a EZ$avings4U plan. It may be used for other retirement plans that include an employer contribution.
Save/Delete/Clear
-
Click Save to save the plan or changes to the plan
-
Click Delete to delete the plan (if not used yet)
-
Click Clear to clear the window without making any changes
Employee Census Export

-
Go to Retirement > Census Export.
-
Select the Plan ID you’ve just created for EZ$avings4U.
-
For Lookback # of Days, enter 30.
-
Click Preview to create the Retirement record.
Review Retirement Record

-
Go to Retirement > Review Retirement Record.
-
Here you can edit all retirement records that have been created. Select the employee you want to edit.
-
As you get opt-out forms, you can change the employee status from Pending to Declined in Enrollment Status entry.
After 30 days, you must change Pending to Enrolled and pull deductions.
The program doesn’t change employee status automatically for EZ$avings4U. Therefore, you must change them manually.