Payables Checks
Entering Payables Checks
Use Accounts Payable Checks to pay vendor invoices that have already been entered. To enter an Accounts Payable Check, go to Payables > Checkbook >Payables Check button.
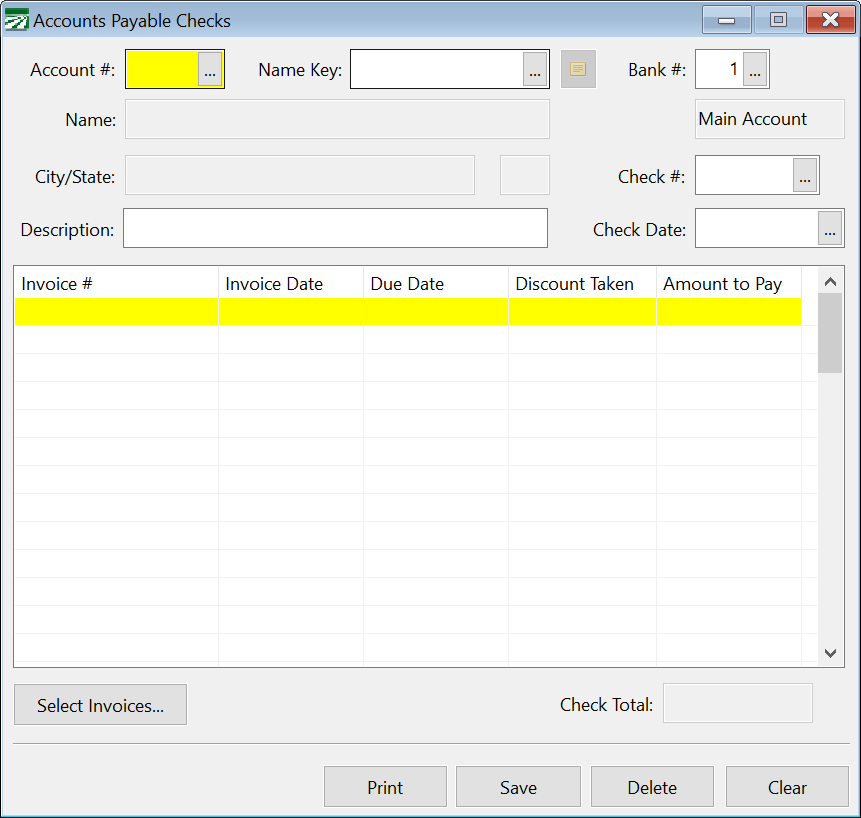
Account # /Name Key
Enter the account number or name key of the vendor account you want to write the check to. Press [F4] or click on the lookup button to get the vendor selection list.
Bank #
This is the bank account that is currently selected to write checks from. You can click on the Bank # entry, or press [Ctrl]+[B] to activate it. The bank account number that is displayed in the Checkbook Register window will appear here automatically.
Advanced uses may wish to change the bank account number here, however note that the Checkbook Register will continue to display information from the original bank account. That means that as you enter checks, you will not be able to see updates on the Checkbook Register.
The recommended method is to change the bank account displayed in the Checkbook Window, then click on the Payables Check button to reopen the Accounts Payable Checks window with the new bank account.
Check #
The next check number will appear here automatically. If you are entering a check used out of sequence, type that number in.
If you need to change the next check number, see the information on setting up bank accounts.
Description
Enter a description of the transaction.
Check Date
Today's date will appear here automatically on your first entry. If you change the check date, this date will be retained for subsequent checks.
Select Invoices
After entering the check date, click Select Invoices. This window will open and you can select which invoices to pay on this check:
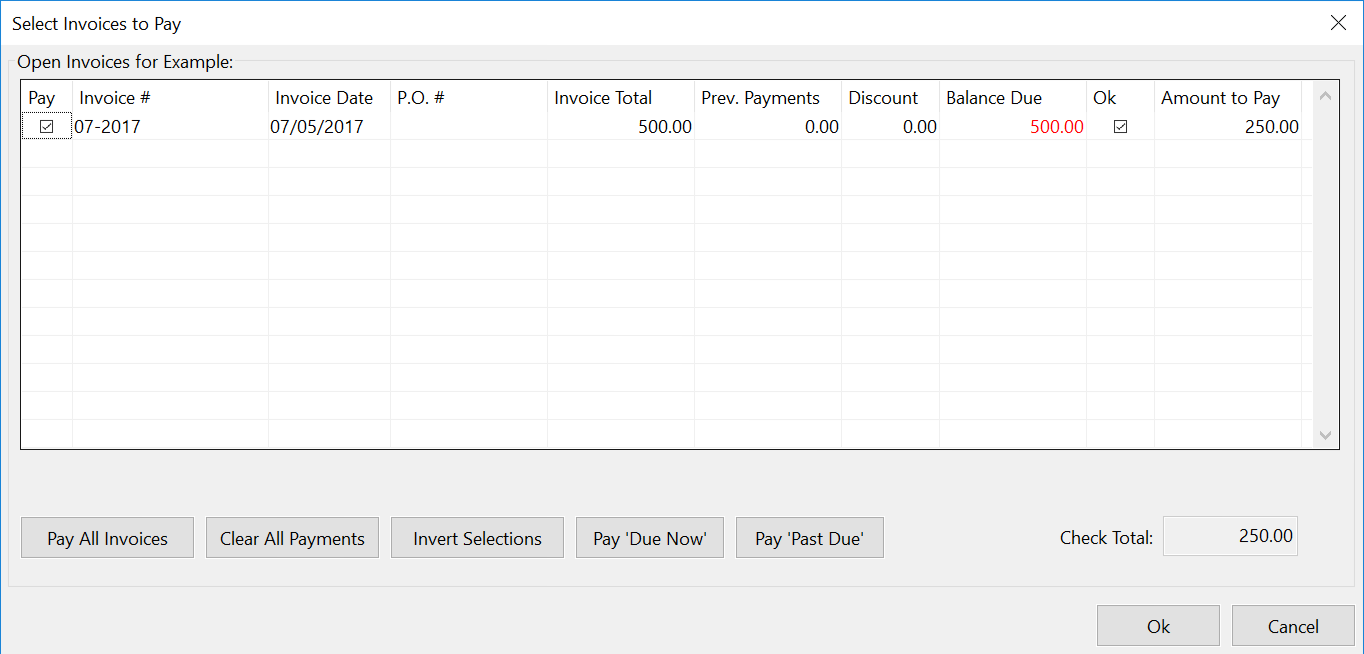
The Discount column will show a amount if a discount is available for each invoice. The check date that you have entered and the terms of the invoices are used to determine if a discount is available. The Balance Due column will reflect the invoice total less any previous payments less any discount available. Invoices that are past due will have the balance due amount in red. Invoices that are due within the next week will have a black balance due amount. Invoices which are due after one week from today will have a green balance due amount.
The Ok check box is the "Ok to Pay" status entered on the invoice. This is displayed for your reference, so that you will be able to see if there are any invoice on hold.
To select invoices for payment:
The first column contains the Pay check box. When you select this check box, the amount to pay will be automatically entered in the Amount to Pay column on the right-hand side. If there is a discount available, this will be automatically deducted from the total due.
To make a partial payment on an invoice:
Click on the check box first, which will enter the balance due for the invoice in the Amount to Pay column. Click on that amount (or use the tab key to move over to the Amount to Pay column). You can then type in a different amount to pay on that invoice.
To clear a payment on an invoice:
If you have already selected an invoice for payment but decide not to pay it on this check, simply deselect the Pay check box. The Amount to Pay column will be changed to zero.
The total of the invoices selected will appear. Several buttons are available that help you quickly select which invoices you want to pay:
Pay All Invoices
When you click on this button, all invoices listed will be selected for payment. Any discounts that are available will be taken.
Clear All Payments
When you click on this button, all invoices will be deselected. The Amount to Pay column will be zeroed for all invoices listed.
Invert Selections
When you click on this button, the invoices you have selected to be paid will have their payment amounts zeroed, and any invoices that have not been selected to be paid will be paid. This is useful in a situation where you have many invoices on one account and you want to pay all of them except one or two. First select the invoices that you don't want paid, then click on the Invert Selections button.
Pay 'Due Now'
Click this button to pay all invoices that are due within the next week. (These invoices will have balance due amounts displayed in black.)
Pay 'Past Due'
Click this button to pay all invoices that are past due. (These invoices will have balance due amounts displayed in red.)
Once you have finished selecting invoices for payment, click Ok. If you click on the Cancel button, no changes will be made to the invoices selected to be paid on this check.
The invoices will be displayed in the main Accounts Payable Check entry window, and the check total will be calculated based on the total invoices and discounts if any.
Once you have selected the invoices you want to pay on this check, click on this button to save and print a copy of the check.
Save
If you don't need to print out the check, click Save. The check will be saved and the window cleared for another entry.
Delete
Click on this button to delete an existing Payables check. This button does not record a void for this check number. If you need to show the check as voided, you can use the Void Check option. Otherwise, the check number may be re-used.
Clear
If you are part of the way through entering check information, you can click on this button to clear the window for a new entry without saving what you have entered so far.