Workers' Compensation Report
Workers' Comp Table and Report
The Workers' Comp report is designed to assist you in determining your workers' comp premiums. It can also be helpful in performing a worker’s comp audit.
The Workers' Comp Report will total and print wages based on the categories that you have set up in the Workers' Comp Table. For instance, a farming operation may have a separate entry in the worker’s comp table for each field (cost center). This tells the program what rate should be used when employees work in different fields. By printing a total of wages for each entry in the worker’s comp table, you can see the total worker’s comp expense for each field.
If you have set up and assigned the worker’s comp class codes, then the report also produces a summary page listing the total wages by class codes. For instance, you may have several vineyards, each set up as a different cost center. Each cost center is assigned to the vineyard labor worker’s comp class code (0040). In addition, you have several orchards, also set up as different cost centers, and assigned to the worker’s comp class code for orchards (0016). The Summary by Worker’s Comp Code page will show you the total wages and calculate the premium for each of your worker’s comp classes.
In addition to the summary reports of wages, the Worker’s Comp Report can also print a detailed report that lists every line item of every check for the dates that you have requested. This detailed report shows the worker’s comp premium for each line item. When printing the detail report, you can select individual cost centers, job codes, or worker’s comp classes to include on the report. You also have the option of selecting the order in which the detail is printed.
This detailed report may be helpful in several situations. For instance, your insurance company may request a detailed report that list the worker’s comp totaled by each check. Or you may print the detail for a specific cost center to determine on which checks that cost center was used.
Go to Payroll > Reports > Worker's Compensation Report.
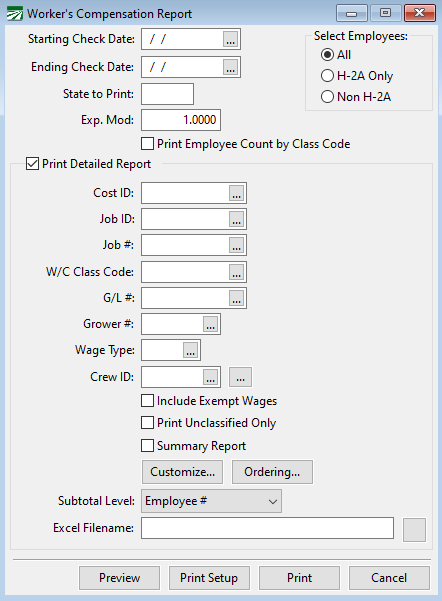
Starting Date / Ending Date
Enter the date range you want to print the report for here. The report uses the check date to select payroll checks to include. The payroll period starting and ending dates are not used to determine whether a check will appear on the report.
State to Print
If you have employees in different states, you can print separate reports for each state. The State for Withholding entry on the employee file is used to select employees. If you leave this entry blank, all employees will print, regardless of what their State for Withholding entry is set to.
Note Under Washington state rules, sick pay, vacation, holiday pay, and paid leave are all not subject to labor and industries taxes. Therefore, they are excluded from the Worker's Comp Report.
Print Detailed Report
Select this box if you want to print a detailed report, listing each line item on each check in the period you have requested. When printing a detailed report, you have additional options to select the detail that is included on the report.
Cost ID
Enter a cost center or select a cost center from the lookup by pressing [F4] or clicking on the lookup button. The report will only include line items that were expensed to the cost center you have selected.
Job ID
Enter a job code or select a job code from the lookup by pressing [F4] or clicking on the lookup button. The report will only include line items where the labor was expensed to the job code you have selected.
Job #
Enter a Job # or select it form the lookup. The report will only include items with the Job # you have selected.
W/C Class Code
Enter a worker’s comp class code or select one from the lookup by pressing [F4] or clicking on the lookup button. The worker’s comp code must have already been set up on the Class Codes tab of the Worker’s Comp Rate window.
Grower #
Enter a grower account number here to print a worker’s comp report that includes only labor for a specific grower. Leave this entry blank to print all growers.
Crew(s):
Enter one or more crew numbers to print a report that includes only labor for the specified crews. If you enter multiple crew numbers, separate each one with a comma, or enter a range of crew numbers using a dash. For instance, entering “1, 5, 10-12” would print a report that includes crews 1, 5, 10, 11 and 12.
Ordering
Click on this button to select the order that detail items will be printed in. For more details on changing the report order, see the section below.
Note When printing a detail report for the state of Washington, lines for vacation, sick pay, holiday, and paid leave will be excluded.
Selecting the Order for the Worker’s Comp Detail Report
When printing a detailed Worker’s Comp Report, you have complete flexibility over the order that information is printed in. This can be very useful because you may want the detailed listed and subtotaled differently depending on the situation.

To see what the current report order is, place the mouse pointer over the Ordering button. A tooltip will appear that shows the fields that are currently use for the detail report order. To change the report order, click on the Ordering button, and the following window will open:
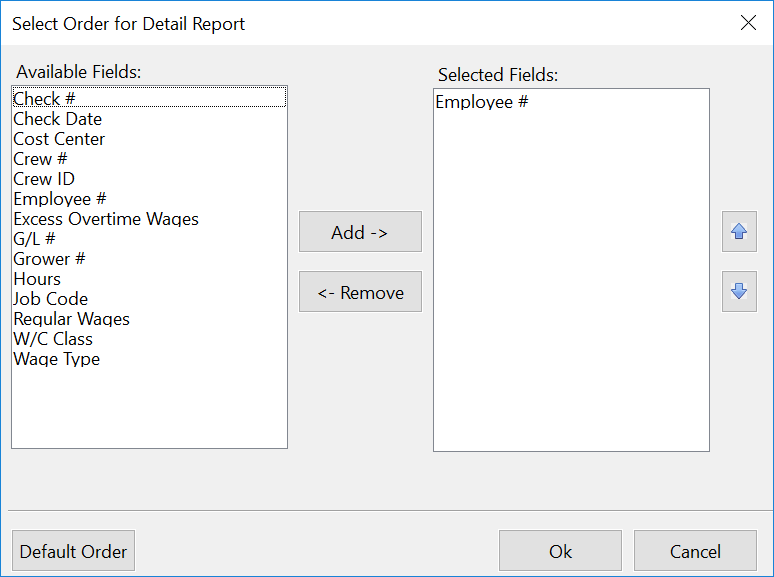
The list on the left side of the window shows you the fields that are available for ordering the report. The list on the right side of the windows shows you the fields that are currently selected for ordering the report.
To add a new field to the selected list, first highlight it, and then click on the Add button. To remove a field from the selected list, highlight it and then click on the Remove button.
If you want to change the order of the fields in the selected list, highlight a field in the list and then click on the Move Up and Move Down buttons.
The first field that appears in the Selected List is important: it is the primary field for ordering the report. The report will print a subtotal for the primary field. In the example above, the primary field is the Employee #. This means that the report will provide a subtotal that shows the worker’s comp totals for each employee.
Here are some examples of how you could change the report order shown above in different situations:
Example Your worker’s comp insurance company wants a detailed report that shows the total worker’s comp for each check that you have issued. So that you can get a total for each check, the Check # field must be the primary field. Highlight the Employee # field in the Selected Fields list and click on the Remove button. This will move the Check # up to the first item on the list.
Example Your worker’s comp insurance company wants a report that lists the detail by worker’s comp class code, and shows a subtotal for each class code. Within each class code, the detail should be listed in check date, and for each check date, by check number. In this case, highlight the W/C Class in the Selected Fields list and click on the Move Up button until it is the first field in the list. Click on the Employee # field and then the Remove button. Highlight the Check Date field in the Available Fields list and click on Add. Then click on Move Up until the Check Date is the second field.
Example You want to see the detail reported by cost center, with a total for each cost center. Click on Cost Center in the Available Fields list and then click on the Add button. Click on the Move Up button until Cost Center is the first field. In addition, within each cost center, you want the detail listed in job code order. Click on Job Code in the Available Fields list, and then click on Add. Click on Move Up until Job Code is the second item.
Example You want to see worker’s comp totals for each day you did payroll in the month. In this case, add the Check Date field, and move it up to the top of the Selected Fields list. The subtotals will be printed for each check date in the month.
Troubleshooting Problems
Unclassified Wages
At times the report may be unable to identify an entry from the worker’s comp table to apply a worker’s comp rate/class to wages. Normally this will not happen because during check entry, the program makes sure an entry can be found in the table based on the general ledger account, cost center, and job code entered. However, it is possible to modify the table after checks have been entered, or make changes to the cost center or job code after a check has been finalized. If this happens, then when the Worker’s Comp Report is run the program may not be able to find an applicable entry to determine the worker’s comp rate.
If there are wages that the report cannot determine a worker’s comp classification for, the program will display the following message:
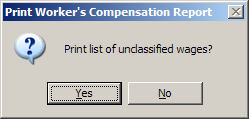
Answer yes and the last page of the Worker’s Comp Report will list all checks that had unclassified wages, including the General Ledger account, Job code, and Cost ID used on those checks. Compare this information to your Worker’s Comp Table, and determine if you need to add and edit any entries in this table to properly classify the wages.
Missing Worker’s Comp Class Codes
If there are entries in your worker’s comp table that are missing worker’s comp class codes, a message will appear at the bottom of the report: “Worker’s comp class code missing from worker’s comp table entry”. To determine which checks have wages that are missing class codes, check the Print Detailed Report. Click on the Ordering button and select W/C Class, Employee #, and Check # for the Selected Fields as shown below:
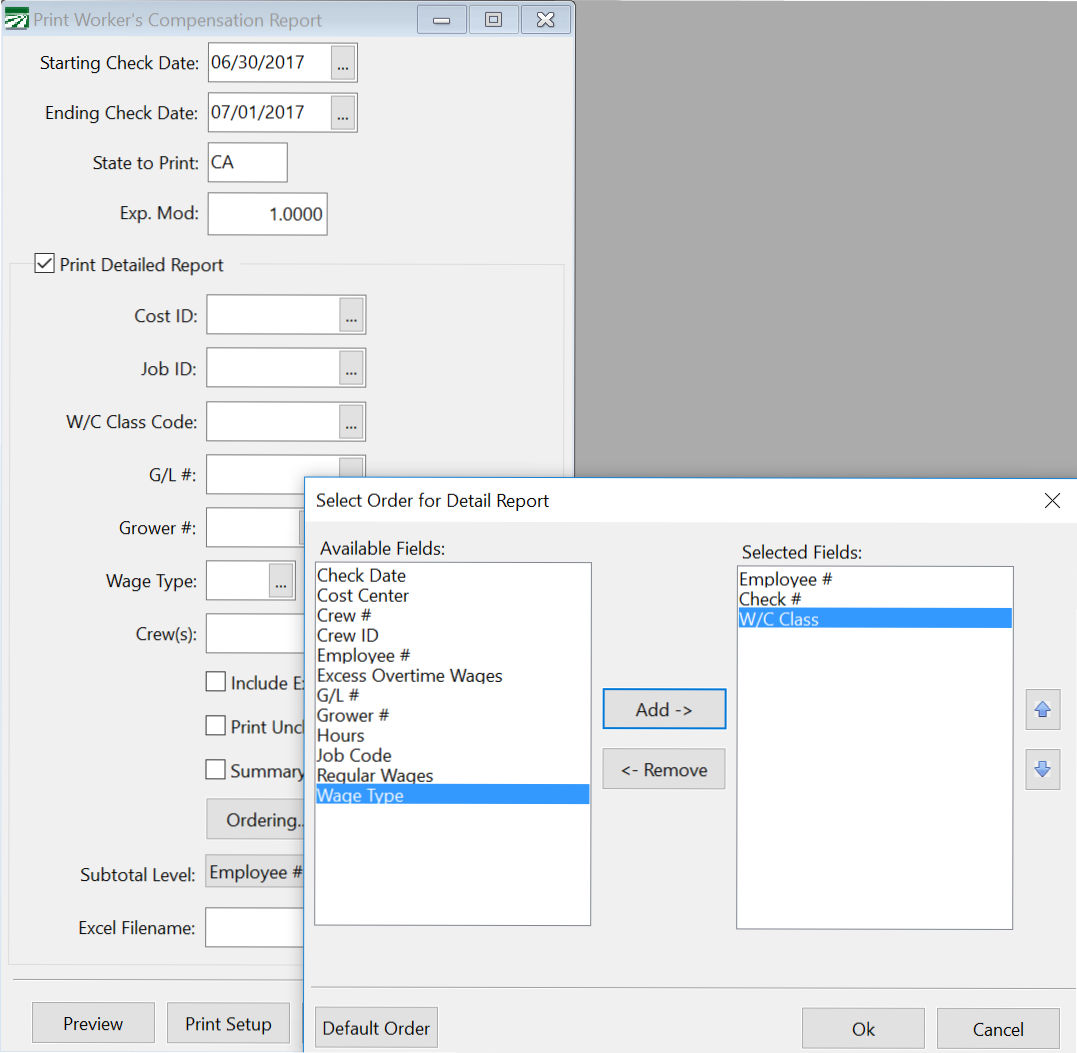
You can now run the report. Wages that don’t have a worker’s comp class code will be listed at the beginning of the detailed report. Once you have identified the check numbers, look them up through the Checkbook Register and see what cost centers, general ledger accounts, and/or job codes were used on the check. Review the worker’s comp table to determine which entry is missing the class code.