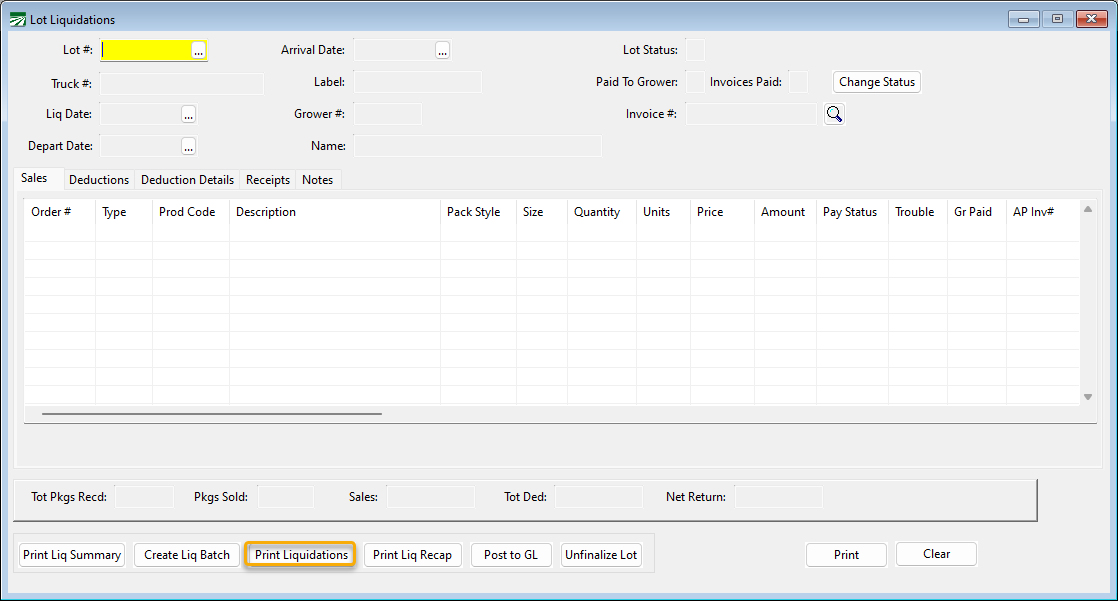
Lot Liquidations
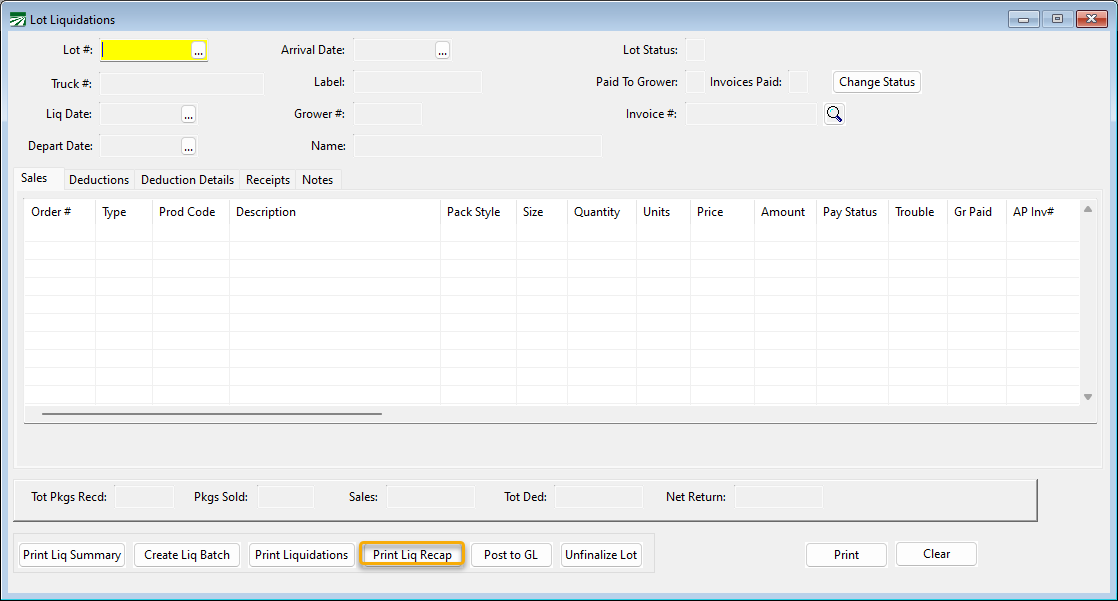
The Grower Liquidation system is designed for batch processing of liquidation statements. However, if needed, it allows you to liquidate individual lots one at a time. Go to Growers > Grower Statements > Lot Liquidations.
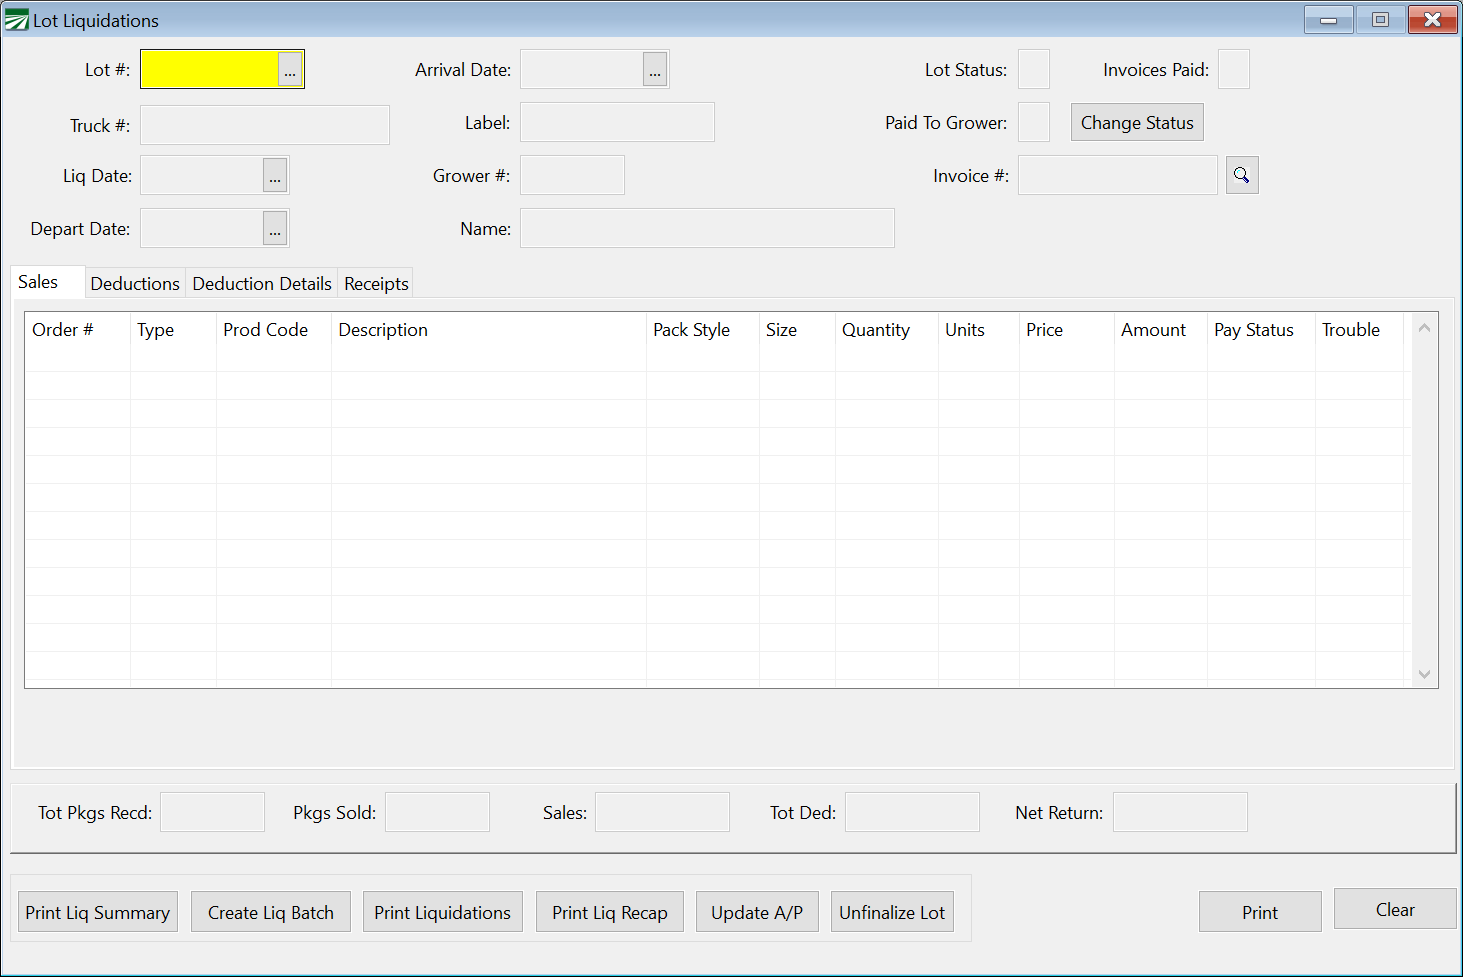
From this screen you can initiate and complete the liquidation process using the buttons at the bottom of the screen. You can also display any lot on the screen. The various tabs allow you to view receipts, sales, and deductions.
The steps in the liquidation process are as follows:
Create Liquidation Batch
This option will create a batch of lots to liquidate and then print a report. The program will automatically search for lots that have been 100% sold and billed, and you can select by date range, paid lots only (paid by customer) or all lots.
Print Liquidations
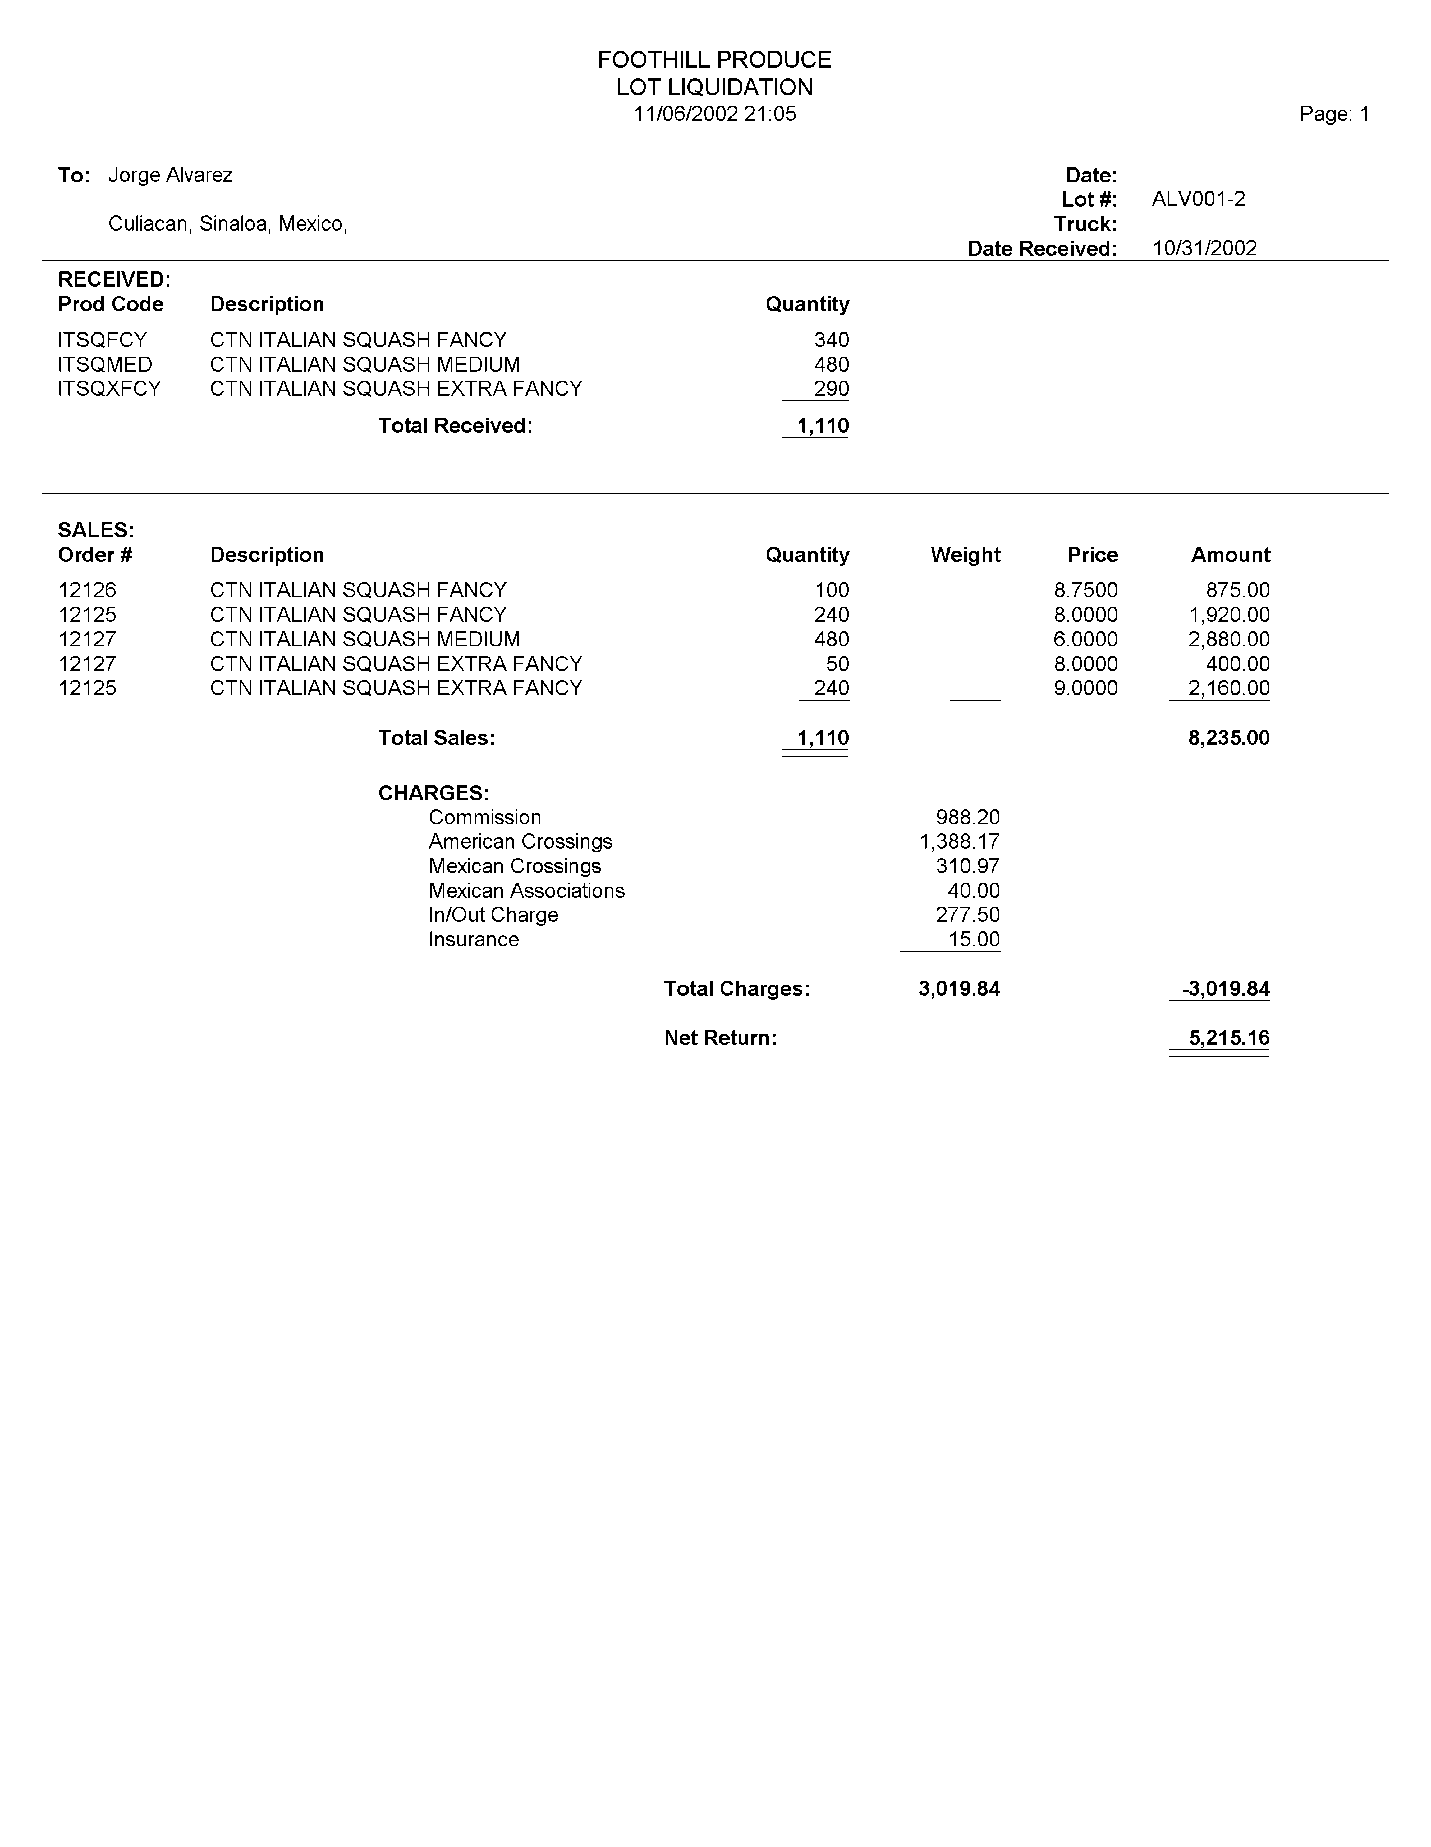
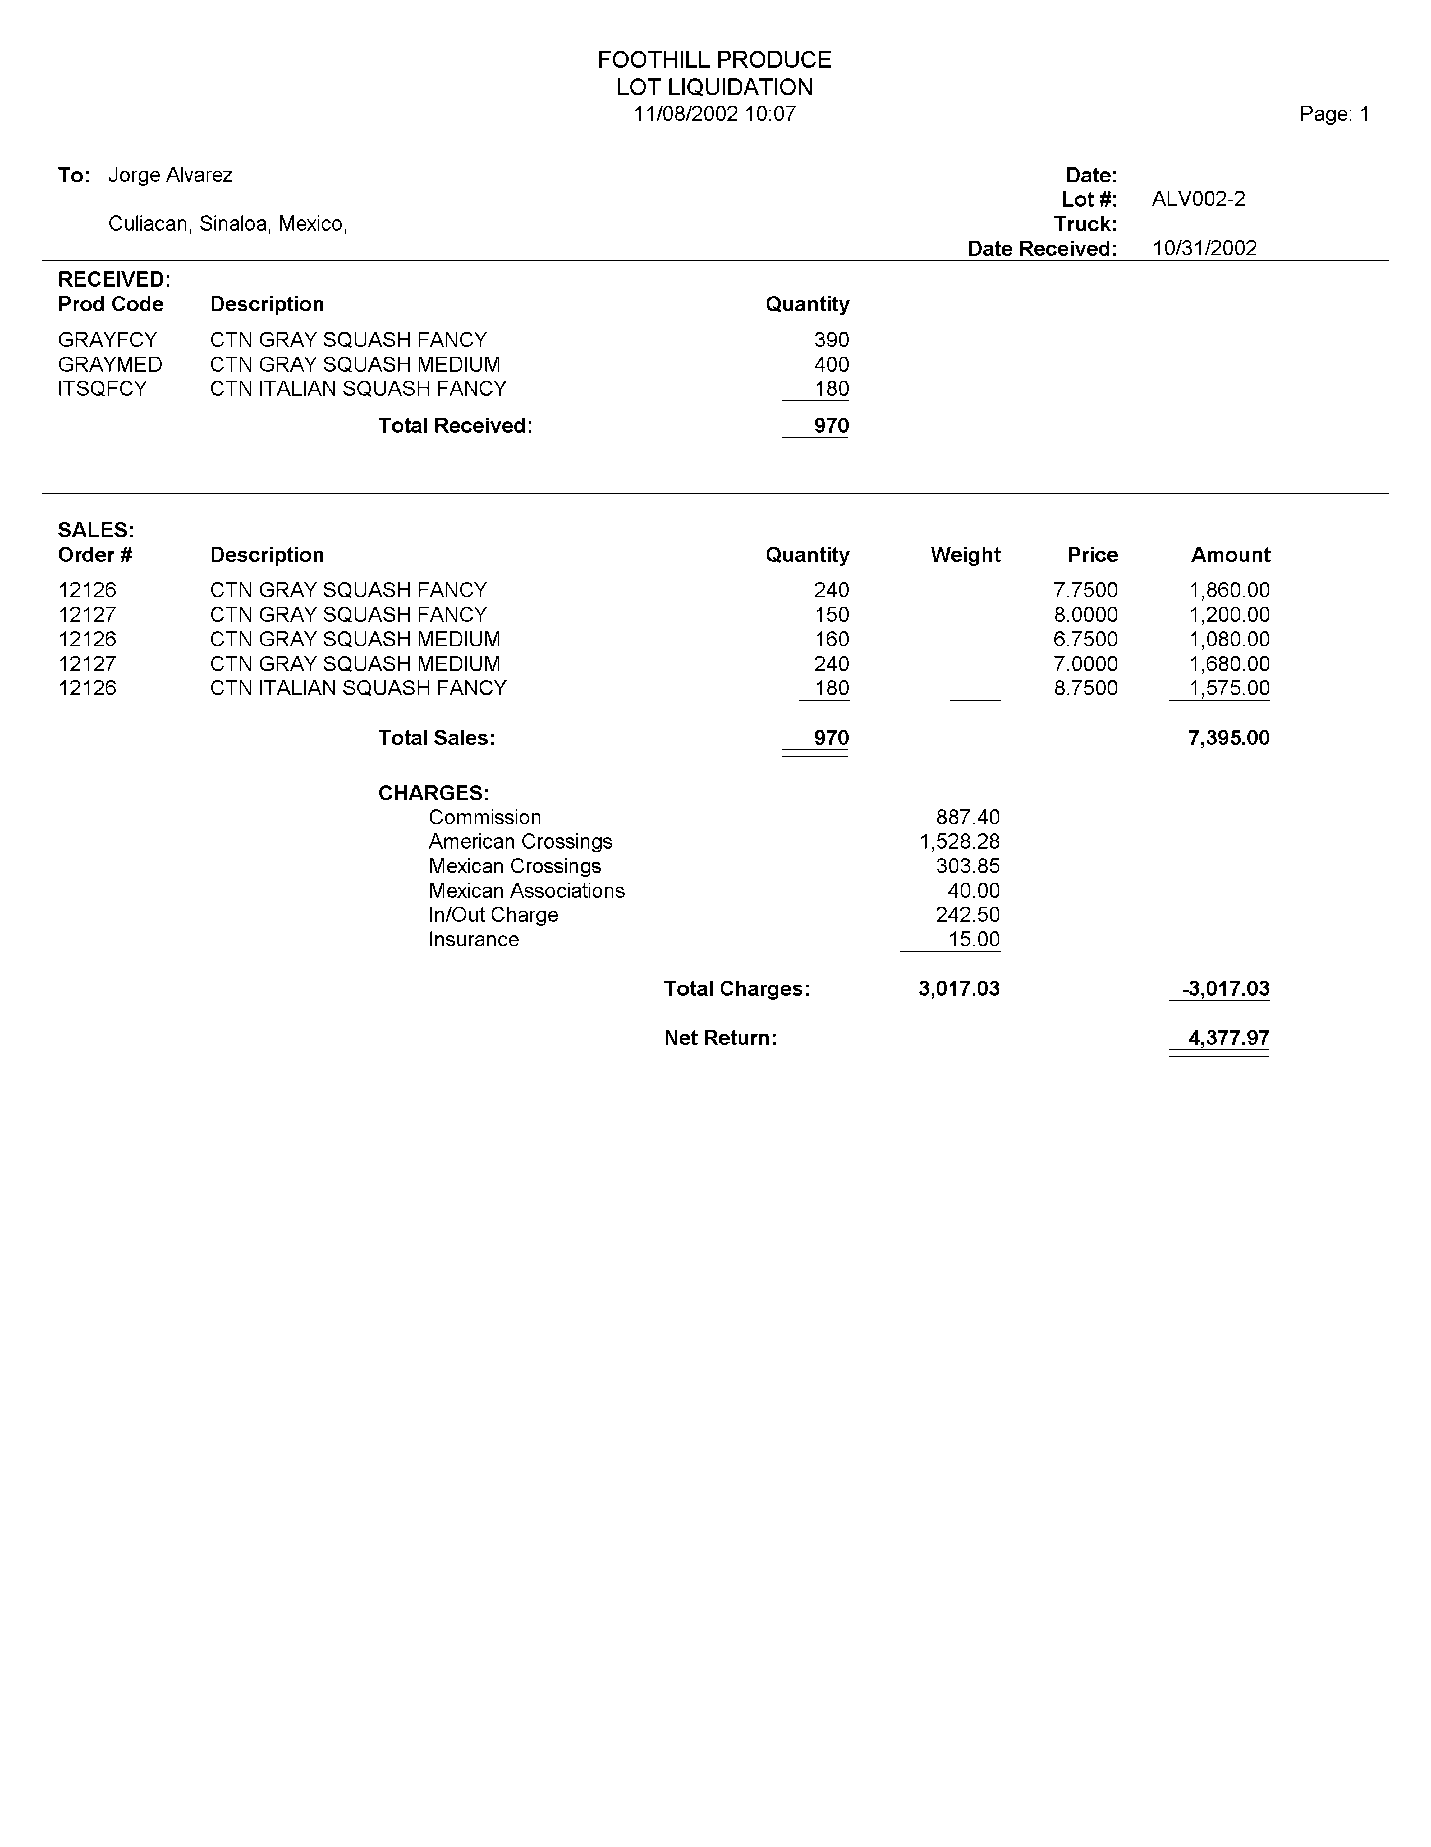
This will print, on a separate page, each lot liquidation that has been included in the batch. You can also reprint old lot liquidations that have been finalized in the event that paperwork has been lost. This is the detailed report that would be given to the grower.
Review the lot liquidations, make sure calculations are correct and that all expenses have been recorded correctly for each lot. If you need to view the lot liquidation information, you can display it on the screen.
If you make any corrections to expenses, you can reprint the lot liquidation. If there is a lot you do not want to liquidate, use the View/Edit Liquidation option to remove the lot from the batch.
Print Liquidation Recap
This will print a list of lots being liquidated for each grower, along with year-to-date liquidation totals. This can be printed as a trial or final report. When you finalize, the year to date liquidation totals are updated for each grower. This should not be done until you are sure that all lot liquidations are correct and you have removed any lots you do not want to liquidate.
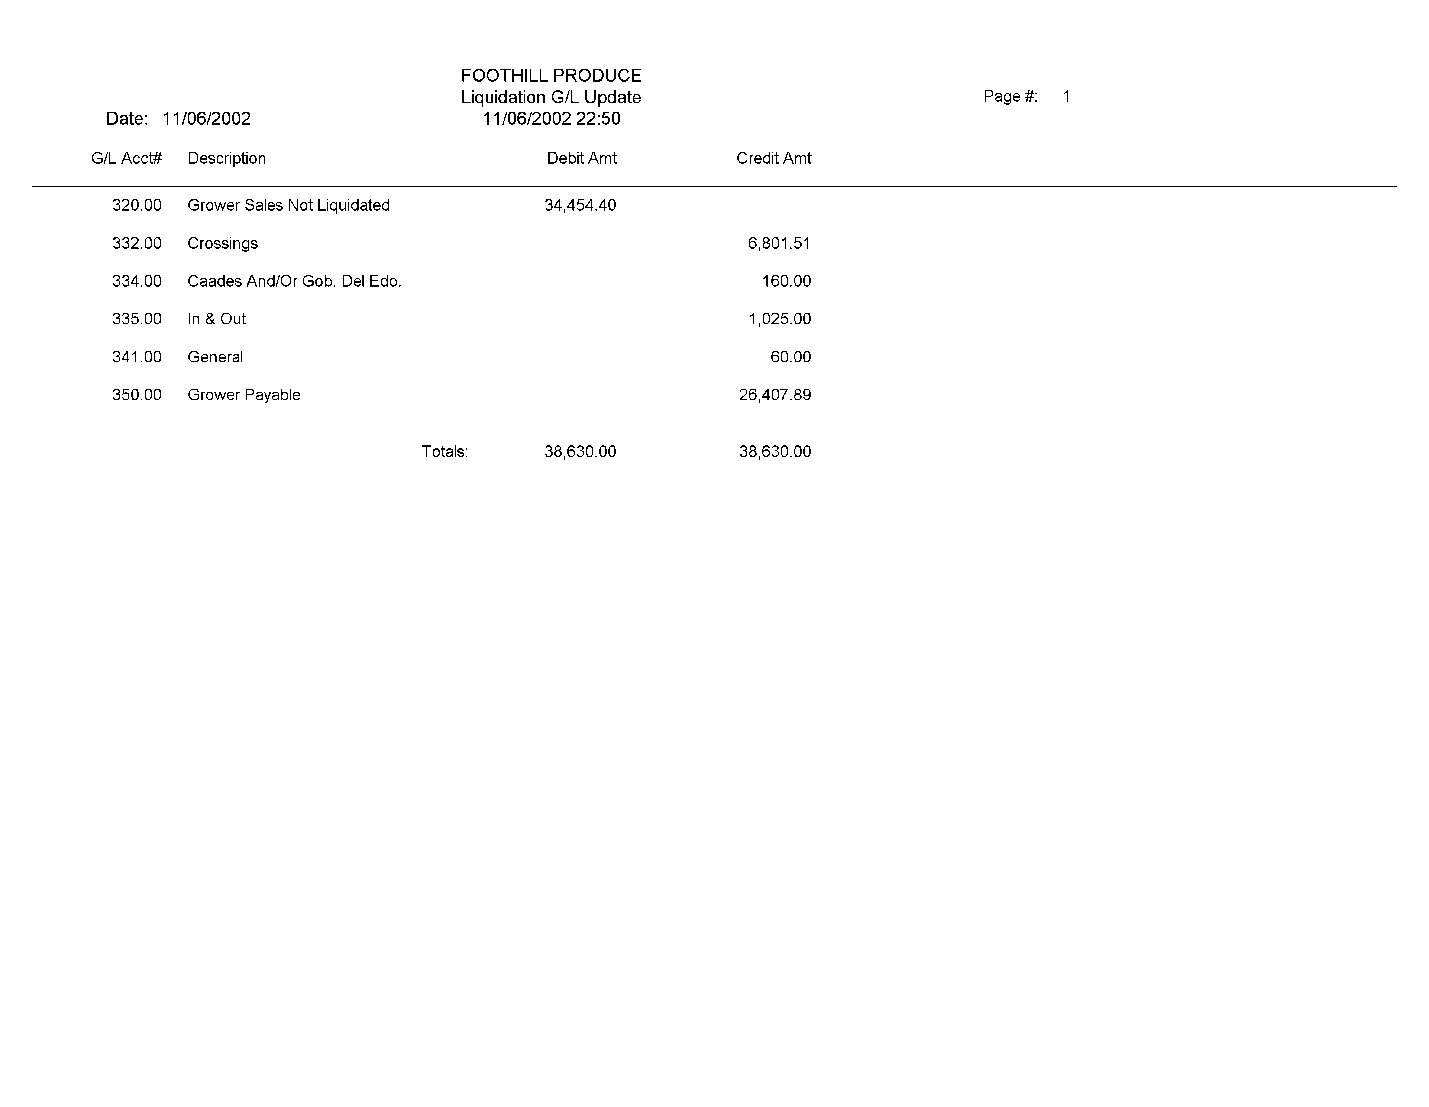
Post Amounts to General Ledger
This completes the liquidation process by updating the General Ledger and printing a list of journal entries. When this is done, the accrued grower payable in account #320 will be debited out, the expense charges for the lot will be credited, and the net due the grower (after direct lot expenses have been deducted) will be credited to the grower payable account #350.
Step 1: Create Liquidation Batch
Liquidations can be processed in a batch, with the program automatically adding lots to the batch. Lots may be selected based on a date range, specific grower, and payment status. If you select paid lots, a lot will be included in the batch if all packages received have been sold and all customer invoices have been paid.
You can also select unpaid lots. All packages received must be sold, but the invoices do not have to be paid.

On the Lot Liquidations window, click Create Liq Batch.
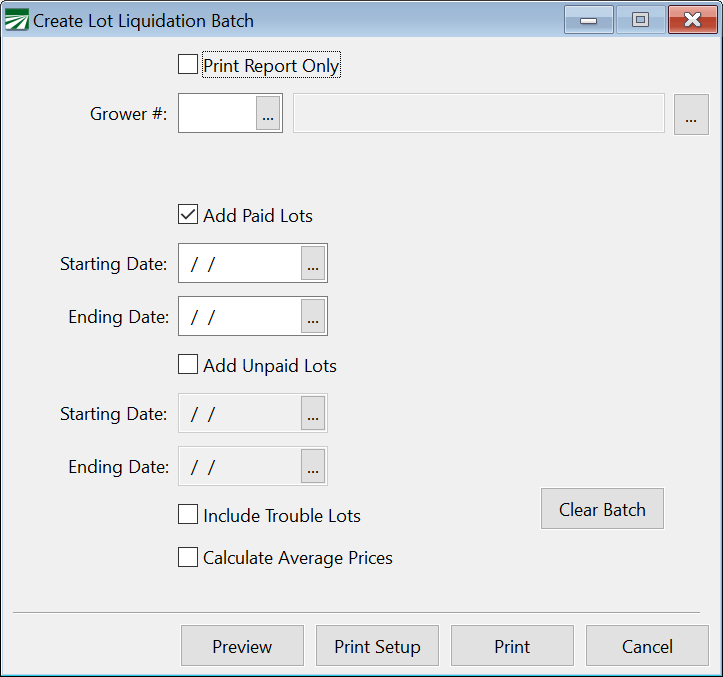
Lots that include invoices with unresolved trouble will not be included in the batch, unless you specifically select Include Trouble Lots.
As the lots are added to the batch, a report is printed.
If you delete lots from the batch, or create a batch manually, you can use this option to print a report of the batch entries only without adding to it. For this option, select Print Report Only.
In some cases, you may create a trial batch, print reports, and then delete the batch since you do not want to finalize it. The lot entries in the batch may be cleared by using the Clear Batch button on this screen.
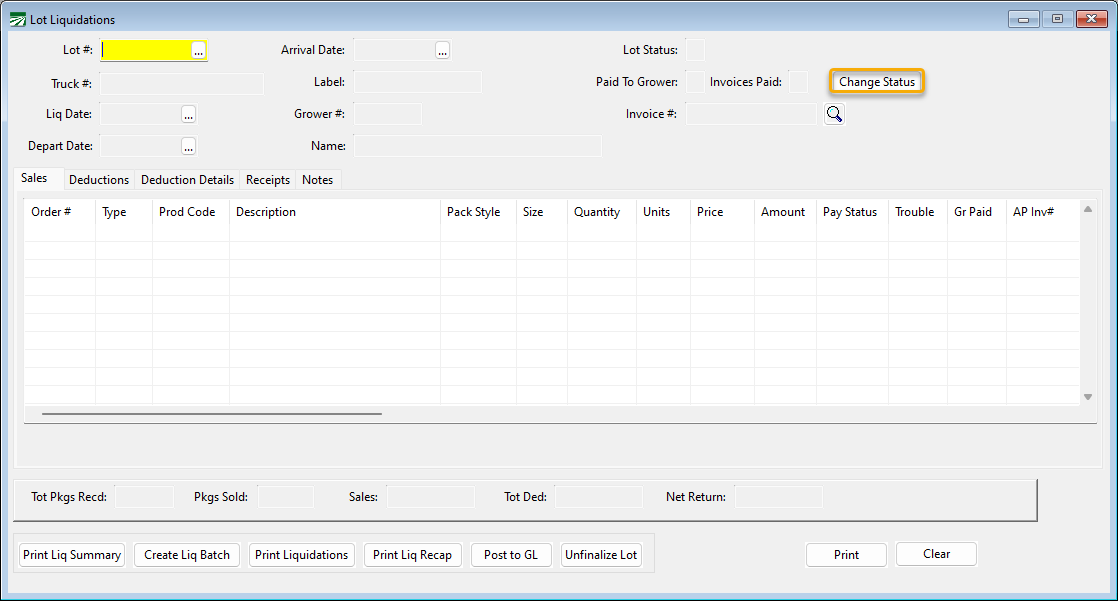
When you go back to the main Lot Liquidations window, one or more individual lots may be deleted or added to the batch. Simply enter the lot #, and it will be displayed on screen. You can then click Change Status to add or delete to the batch.
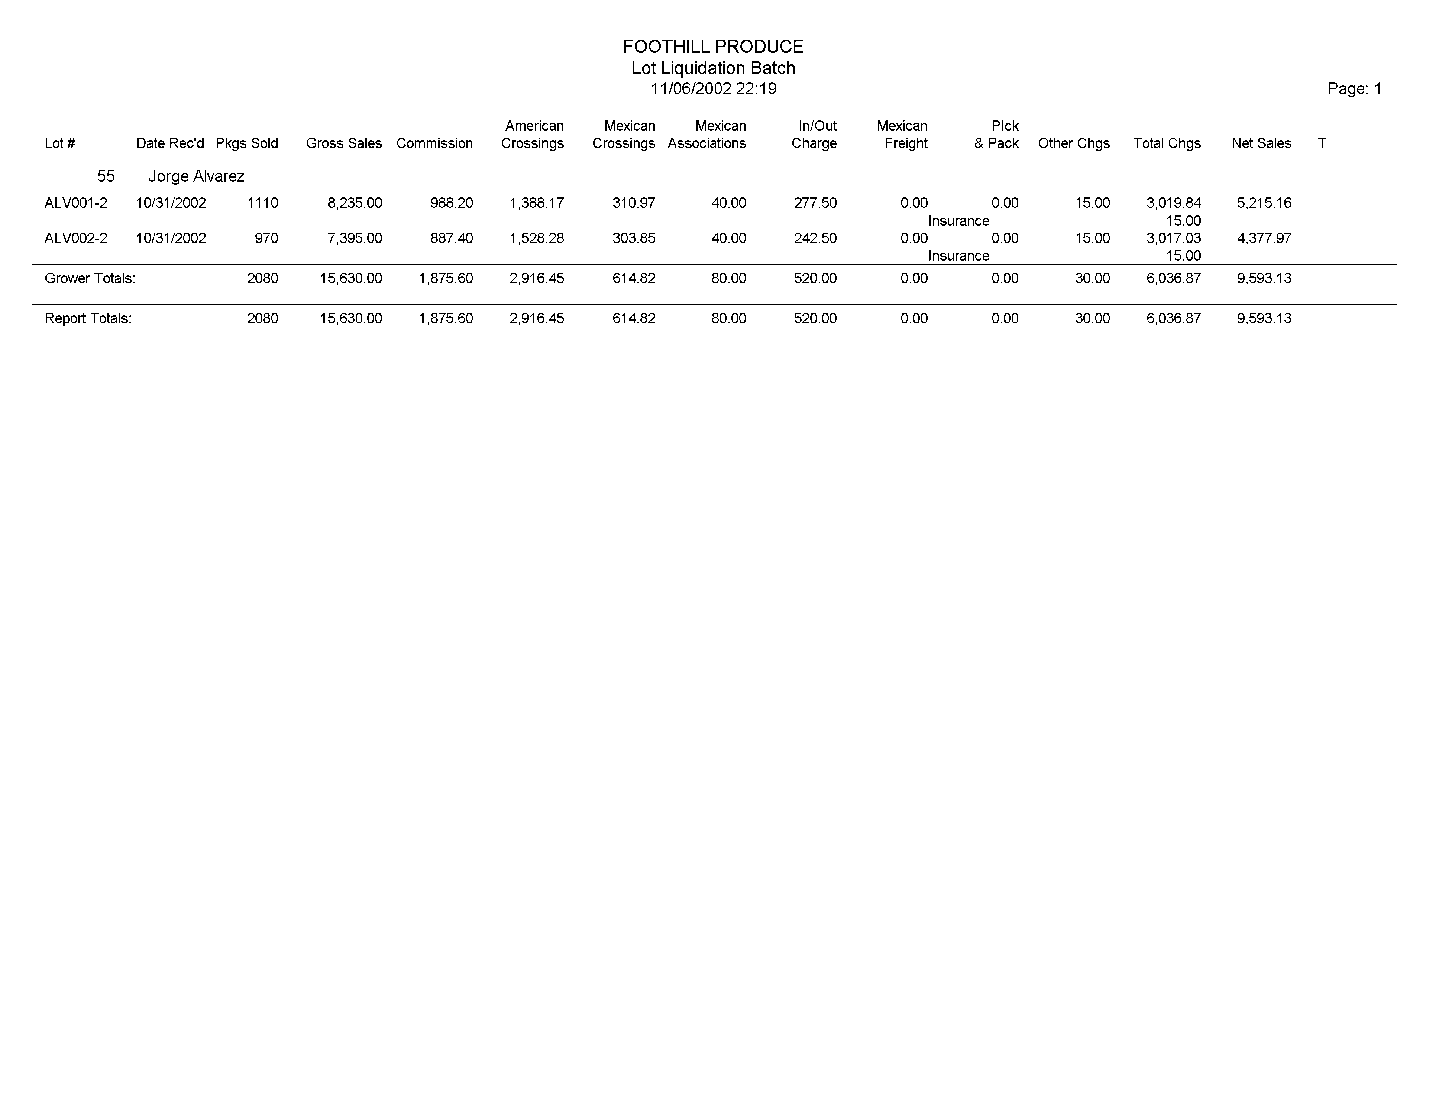
Here is a sample of the Liquidation Batch Report that is printed when you create a batch:
Step 2: Print Liquidations
The Print Liquidation option will print a report for each lot, with the products and quantities received, sales, credits, charges and the net return to the grower. This is the report that is provided to the grower, along with the Liquidation recap.
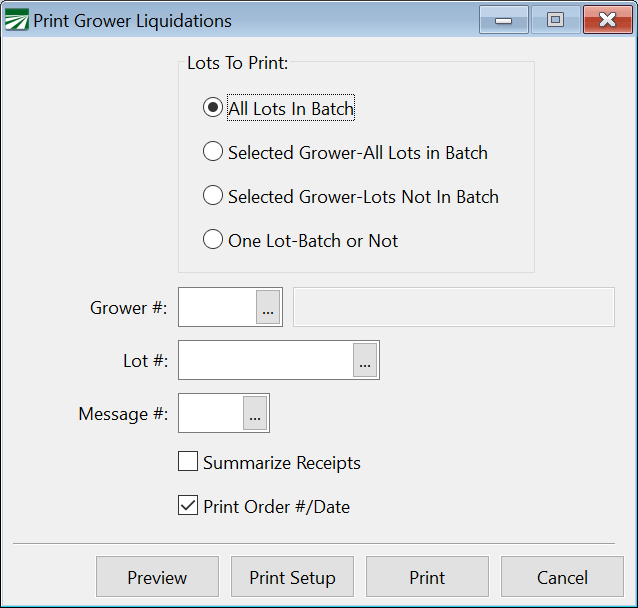
On the Print Grower Liquidations window, first select the lots to print. Normally, when you are processing a liquidation batch you will print all lots in the batch. If you have multiple growers in the batch, you may want to print one grower at a time.
You can also print lots that are not in the batch. They cannot be finalized, but may be printed.
The Message # entry allows you to print a header and/or footer message on the grower liquidation. These messages must be set up in Messages (Receivables > Setup > Messages).
If you find any problems with a liquidation at this point (i.e. as missing expenses), they can be reviewed, fixed, and the liquidation can be reprinted. If there is a problem you cannot resolve, the individual lot can be removed from the batch and processed in the next batch or separately.
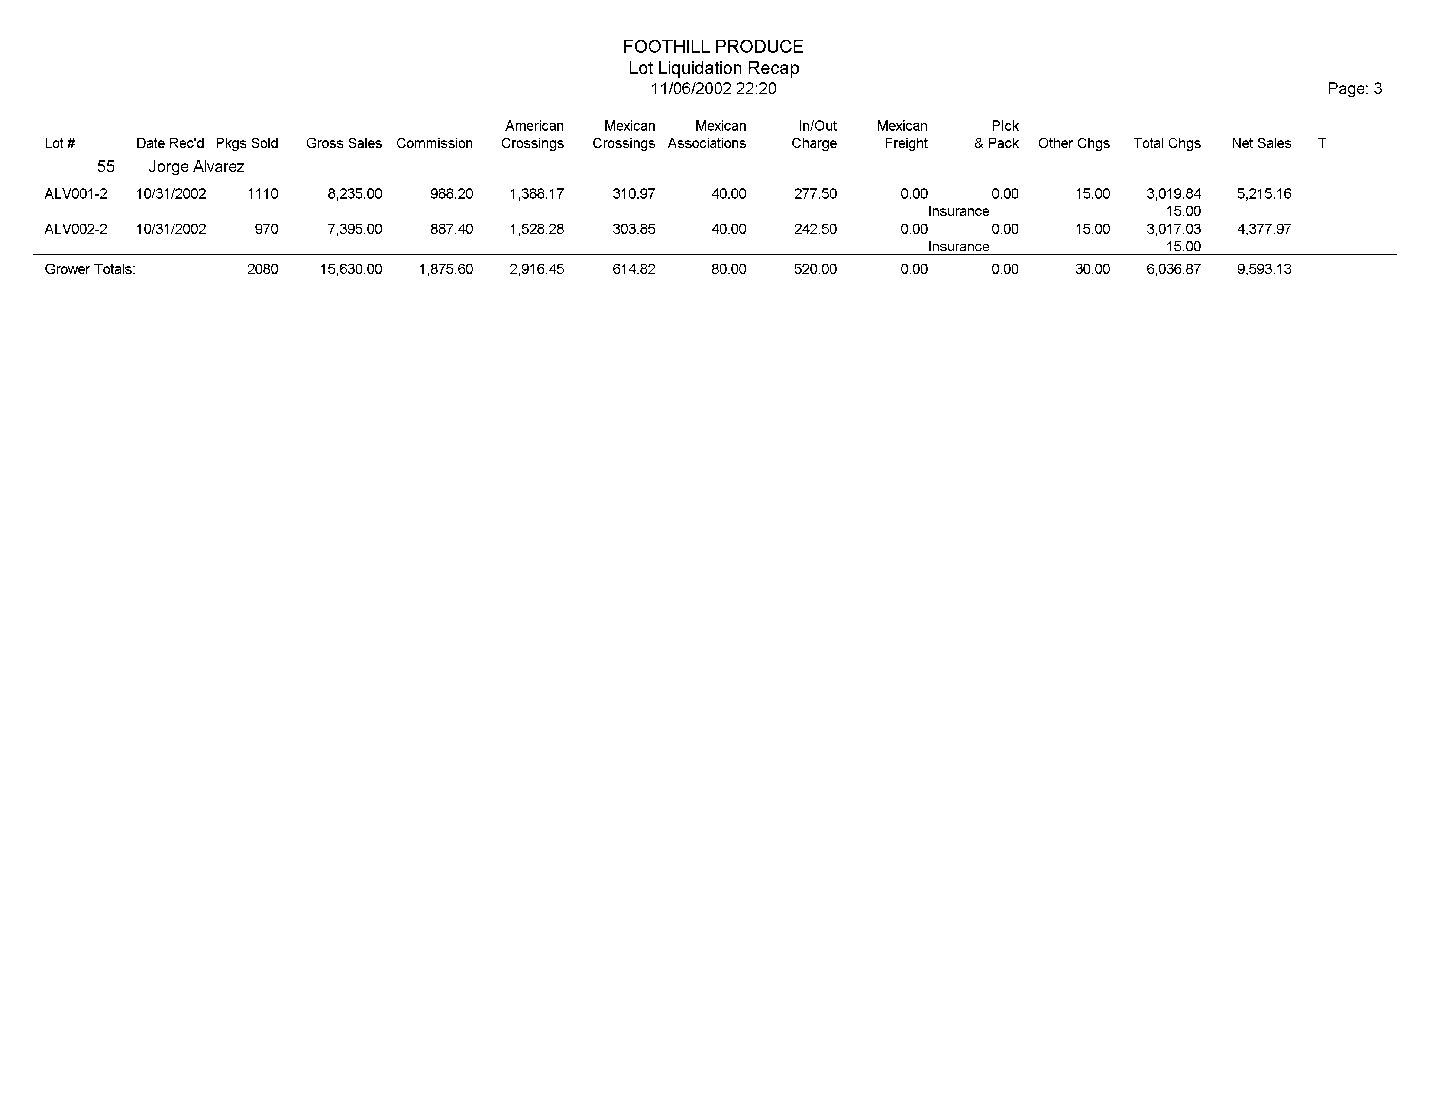
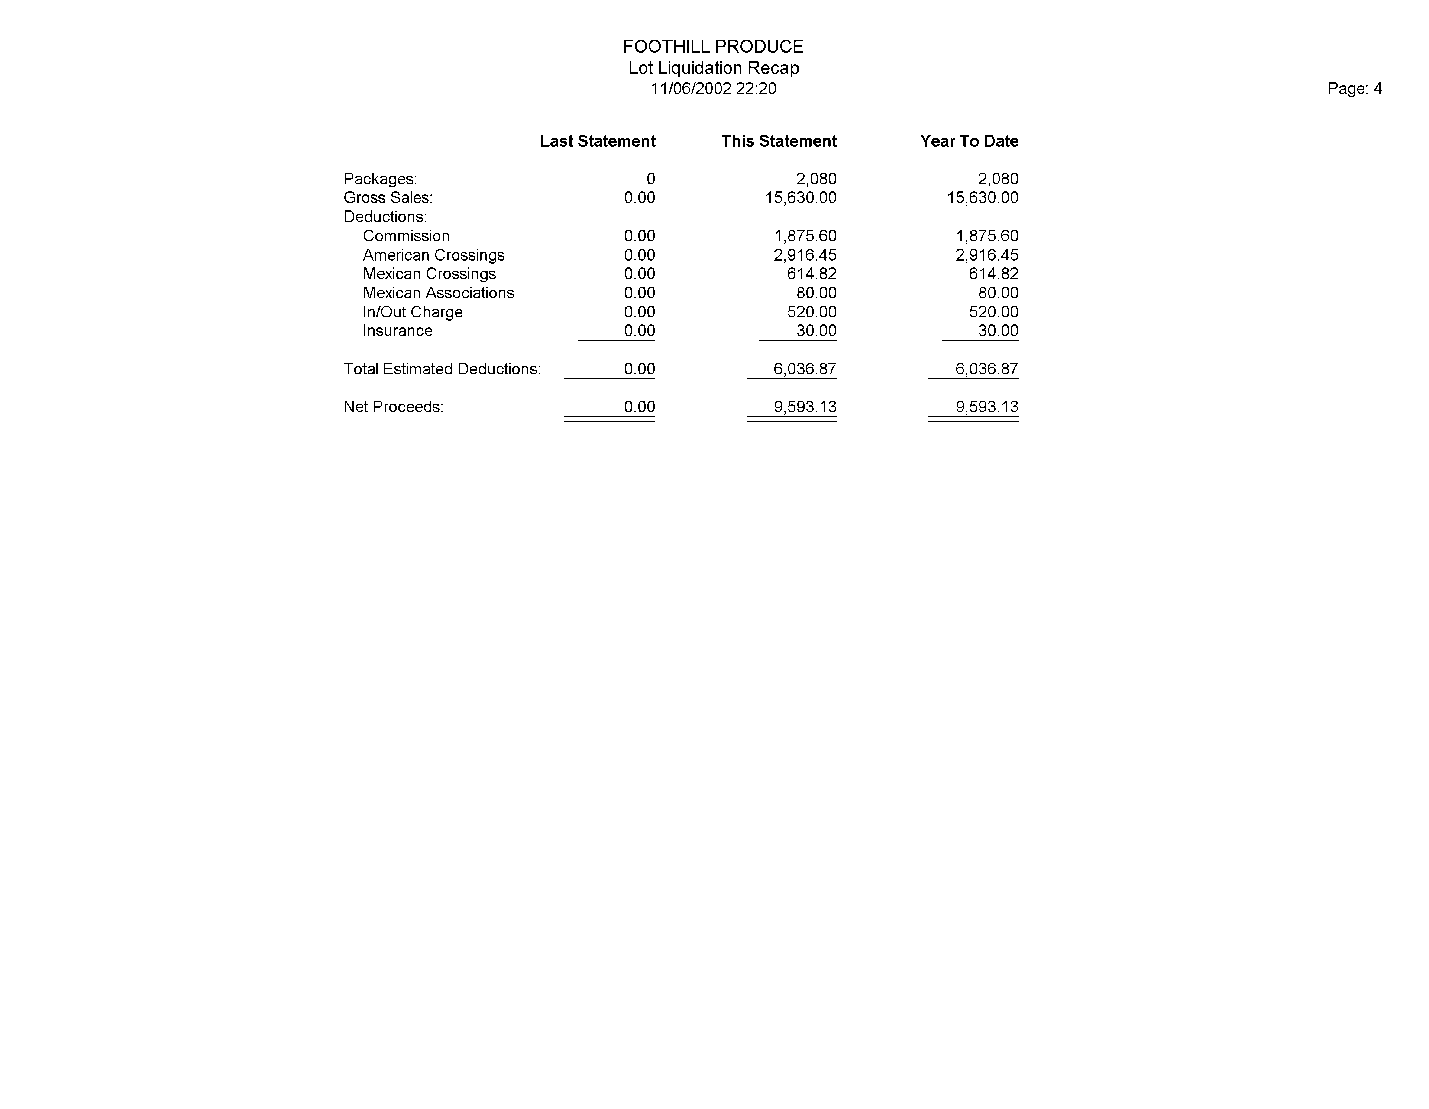
The next 2 pages show the Lot Liquidations for grower 55.
Step 3: Print Liquidation Recap
The Print Liquidation Recap provides two functions: (1) the report that is printed summarizes the individual lot liquidation pages and updates the year-to-date liquidation totals for the grower; and (2) when you print this as a final report, the year-to-date totals are updated and the lots are marked as paid to the grower.
Once you finalize the report, the final step of updating the General Ledger must be completed.
The following are samples of Print Liq Recap reports:
Step 4: Post Amounts to the General Ledger
The final step in the liquidation process is to create journal entries that finalize the lot liquidations.
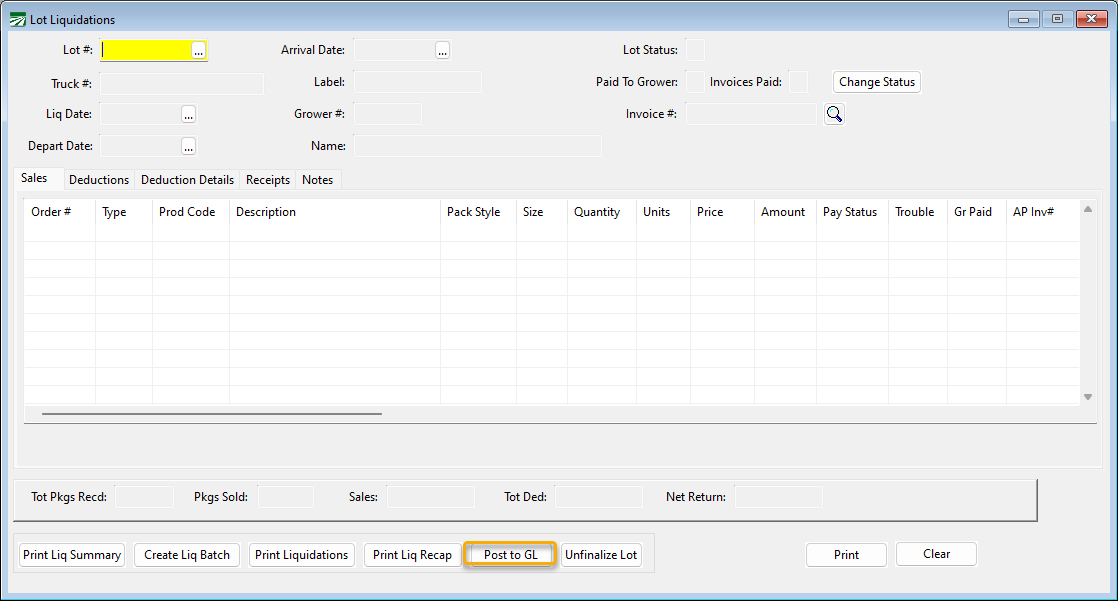
You can do this by clicking Post to GL on the Lot Liquidations window.
One set of entries is created for each lot. The net amount due the grower is credited to the Grower Payable liability account, account #350 in the case of our sample chart of accounts. Here is a summary of the entries created from a liquidation batch:
The Grower History Report (Growers > Grower Statements > Grower G/L History Report) now reports a zero balance in account #320 for grower #55, since all sales for that grower have been liquidated:
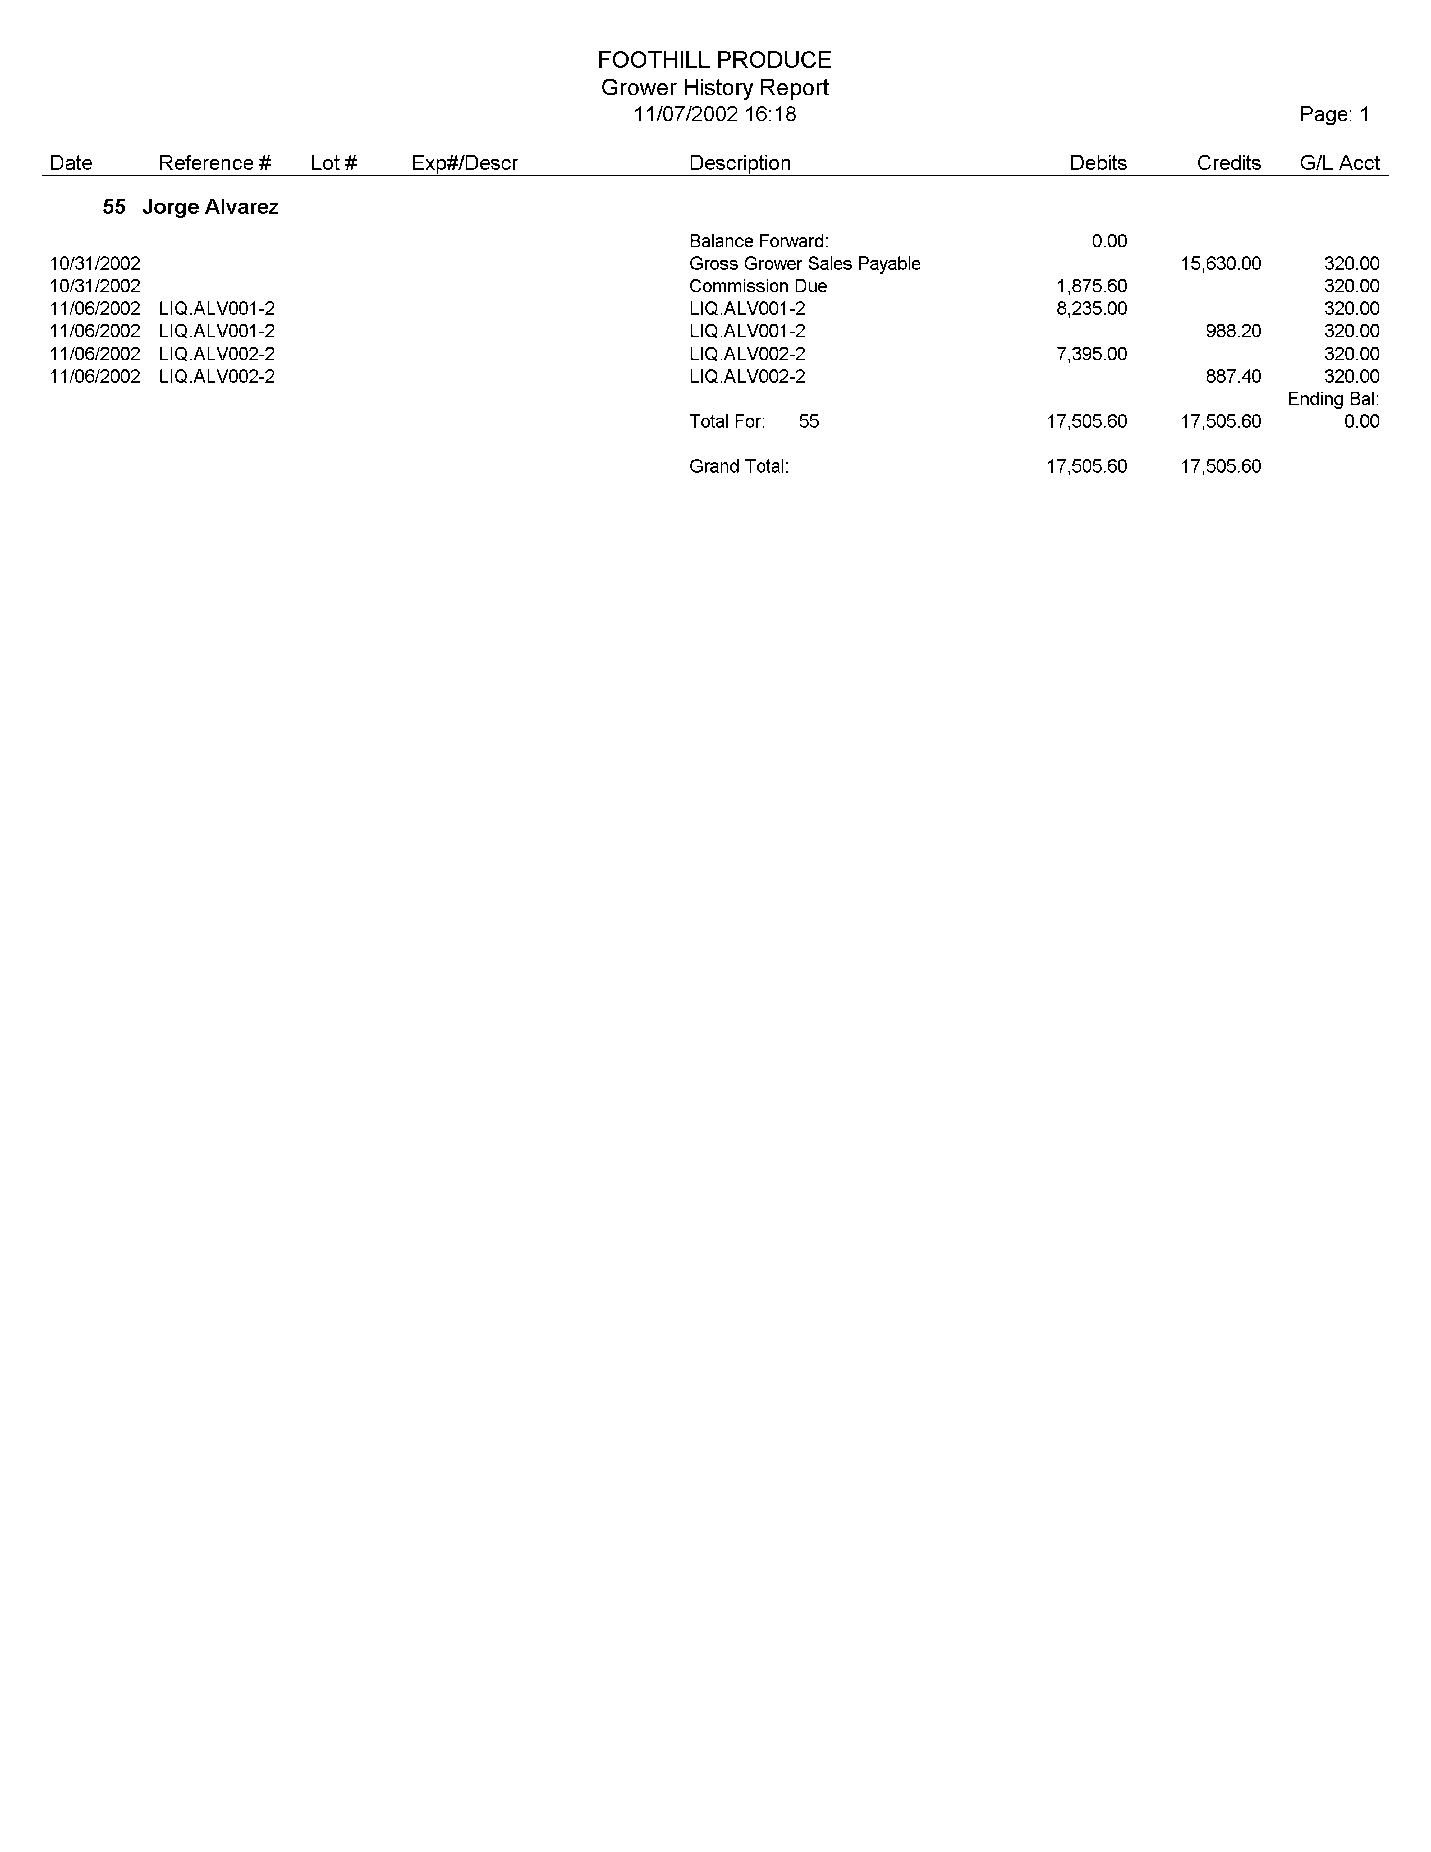
In reality, this account (Grower Sales Not Liquidated, #320) will not have an ending balance of zero until the end of the season and all lots have been sold and liquidated. During the shipping season, you would normally have lots that have been sold and credited to the grower’s account (but not liquidated) and those amounts are credited to this account.
We can also print a Grower History Report on the expense accounts for grower #55, which will show the charges to the account from accounts payable, the credits from the liquidation, and any balances not liquidated:
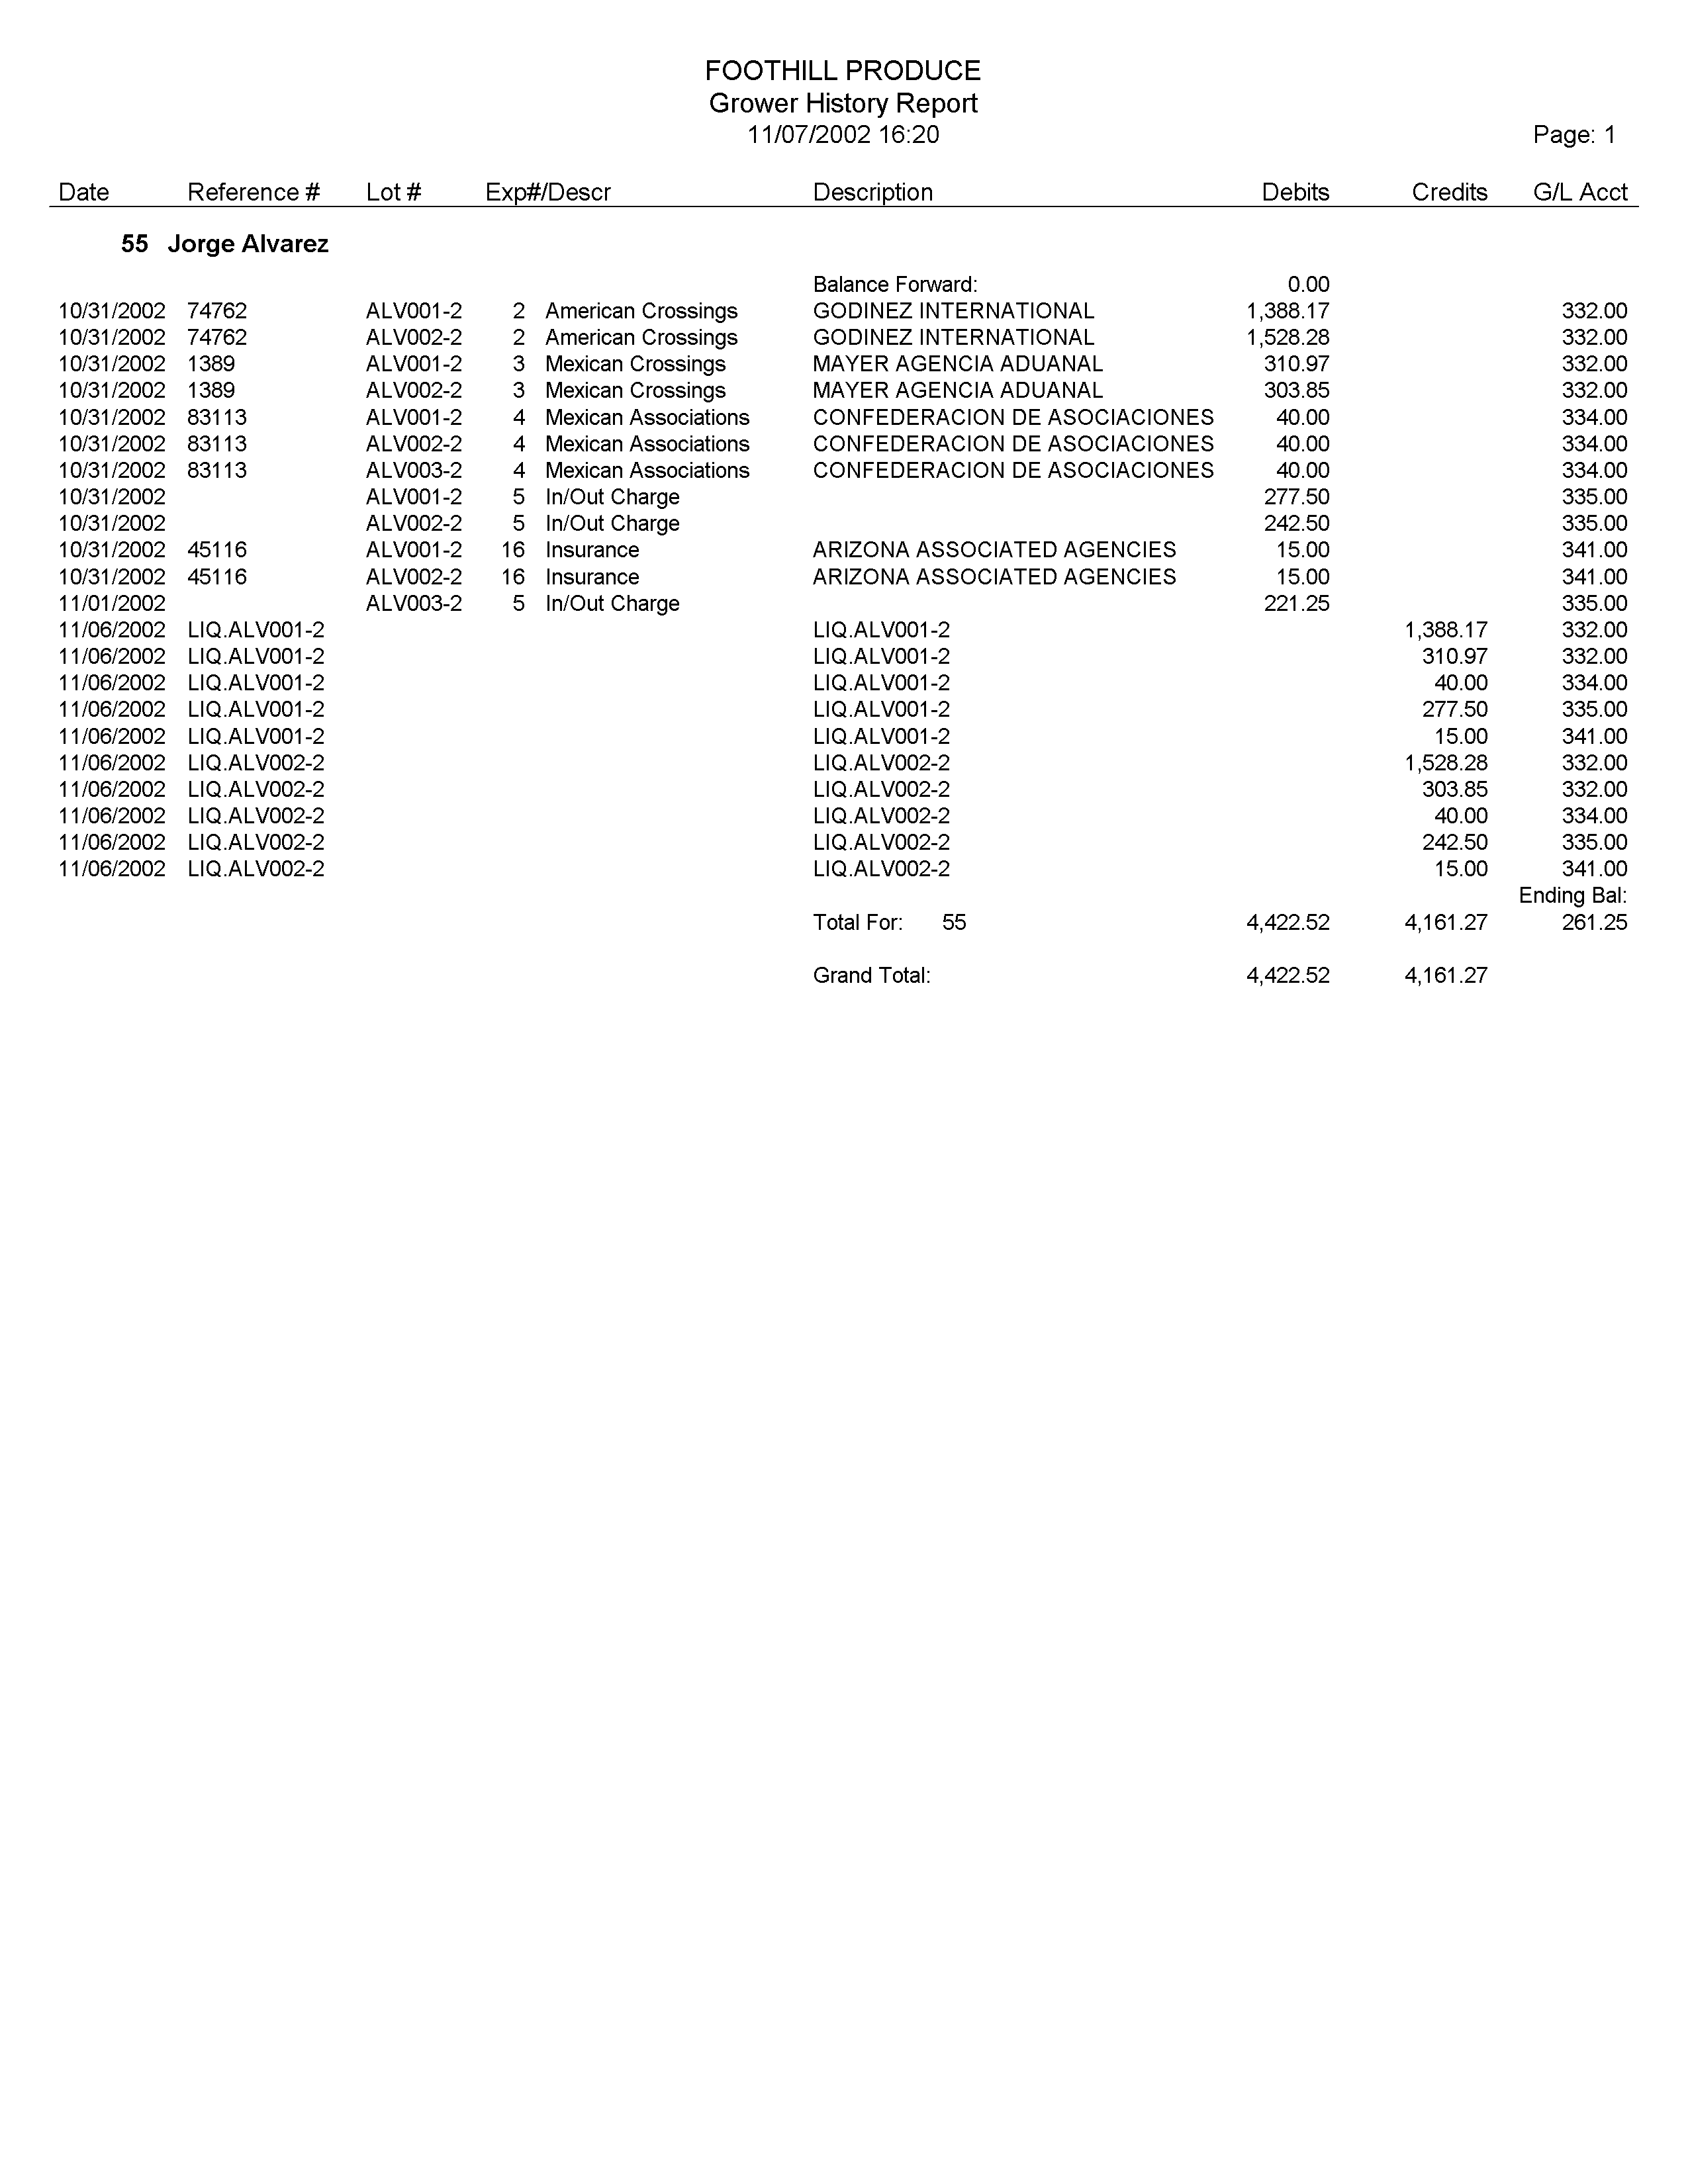
Unlike the Grower History Report for Account #320, the Grower History Report for grower charges does not have an ending balance of zero. This is because a lot was received for this grower (ALV003-2), and there are charges that have been entered for the lot in the amount of $261.25. However, since no product has yet been sold, there is no open balance in Account #320.
Is there a way to unfinalize a lot?
If you have gone to the point of making a payment, follow these steps to unfinalize a lot:
Note These instructions are only for those that have not chosen to automatically update Lot Liquidations to A/P invoices.
-
Start by deleting the check.
-
Then, go to Growers > Grower Statements > Grower Payable Report. (This report will not be available if you are using the Lot Liquidation Update to A/P option.)
-
Select the A/P invoice that includes the lot you are unfinalizing and click Delete Grower Payable.
-
Now go to Growers > Grower Statements > Lot Liquidations.
-
Select the Lot you are unfinalizing and click Unfinalize.
-
Now you can make your changes and liquidate again. The Grower Payable can be created and then you can redo your payment (or make a payment for the first time if the check had not been created.)