Cost Centers
Setting Up Cost Centers
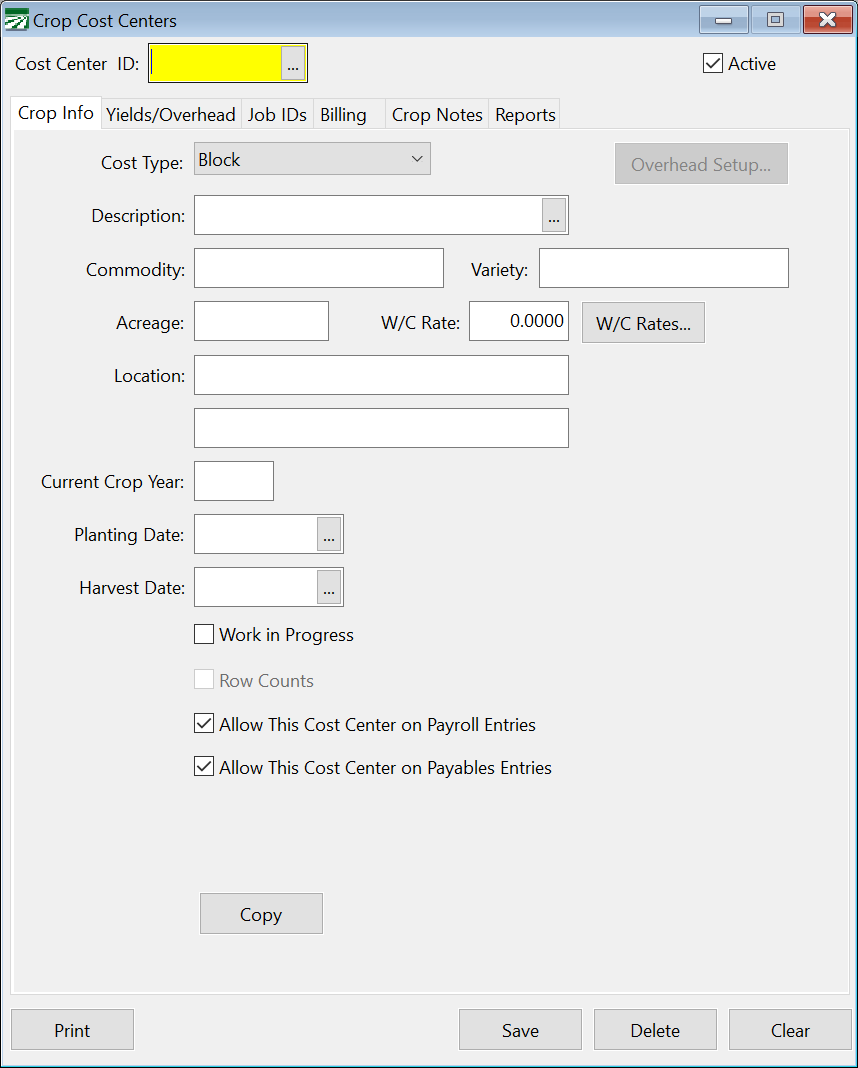
To set up a Cost Center, go to Cost Accounting > Cost Centers.
Cost Center ID
For each Cost Center you set up, you will create its own unique ID # of up to eight letters or numbers. Use a code that is short and easy to remember. For instance, you might use combinations like "HOME40" or "DADS30". Or suppose you have different ranches, and each field has a map number assigned to it. You might use something like "RR01" to mean "River Ranch, field #1".
If you assign numeric ID numbers, you may want to use leading zeros, for instance, use "01", "02", "03" instead of just "1", "2", "3". This will ensure that Cost Center ID's are listed in the correct order.
Cost Type
Select the appropriate type of Cost Center. The "basic" types are Block, Field, Herd, Orchard, and Vineyard. Each of the basic types may be included under an Overhead Cost Center. The two types of Overhead Cost Centers are Ranch and Crop/Variety.
Description
Enter a Description for the Cost Center. This may be a commodity, location, ranch name, etc.
Commodity/Var Code
Enter the Commodity for this Cost Center. If the Commodity is included in the description, or you grow different crops on this cost center from year to year, you can leave this entry blank.
If you have turned on the Commodity/Variety Code feature, then the program will change this entry to ask for the Commodity/Variety Code.
Acreage
Enter the Acreage for this cost center. (If the planted Acreage varies from year to year, you can enter the total Acreage and specify how many acres are planted from year to year on the Yields/Overhead tab page.
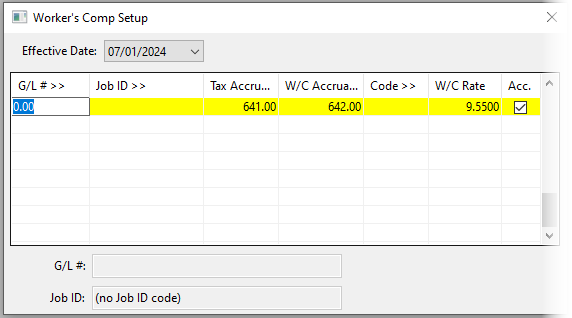
W/C Rates
Clicking this button will open the Worker's Comp Setup table. This table is used to determine the Worker's Comp Rate to apply to labor as well as the payroll tax expense and Worker's Comp expense accounts to use for accruing taxes and Worker's Comp.
The Effective Date will automatically be displayed when viewing the Worker's Comp Rates. Use the drop-down to change to a different effective date and view rates that were active at that time.
When a new Cost Center is saved, an entry is created in the Payroll Setup Workers Comp screen. If you don’t assign the Cost Center to a Workers Comp Class Code or Rate on the W/C Rates tab you can do so through the Payroll Setup Workers Comp window. If you enter the W/C Class or Rate information in the Cost Center file, it will automatically be added to the Workers Comp Setup window in the Payroll system.
By setting up this table correctly, you can separate ag and non-ag payroll tax expenses, or keep separate payroll overhead expenses for different divisions of your business (for example, keeping farming and dairy payroll expenses separate).
In the simplest example, with farm-only payroll, you may leave the G/L # and Job ID blank. The program will assign the tax liability and Workers Comp class based on the Cost Center entered on the payroll check. This entry would look like this:
To extend this example, suppose you have an office worker who has a different Worker's Comp rate (and you want to keep the payroll overhead for office wages separate from farm wages). In this case you should have a General Ledger expense account for office wages, and you would enter this in the first column, and leave the Job ID column blank. The program will match the office wages General Ledger account entered on the check to this entry, and thus will use it for the Worker's Comp rate and General Ledger expense accounts. This entry would look like this:

When determining the entry in this table to use, there is a specific order that is used to search the table. The program will use an entry from the table based on the first entry that matches:
-
The General Ledger Account, Job Code, and Cost Center
-
The General Ledger Account and Cost Center
-
The Job Code and Cost Center
-
The General Ledger Account
-
The Cost Center
Location
Two lines are provided for entering Location or other information.
Current Crop Year
If you have different crops that have overlapping Crop Years, you can enter the current Crop Year here. This will be used as a default during check/deposit entry, overriding the Current Crop Year in the System File. If you leave this entry blank, then the default Crop Year will be used from the system file.
For instance, suppose you are harvesting citrus in December 2000/January 2001, and you are using 2000 as your Crop Year for your citrus crops. In January, you are also replanting in your almond orchard and winter pruning, and these expenses are a part of your 2001 crop year for almonds. In this case, you may want to have the Current Crop years set different on each of the Cost Centers.
Planting Date / Harvest Date
Enter the Planting and Harvesting Dates for this Cost Center. Press [F4] or use the lookup button to access a calendar.
Work in Progress
Select this box if you are using this as a Work in Progress Cost Center.
Row Counts
If you have the Row Counts option enabled in the System File, you can check this box to indicate that row counts are used for this particular Cost Center. Leave it unchecked if you do not use row counts for this cost center.
For instance, if you grow raisin grapes, cotton, and almonds, you may only check the Row Counts box for your raisin Cost Centers. When entering payroll on the cotton and almonds, the Row # entry will be skipped because the program will know that row counts are not used for these crops.
Allow This Cost Center on Payroll Entries / Payables Entries
If these boxes are checked, this Cost Center can be used when doing payroll or accounts payables.
Charge Payroll Overhead as Percentage
Normally, payroll taxes and workers' Comp overhead will be expensed exactly to the Cost Centers labor is expensed to. You can override this default behavior by checking this box. When it is checked, the payroll journal will instead charge a flat percentage of the wages to the payroll tax account. Enter the percentage to charge for payroll overhead to the right.
Yields/Overhead
The Farmer's Office maintains information for each Crop Year for historical reporting and comparison purposes. The Yields/Overhead tab page lists this information for each cost center:
This tab page includes information on the Overhead Cost Centers the percentages to allocate from each overhead. While you can edit the Overhead Cost Centers and percentages on this tab page, it is usually easier to use the Overhead Setup button on the Crop Info tab page to allocate costs from Overhead Cost \Centers.
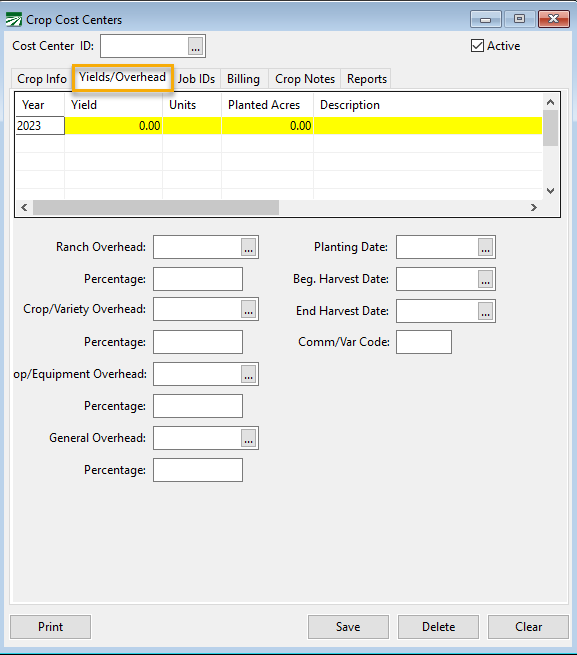
Year
This is the Crop Year for this line (and the overhead information displayed below the grid). If you want to make an entry for a new Crop Year, click on a blank line (or arrow down to it) and type in the Crop Year here.
Yield
Enter the total Yield for this Cost Center/Crop Year. The number you enter here will be used for calculating income and expenses per unit yield.
Units
Enter the type of Units you measure the yield in, for instance, tons, bales, pounds, boxes, etc.
Planted Acres
This is the total Planted Acreage for this Crop Year. This entry will automatically default to the acres entered in the Cost Center file. For open ground crops you can override this and enter a different Planted Acreage for each Crop Year.
Description
Ranch Overhead
Enter the Cost Center ID for the first Overhead for this Cost Center.
Percentage
Enter the Percentage to allocate to this Cost Center from the first Overhead Cost Center.
Crop/Variety Overhead
Enter the Cost Center number for the second Overhead for this Cost Center.
Percentage
Enter the Percentage to allocate to this Cost Center from the second Overhead Cost Center.
Overhead #3
Enter the Cost Center number for the third Overhead for this Cost Center. (There is no default overhead type for the third Overhead, so this will either not be used or it will show the overhead type that you have defined.)
Percentage
Enter the Percentage for the third Overhead allocation.
Overhead #4
Enter the Cost Center number for the fourth Overhead for this Cost Center. (There is no default Overhead type for the third Overhead, so this will either not be used or it will show the Overhead type that you have defined.)
Percentage
Enter the Percentage for the fourth Overhead allocation.
General Overhead %
Enter the percentage of the General/Administrative Overhead expenses that you want charged to this Cost Center/Crop Year. The Crop Reports will calculate the total general Overhead using the parameters below.
Starting GL # / Ending GL #
The Starting and Ending General Ledger numbers are used by the Crop Reports to calculate the total general Overhead. All expenses that have a general ledger account in this range and are not expensed to a Cost Center will be considered a part of the general Overhead. These entries do not need to be filled in if you are not using the general Overhead calculation feature.
Starting Date / # of Months
The Starting Date and the # of Months entries are also used to calculate the total general Overhead. Expenses are selected by date, and must fall within the range determined by these entries. For example, if the starting date is 10/01/98 and the number of months is set to 7, all expenses that fall between 10/01/98 and 04/30/99 will be included in the general overhead. These entries do not need to be filled in if you are not using the general Overhead calculation feature.
Planting Date
Enter the Planting Date for this Cost Center. Press [F4] or use the lookup button to access a calendar.
Beginning Harvest Date / Ending Harvest Date
Enter the harvest season by entering the first and last date of it.
Calculating Income/Expense Per Tree or Vine
For permanent crops, in addition to providing per acre and per yield figures on the crop reports, you can also get crop reports that show your income and expenses on a per tree or per vine basis. All you need to do is put the number of trees or vines in the Yield entry of the crop report data file, and "TREE" or "VINE" in the Unit Type entry. Then print the crop reports. When you are done, you can put the actual yield and unit type back in.
Knowing your per tree or vine costs on labor expenses may be helpful if you are currently paying employees on a hourly basis, and are thinking of switching to piecework-based pay. This gives you a starting point for determining piecework rates.
Job ID’s
Job IDs can be linked to Cost Centers. This will allow you to use that Job ID when cost accounting for a particular Cost Center.
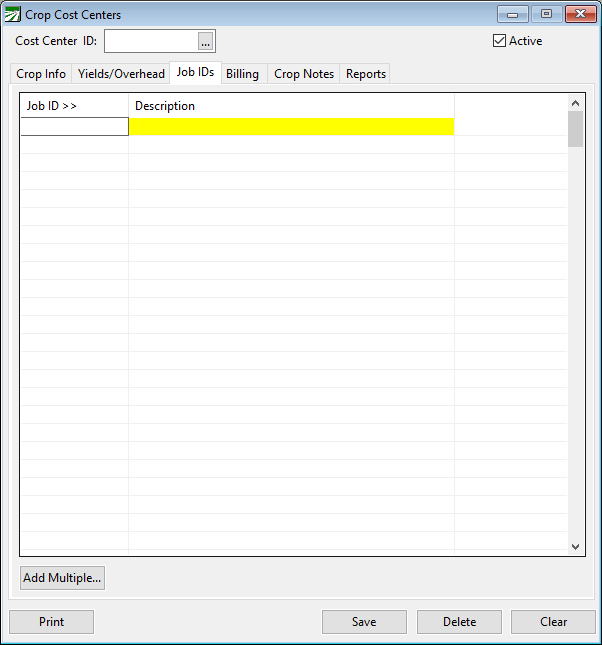
Job ID
Enter the Job ID you would like to link. Or you can look up your Job IDs by pressing [F4] or clicking on the Job ID header.
Description
The Description will automatically appear when you select the job.
Add Multiple...
Click this button to attach multiple Job ID's to the Cost Center.
Billing
The Billing tab is for use by farm management companies. This tab allows you to bill your customer for the payroll overhead and any management fees you have. If you don’t manage cost centers for others, then do not use this window. For more information, see the section: Farm Management Billing. To use this window, select the Managed For box discussed in further detail below.
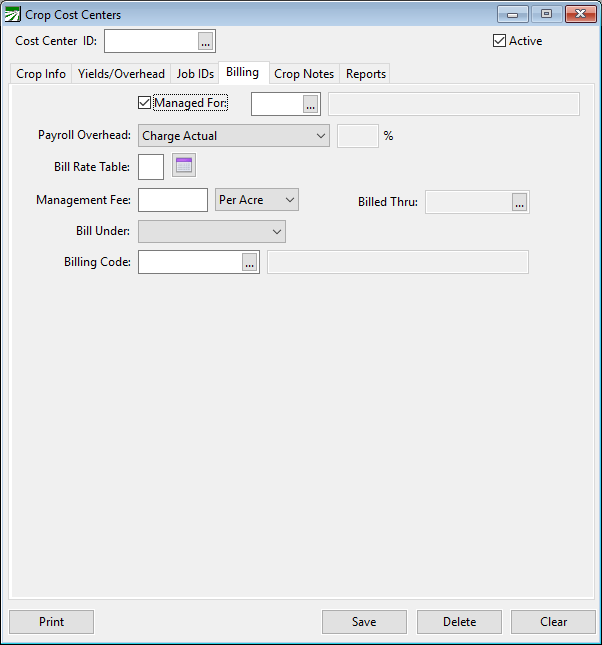
Managed For
If you manage this cost center for someone else, select this box. This enables you to bill them. Select the customer using the lookup button in the entry next to the check box.
Payroll Overhead
You can forward to the Payroll Overhead to the customer you manage the Cost Center for. Do this by selecting how you want it billed. Select this from the drop-down menu labeled Payroll Overhead. There are 4 options:
-
Charge Actual: This option will simply charge the customer exactly what you pay as a Payroll Overhead.
-
Charge Actual/Bill Percentage: This option will charge the actual expenses plus whatever percentage you want on top of that.
-
Charge Percentage: This option will charge a straight percentage. This is a percentage of payroll. This is set up using the Bill Rate table which is discussed in further detail below.
-
Fixed Rate: This option charges one flat rate per month.
Bill Rate Table
The Bill Rate Table is where you can set up your fixed rate billing. This table can set up different rates for different Job IDs, allowing you to bill many different rates by changing the Cost Center/Job ID combination.
For more in depth information on how to use this, see the section Cost Center Bill Rate Table.
Management Fee
If you charge an additional management fee (on top of just the payroll overhead), enter it here. This can be a Per Acre charge or a flat monthly fee.
Bill Under
If this Cost Center is connected to an Overhead Cost Center, you can bill these expenses under that overhead. Since a Cost Center can be assigned a Crop Overhead and a Ranch Overhead, select which one you would like to bill under by choosing one from this dropdown menu.
Billing Code
To link this billing to a particular General Ledger account, you must use a Billing Code. For more information on this, see the section Billing Descriptions.
If nothing is entered here, the program will use MGMTFEE as the default billing code.
Crop Notes
The Crop Notes feature gives you the ability to enter any notes, soil test results, weather conditions, planting times, or other cultural information on your crops and fields. When you enter this information, it is identified by crop or field, type of expense, and date. You may then view and print reports based on this information at any time, selected by field, for any one expense or all expenses.
When you select the Crop Notes tab in the Crop Cost Center file this window will be opened:
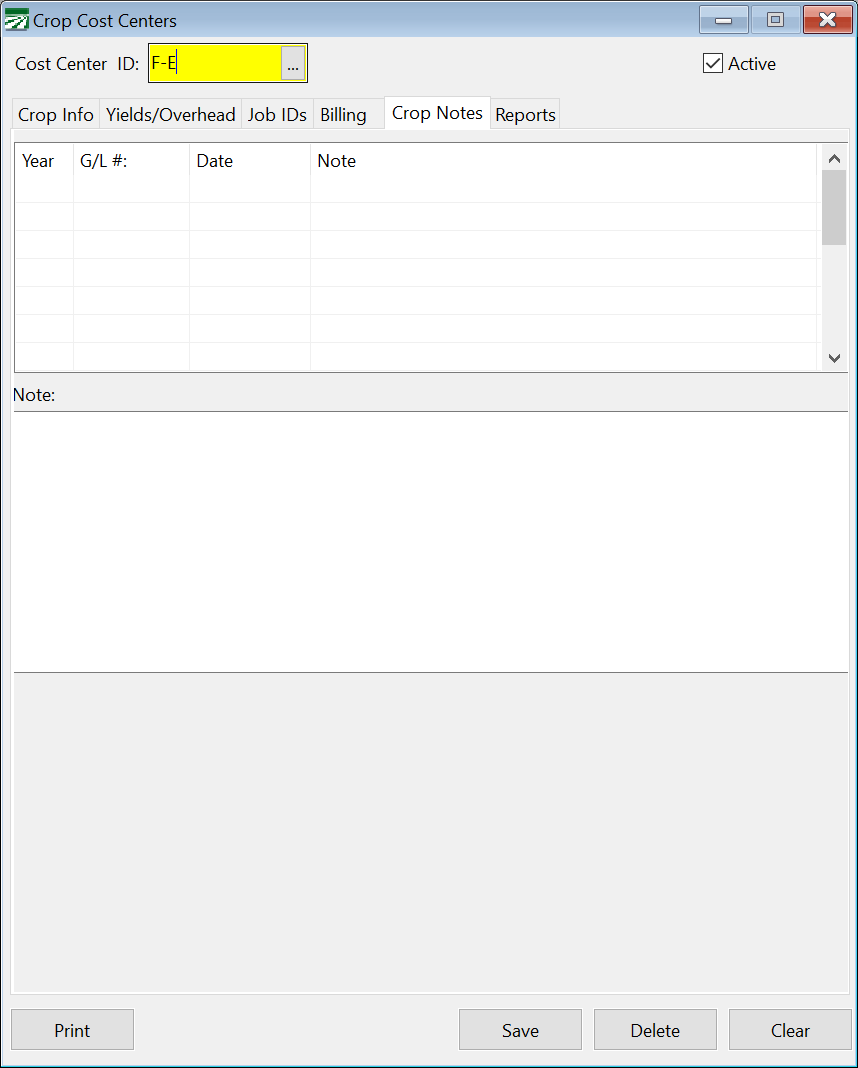
Year
Enter the Crop Year that the entry applies to.
G/L #
Enter the expense number that the crop note relates to. For example, if you are entering a note on the effectiveness of a pesticide application, you might select the pesticide expense account number. This entry is optional and may be left blank.
Date
Enter the Date of the note entry.
Note
Click into this entry field (located in the lower half of the Crop Cost Centers window) to enter your notes.
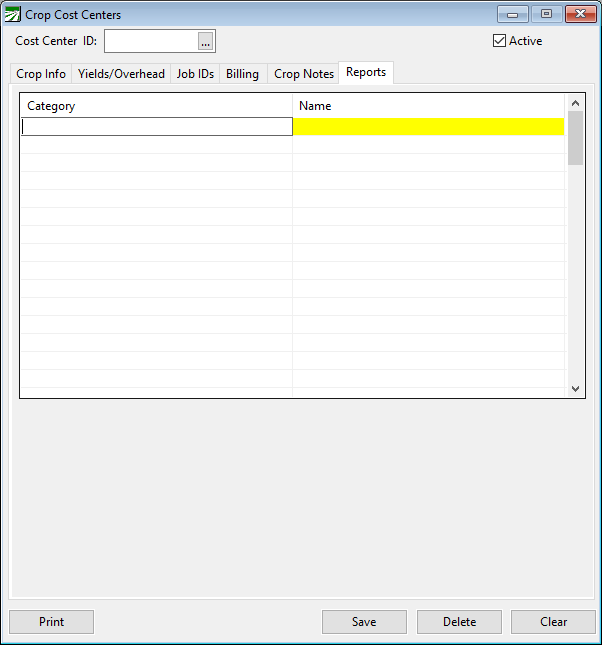
Reports
The Reports tab of the Crop Cost Center window allows you to see which custom Consolidated Crop Reports this Cost Center is assigned to. For more information on consolidated crop reports see the section Setup Consolidated Crop Reports.
This window will list each report that the Cost Center is used in. This is sorted by category then individual name.
Overhead Cost Center Setup
Ranch and Crop/Variety Overhead Cost Centers allow you to divide an expense automatically among multiple field, block, orchard, or vineyard Cost Centers. To do this, the program must know which Cost Centers make up the overhead, and how much (what percentage) to allocate to each Cost Center.
When you are editing an Overhead Cost Center, the Overhead Setup button will be enabled. When you click on the button, the following window will appear:

Year
Each Overhead Cost Center may have a different allocation setup for each Crop Year. The current Crop Year will be displayed here automatically. You can change this to a prior Crop Year by clicking on the drop-down button.
Overhead settings for a new Crop Year may be created from this window by clicking on the New Year button. See the instructions below for more information.
Add
When you click the Add... button, a window will appear for you to select a Cost Center to add to the list.Type in the Cost Center ID or click on the lookup button to select a Cost Center. Click Ok to add the cost center or Cancel to close the window.
Remove
The Cost Center currently highlighted will be removed from the list.
Allocate
As you add Cost Centers, you will notice that the "% of acreage" column will show the percentage of the total acreage of the cost centers listed. This will change as you add or remove Cost Centers. The "Overhead %" column shows the actual percentage currently assigned to each cost center.
When you click the Allocate button, the percentages in the "% of acreage" column will be copied to the "Overhead %" column.
In addition to automatically assigning the Overhead % by acreage, you can click on any of the overhead percentages and type in a different value. The percentages, of course, must total 100.
If you make changes to the overhead allocation, click Ok to save the changes. If you don't want to save the changes you have made, click Cancel.
Setting Up Overheads for a New Crop Year
When you click on the New Year button, the following window will appear:
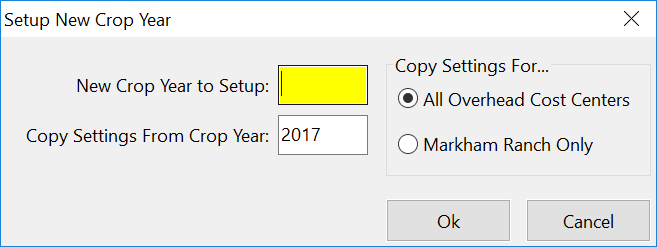
Enter the new Crop Year that you want to create overhead entries for, which Crop Year you want to copy the entries from, and whether you want to create entries for all overhead Cost Centers or just the one you are currently working on. Click Ok to create the entries or Cancel to close the window.
Print Cost Center List
Click the Print button on the Cost Center window to print a list of your cost centers. The following window will open:
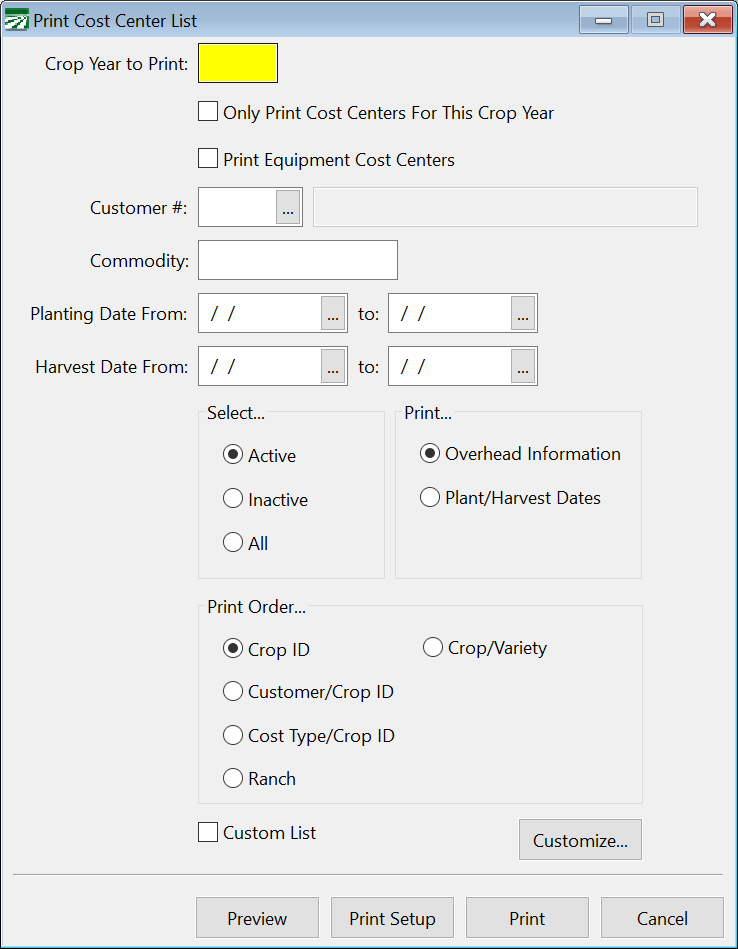
This window will generate a list of all of your Cost Centers unless parameters are defined, as described below:
Crop Year to Print
The Cost Center list includes information from the Crop Year file, including yields and overhead setup information. Enter the Crop Year that you want to print on this report.
You can leave this blank if you aren't concerned about getting the information specific to the Crop Year on the list.
Note If you are printing the report for a single crop year and the Crop Year entry is not enabled, the report will select Cost Centers based on the current crop year setting on each Cost Center.
Only Print Cost Centers For This Crop Year
Select this box if you only want the report to include Cost Centers with entries in the Crop Year file for the year you entered.
Print Equipment Cost Centers
Select this box if you want to Print Equipment Cost Centers also. Otherwise they will be excluded.
Customer #
If you want to print Cost Centers for a particular customer, enter the Customer # here.
Comm/Var Code
Filter the list by Commodity or Variety by entering a code here. If you select a Commodity or Variety, only Cost Centers that include the chosen Comm/Var code will be included.
Planting Date From
Filter the report by planting season by entering the first and last Planting Dates.
Harvest Date From
Filter the report by harvest season by entering the first and last Harvest Dates.
Select
Select which Cost Centers to include based on activity status. This can be Active, Inactive, or All.
Select what info you want to print on the list. This can be the Overhead Information or the Plant/Harvest Dates.
Print Order
Select the Print Order for the list. There are 5 different options: Crop ID, Customer/Crop ID, Cost Type/Crop ID, Ranch, Crop/Variety.
When there are two parameters in a given option (such as Customer/Crop ID), the list will be sorted by both. The first will be the first sorting parameter and the second one is the subheading. For example, Customer/Crop ID will show each Crop ID for every Customer.
Custom List / Customize
This list can be customized. This allows you to gather other information about Cost Centers that wouldn’t normally be included.
To do this, select the Custom List box. Then click Customize to modify the list.