Custom Crop Report
This window can generate a completely custom crop report. In fact, there is no default layout or included fields for this report - so it must be customized in order to use it. To do that, you will use the Customize button. After it is customized, you can enter the parameters like a normal report.
Go to Cost Accounting > Reports > Custom Crop Report.
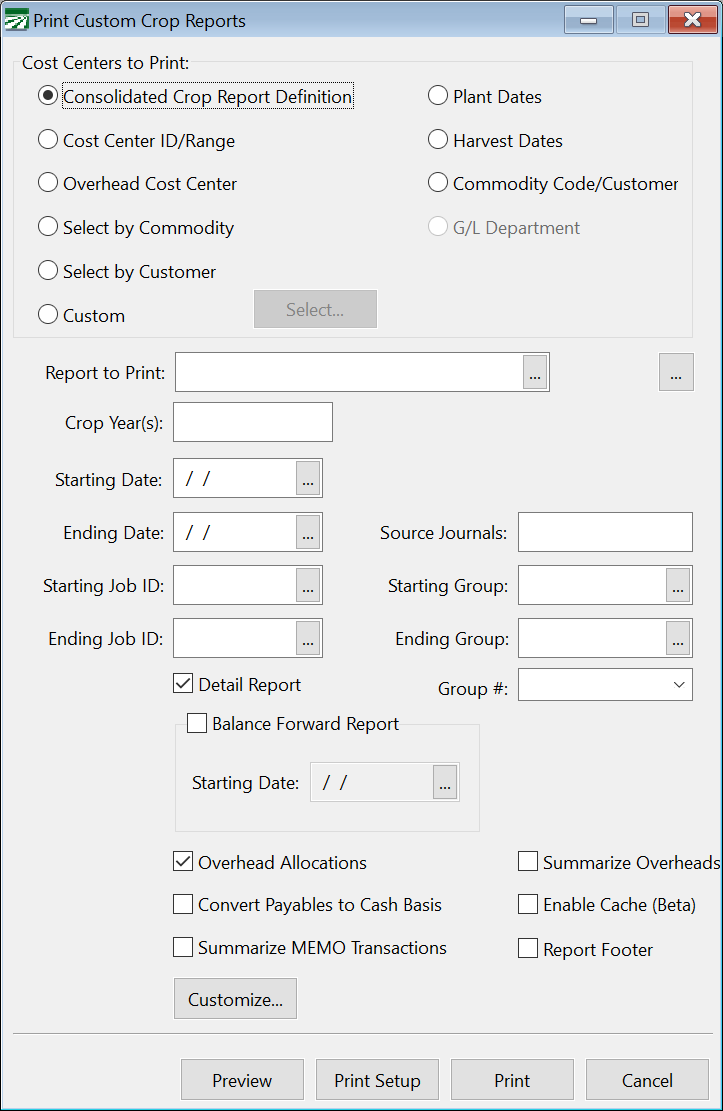
Cost Centers to Print
There are nine different options to use when printing the Consolidated Crop Report, as indicated below:
Consolidated Crop Report Definition
This option will allow you to select a report definition that you have already set up and the report will include all Cost Centers assigned to that definition.
Cost Center ID Range
This option allows you enter starting and ending Cost Centers for which you want to print the report. This may be useful if you have set up your Cost Center ID’s in such a way that related Cost Centers are grouped together.
Overhead Cost Center
This option will include all Cost Centers that are assigned to a particular Overhead Cost Center. For instance, if you set up Overhead Cost Centers for commodities, you can select an Overhead for a particular commodity and it will include all Cost Centers for that commodity.
Select by Commodity
This option allows you to enter a commodity and the report will print all Cost Centers that match that commodity.
Select by Customer
This option will print all Cost Centers that are billable to a single customer account.
Custom
This option allows you to select any combination of Cost Centers.
Plant Dates
This option will select Cost Centers to print that have Planting Dates within the date range that you provide.
Harvest Dates
This option will select Cost Centers to print that have Harvest Dates within the date range that you provide.
Commodity Code/Customer
This option will select Cost Centers that are assigned to the selected Commodity Code/Customer.
Report to Print
If you are printing the report for a Consolidated Crop Report Definition, enter the report name to print here. Click on the lookup button (or press [F4]) to get a list of reports to choose from. Use the Setup Consolidated Reports option to create report definitions.
If you are using a different method to select the cost centers to print on the report, this entry will change to provide the appropriate selection. For instance, if you select the Cost Center ID Range, you will be able to enter a starting and ending Cost Center IDs.
Crop Year(s)
Enter the Crop Year(s) for which you want to print the report. If you want to print the report for multiple years, separate each year with a comma.
Starting Date / Ending Date
This report can be run for a particular length of time. To do this, enter the Starting and Ending Dates in these boxes.
Starting Job ID & Ending Job ID
To print a report that includes only specific jobs, you can enter a range of Job IDs.
Starting Group & Ending Group / Group #
Filter this report by certain groups by entering the group number range in these two entries.
Detail Report
This controls the detail level of the report. If it is not selected, a summary report will be generated. However, this box is selected by default to ensure the full report is generated.
Customize
Use this button to access the customization window. For more info on customizing this report, see Creating a Custom Crop Report.
Creating a Custom Crop Report
In order to successfully use the Custom Crop Report, you must give it the custom parameters that you want. To do this, click on the Customize button. The following window will appear:
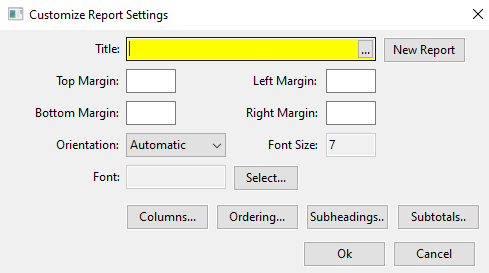
Follow these steps to create a custom report:
-
Enter a Title to save this report for repeat usage.
-
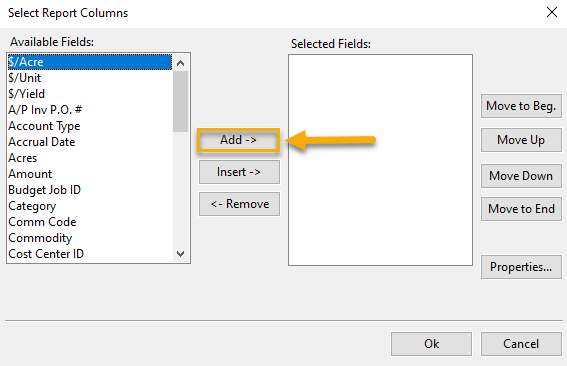
Click on the Columns button. (The Select Report Columns window will appear).
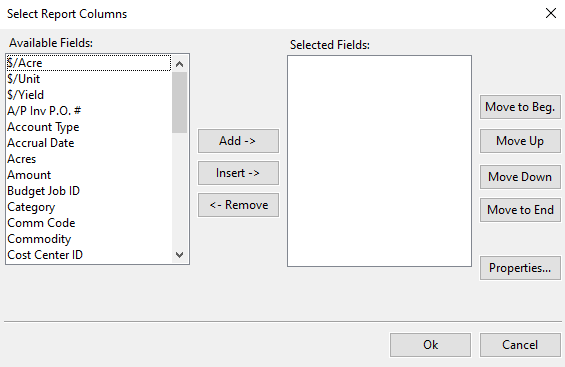
-
In the Select Report Columns window, you can select the data you would like to see for each Cost Center. Select a field that you would like to add by clicking on it. When selected, the field should be highlighted in blue as in the screen shot below.
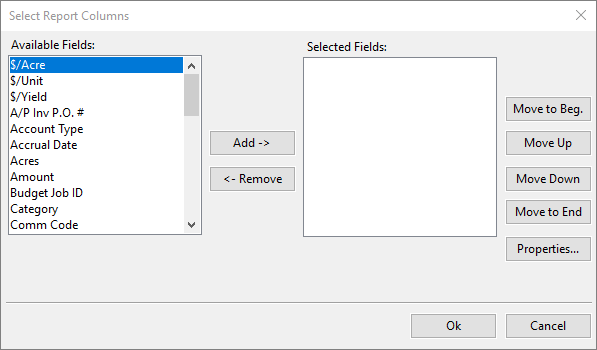
-
Once a field is selected, click the Add > button as highlighted in the following screen shot.
-
Repeat steps 3 and 4 for each field that you would like to add to the report.
-
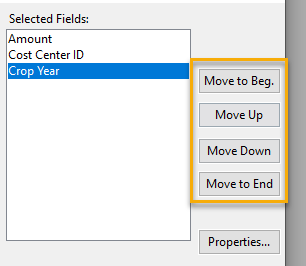
If needed, you can rearrange the order of the fields by using the buttons to the right.
-
Click Ok on the Report Columns window and the Customize window.
-
Fill in the desired parameters and your report will be ready to print. You can now reuse this report by looking it up in the Title entry of the Customize window.