Generate California Labor Contractor Pay Data
Generating the Labor Contractor Data Report
Tutorial del Labor Contractor Data Report
CA employers that have more than 100 employees or hired more than 100 workers through labor contractors are now required to annually report pay, demographic, and other workforce data to the Civil Rights Department.
CA Pay Data Reporting has two reports:
-
Labor Contractor Employee Report
You will have to file one or both depending on how many employees or hired workers you had during the year. Labor contractors are required to send this information to growers they send workers to throughout the reporting year.
If you only have our Payroll program, you will only be able to generate the information for the Labor Contractor Report. If you need to generate information for the Payroll Employee Report, you will need to add our HR program.
To begin reviewing, editing, and exporting the Labor Contractor Employee Report data, follow this workflow:
Note Some customers have multiple grower accounts in their program for one grower. In this case, you would have to send your grower one CA Pay Data File with all of their employee information. If you have more than one account created in your software for one grower, follow these steps to combine the accounts for CA Pay Data Reporting.
You should only combine grower accounts that are for the same grower.
How to Combine Multiple Grower Accounts into One Pay Data Report
You will need to identify any growers in your Datatech software that have multiple accounts. To do this, you can follow Step 1 to generate and review a grower list. Once you are aware of the growers with multiple accounts, there is a quick way to combine them for CA Pay Data reporting.
Example Grower 1, Grower 2, and Grower 3 are all the same grower and need to be sent as one Pay Data File. In this example, we want the Pay Data File sent under Grower 3’s account.
-
In your Payroll program, go to Labor Reports > Grower Entry.
-
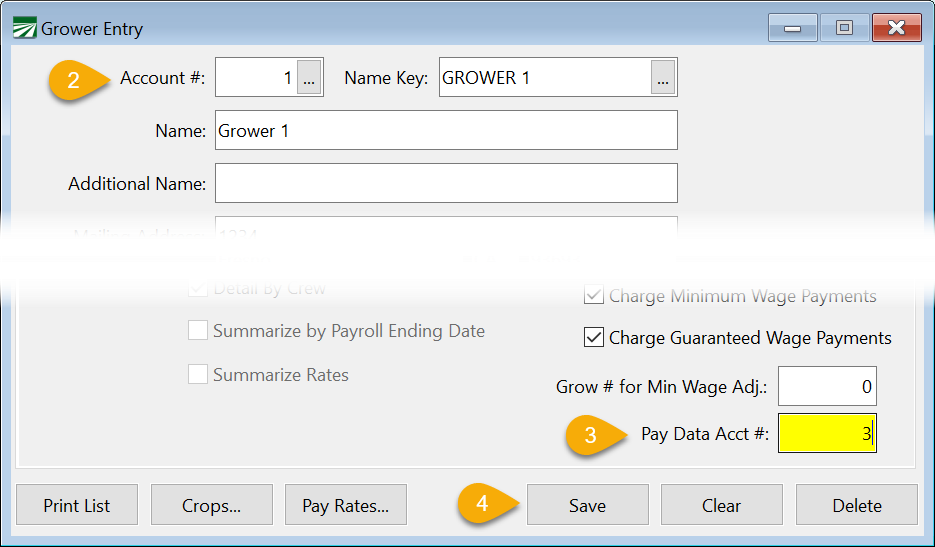
Enter one of the grower accounts you need to combine. (We will start with Grower 1.)
-
In the Pay Data Acct # entry, enter the grower account number with which you want this account to be combined. (In our example, we want the Pay Data File sent under Grower 3’s account. Grower 3’s account number is 3, so we enter 3.)
-
Save the record.
-
Repeat this process for any other growers you need to combine (In our example, we would open Grower 2’s account and enter a 3 in the Pay Data Acct # entry).
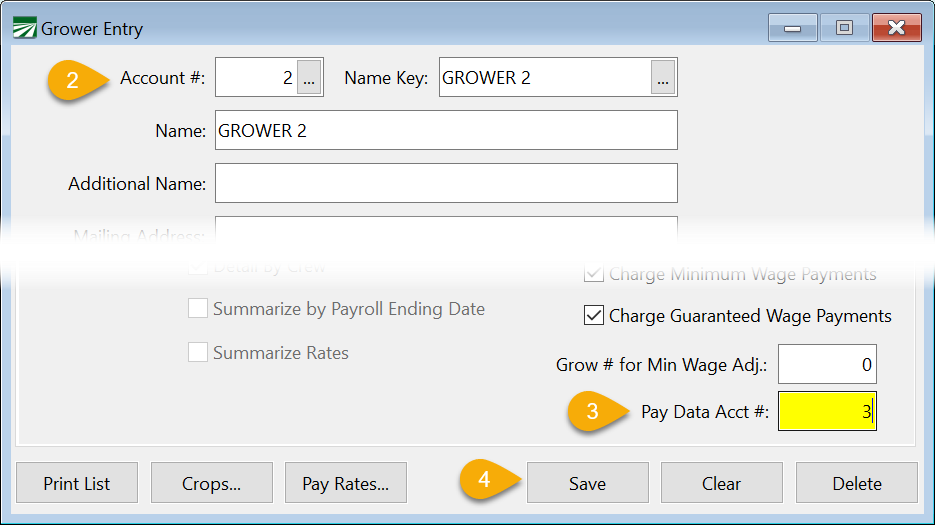
Note You would not need to enter anything in the Pay Data Acct # entry on the account you are putting the other growers under. In our example, this means that Grower 3’s account does not need a 3 entered in the Pay Data Acct # entry.
Step 1: Generate & Review Grower List
Begin by generating a Grower List for the reporting year. Generating this list by calendar year will give you a list of growers you have provided employees for throughout the year.
-
To do this, go to Payroll > Reports > Generate California Labor Contractor Pay Data.
-
Using the Grower List drop-down menu, select Calendar Year.
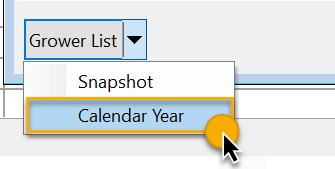
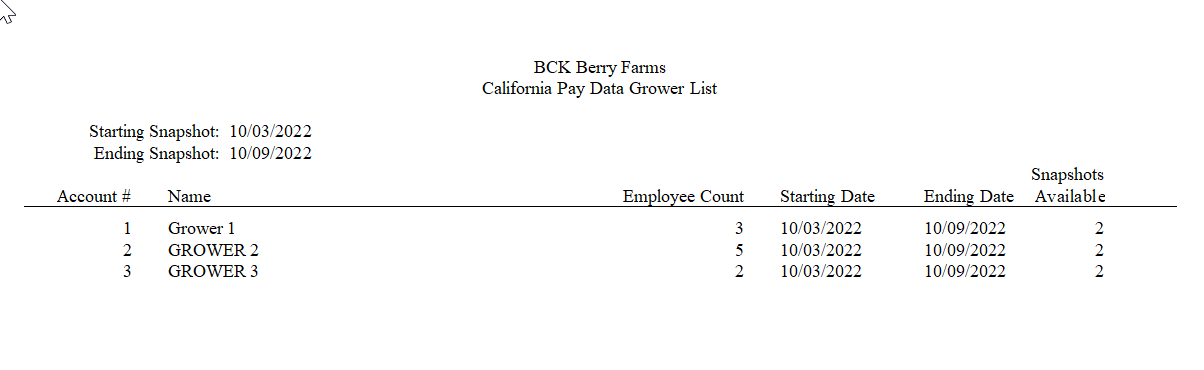
This will generate a full list of the growers you sent workers to in the reporting year, showing the grower’s name and account number, employee counts, the starting and ending dates, and the snapshots available.
-
Using the generated list, review which growers will need you to send them Pay Data Reporting information. The list will help you filter out any growers you did not provide workers to within the October through December Snapshot Periods. If the last ending pay period date is prior to October, then you have no workers that you can report for that grower.
Step 2: Generate a Report for Growers within a Snapshot Period
You will either need to discuss with each of your growers which snapshot period they want to use, or choose for yourself. If your goal is to find a “standard” snapshot period that can be used for all growers, you can use the following option to see what growers have in each pay period. This may help you find one snapshot period that includes all growers needing this data. Then you can generate the snapshot data for only that snapshot period in Step 3. Of course, it may not always work to use only one snapshot period for multiple growers.
Note If you already know the snapshots and growers you would like to generate, or you want to generate all snapshot periods for all growers to review and select a snapshot, skip to Step 3.
To generate a report to see which growers you sent employees to within a selected snapshot period, follow these instructions:
-
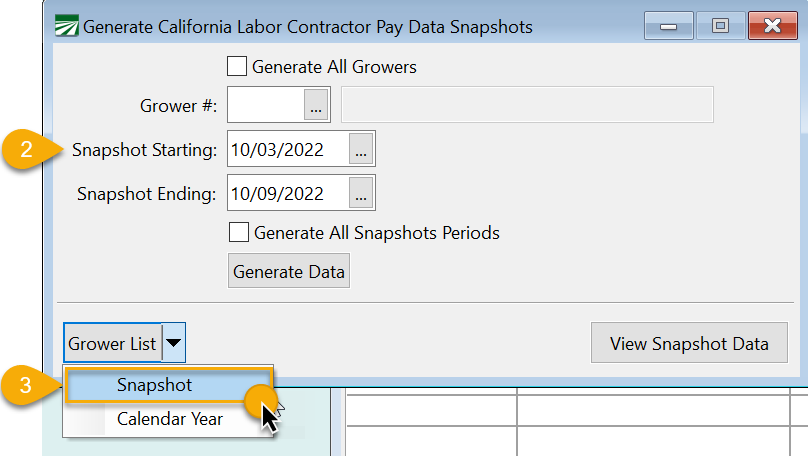
Go to Employees > Reports > Generate California Labor Contractor Pay Data.
-
Enter the desired Snapshot Starting and Ending dates for the report. The “Snapshot Period” is a single pay period between October 1 and December 31 of the reporting year.
-
On the Grower List menu, select Snapshot.
-
Review the generated list to see which growers you sent employees to during the selected dates.
Step 3: Generate & Review Snapshot Period Data
You can quickly generate all snapshot periods to see which are available. This can be done for all growers at once or one by one. It may be necessary to discuss with growers which snapshots include employees and which snapshot the grower prefers to use.
To generate and review all available snapshot periods, follow these steps:
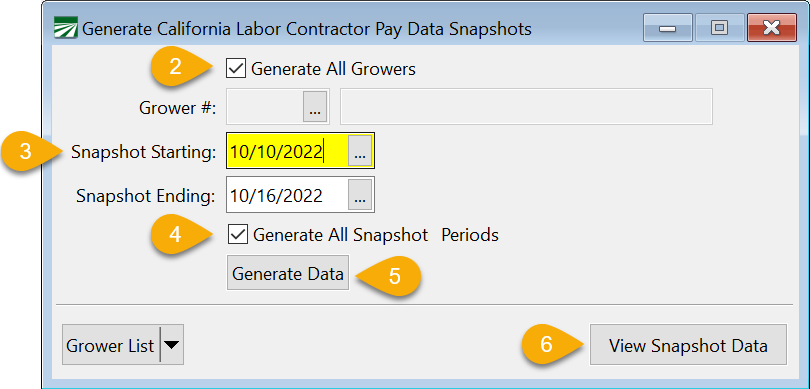
- Go to Payroll > Reports > Generate California Labor Contractor Pay Data.
-
Select Generate All Growers or enter a specific grower in the Grower # entry.
-
Enter the Snapshot Starting and Ending dates. Both the starting and ending snapshot dates must be in October, November, or December.
Note The program will generate all snapshots starting from the date you enter and forward. It will not generate any snapshots from before the starting date you enter. Also, if you have employees with different pay period dates, you will have to decide on one pay period to use.
-
Select Generate All Snapshot Periods to generate all snapshots starting with the starting and ending Snapshot dates you entered. This is useful if you want to be able to review all of the snapshot periods available for each grower to decide which one to use. While you can generate data for all snapshot periods, you are only required to provide the grower with information for one snapshot period.
-
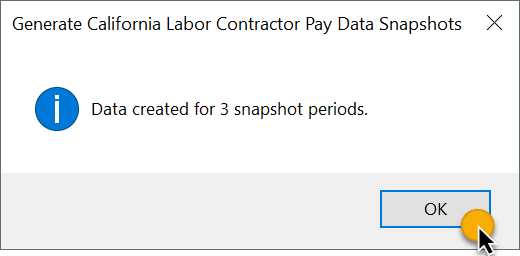
Click Generate Data. The program will let you know how many snapshot periods were created. Click OK.
-
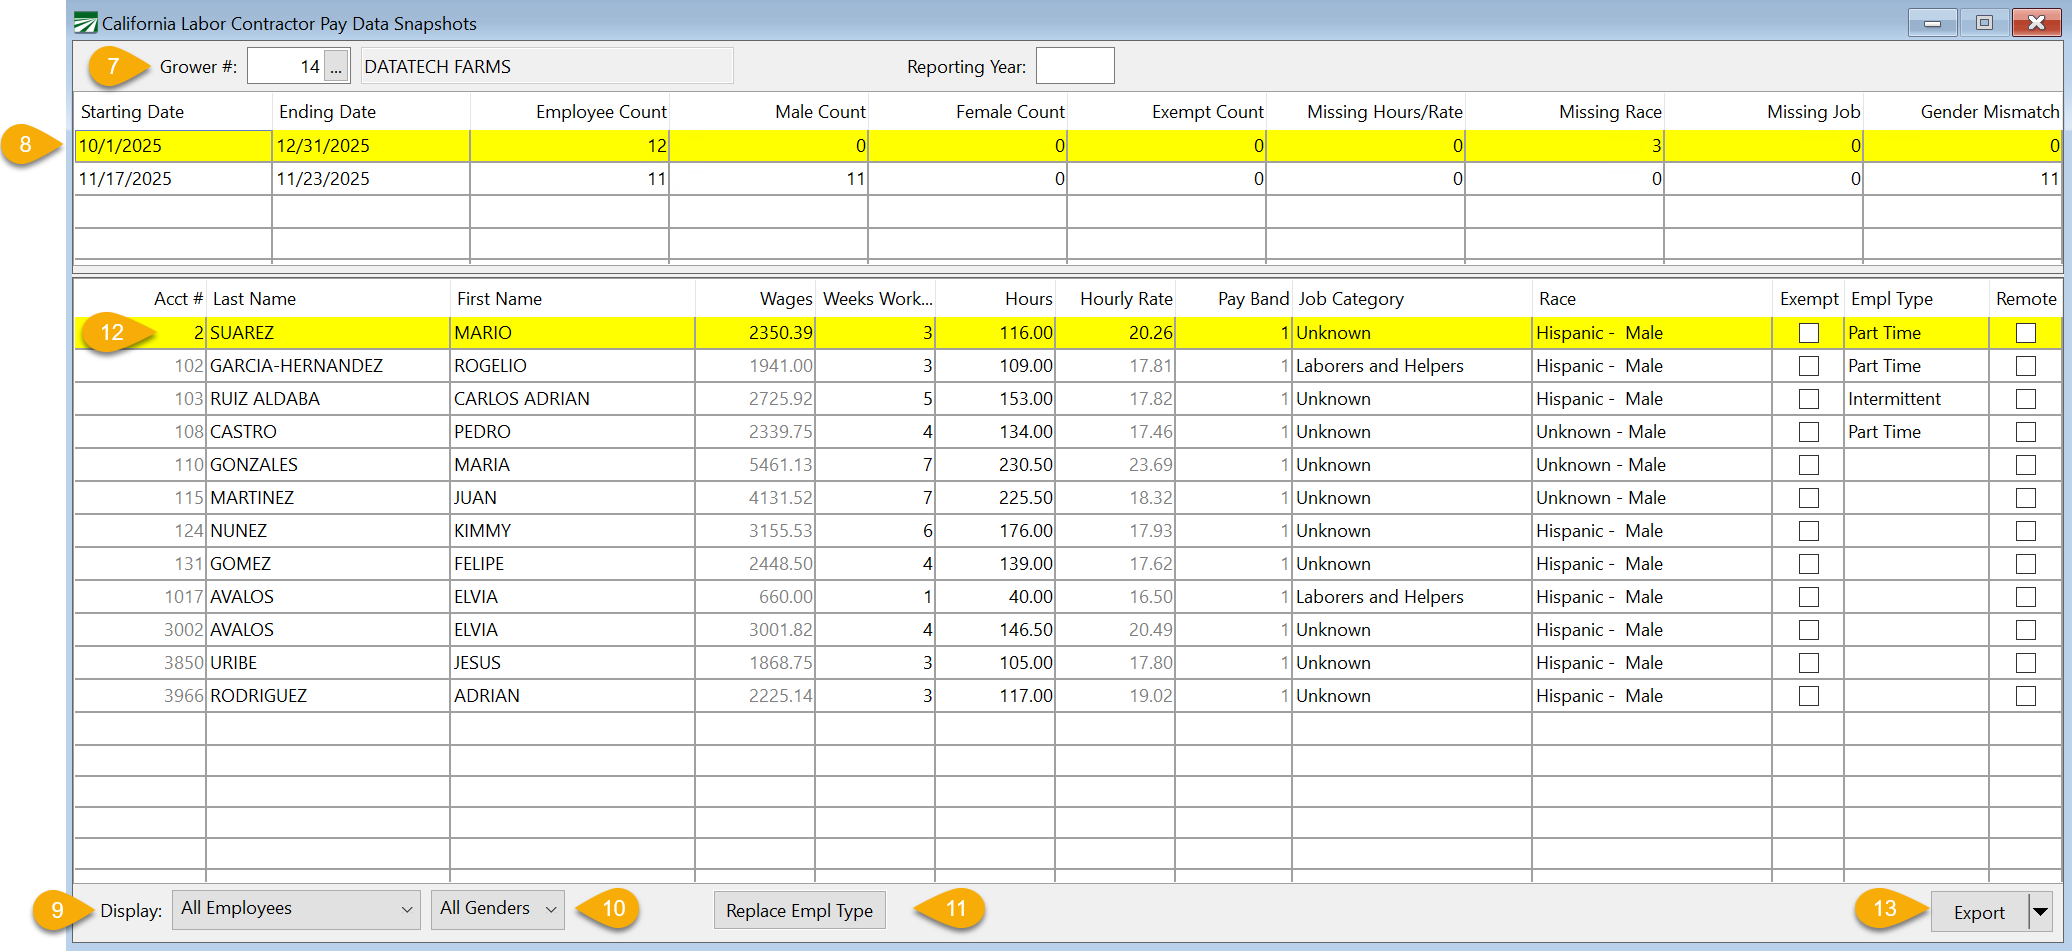
Now click View Snapshot Data. The California Labor Contractor Pay Data Snapshots window will open. This window allows you to view the grower snapshot data and make any necessary edits.
-
Select or enter the Grower #.
-
Select a snapshot period in the first grid. Employees are displayed in the second grid according to the highlighted snapshot period above.
-
Use the Display menu to filter the employees to view:
-
All Employees
-
Missing Race
-
Missing Job Category
-
Missing Hours
-
Mismatched Gender
-
One Job Category
-
Exempt Employees
-
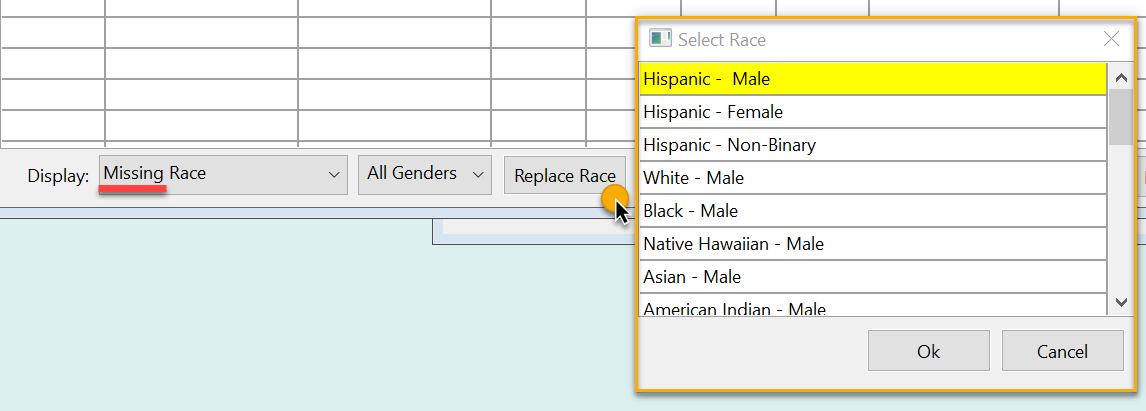
Note The Missing and Mismatched options will activate a Replace option. This can help you change the Gender or Job Category for all employees that are displayed. The purpose of this feature is to help you adjust multiple missing fields at once when most should be changed to the same option. However, if you use this feature, be sure to adjust any employees to which this change should not be applied. Most likely not all in the list should be changed to the same options. For example, you might set all employees to Laborers & Helpers, but then would need to change the Job Category on the crew supervisors. See the image below.
-
You can also filter by:
-
All Gender
-
Male
-
Female
-
Non-Binary
-
-
You can select multiple employee accounts in the grid and use the Replace Empl Type button to change their Empl Type.
-
Edit any missing or incorrect information before you export. When you edit information in this window using your HR program, the changes will be saved to the employee’s files.
Tip The EEO Job Category and Race/Ethnicity settings are only maintained by the HR system. If you are only using Datatech’s Payroll software and not the Human Resources software, these settings are not stored in the employee database. This means that if you regenerate a snapshot period, any edits made on the California Labor Contractor Pay Data Snapshot window will be lost. Also, when generating the snapshot periods for the 2023 reporting year, the system will not pick up the Job Category or Race/Ethnicity reported for 2022. It is always best to make changes directly in an employee’s file.
-
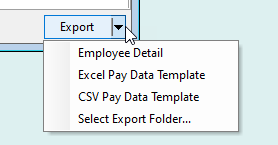
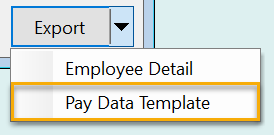
The Export option allows you to export the displayed information in an Employee Detail list in Excel. This report may be used when a grower wants to go over the detailed employee information themselves.
Note The Select Export Folder option allows you to choose a folder to where the file will be saved. The program will also make sure that the export folder exists before exporting a file. This may be needed if a user selects a local folder on their C: drive and a user on another workstation attempts to export a file and they do not have the same folder on ther own C: drive.
-
Once you have made all the necessary edits and corrections, export the information to the Excel or CSV Pay Data Template. This is the file you will send to your grower for them to upload to the state.
-
Review the exported data. If you need to select a new place to save the template, click Select Export Folder and choose the new location. You can then send the finished export to your grower.
For more information on this report, please go to:
https://calcivilrights.ca.gov/paydatareporting/
Right-Click Menu on the California Labor Contractor Pay Data Snapshot window for additional options.
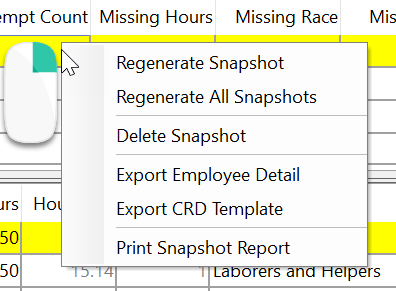
These options allow you to:
-
Regenerate a Snapshot or all Snapshots
-
Delete a Snapshot
-
Export Employee Detail or the CRD Template
-
And Print a Snapshot Report
Frequently Asked Questions
 Find answers to common questions and issues.
How do I select a category that an employee belongs to?
See the handbook found on the CRD's California Pay Data Reporting Page for guidance in selecting a category.
How should I report employment type for seasonal employees?
Datatech employees cannot advise what employment type you should select for seasonal employees. Please review the CA Pay Data Reporting FAQ's. That document says:
Covered employers should classify each California employee into one of three employment types: “Full-time,” “Part-time,” or “Intermittent.”
An employee who is assigned to regularly work full-time hours under the employer’s standard or alternative workweek schedule would fall under the “Full-time” employment type.
An employee who is assigned to regularly work less than full-time hours under the employer’s standard or alternative workweek schedule would fall under the “Part-time” employment type.
An employee who is assigned to periodically or irregularly work full-time or part-time hours, under the employer’s standard or alternative workweek schedule, would fall under the “Intermittent” employment type."
How does the program compile hours?
When compiling hours for the Labor Contractor Employee Report, the program looks at the date worked on the line items to properly add the hours worked in the calendar year. It excludes hours worked in the prior year (that may be paid on the first check issued in the calendar year) and adds hours worked for the last pay period of the calendar year (which may be paid on a check in the following year).
What do I do if an employee is missing hours?
The number of hours worked can be edited on the employee detail grid. When the hours are changed, the Hourly Rate will automatically be recalculated.
What is the snapshot period?
The snapshot period is a single pay period between October 1 and December 31 of the reporting year. It is used to determine which employees an employer must provide data about - including pay, race/ethnicity, sex, and job category.
What snapshot period(s) should I use?
That is entirely up to you and your growers. The California Labor Contractor Pay Data Snapshots window shows all snapshot periods that you have compiled for a given grower. For each snapshot period, you can see various employee counts that give you an idea of how much information may need to be supplied or corrected before reporting. You may want to select snapshot periods that have fewer corrections to make.
If your grower is interested in deciding which snapshot period to use, you can print a report listing the data that you have compiled.
Right-click on a snapshot period in the top grid on the California Labor Contractor Pay Data Snapshots window and select Print Snapshot Report to generate a report that you can send the grower showing the information available.
Can labor contractors have different snapshot dates for different growers?
Yes. Since your growers are compiling these reports and may have multiple labor contractors, they may each want you to use a specific snapshot period. Therefore, you may have to export different snapshot periods for different growers.
How do you export different snapshot periods?
The program gives you the option of generating all snapshot periods beginning with the starting and ending dates you enter. Once generated, they will appear at the top of the California Labor Contractor Pay Data Snapshots window. Select the period in question, then click Export.
You can export an Employee Detail Report if you’re not sure what the grower wants. The grower can use that information to make a report themselves, or you can export the report to the Excel or CSV Pay Data Templates.
For the Labor Contractor Report, what if an employee is salaried and doesn't have any hours?
Because there are no hours, the program will not be able to calculate the hourly rate. In this situation, you will look specifically at that employee and find out how many hours they worked throughout the year. Since the hours are not on their checks, you’ll have to look at reports/time sheets to add up their total hours.
Tip To easily sort employees with a salary/no hours out, in the Display dropdown select Missing Hours/Rate.
Are H-2A workers included in pay data reporting, including the employee count for total employees?
The CA Pay Data FAQ says the definition of an employee for the purposes of pay data reporting is “an individual on an employer’s payroll, including a part-time individual, and for whom the employer is required to withhold federal social security taxes from that individual’s wages.”
This definition does not apply to H2A workers since an employer is not required to withhold social security taxes from them. This definition is applicable when counting the total number of employees and when choosing who to report. Therefore, as we understand it, H-2A workers would not be included in the total employee number count or the reports.
If you want further clarification, please submit a question directly to the Civil Rights Department.
Can labor contractors submit reports to the Civil Rights Department for their clients/growers?
The CA Pay Data FAQ says: “While Professional Employer Organizations (PEOs), Human Resource Outsourcing Organizations (HROs), or labor contractors may assist in preparing and may file pay data reports with CRD on behalf of client employers, an official of the client employer, not from the PEO, HRO, or labor contractor, must certify the report. A certifying official may authorize another person to electronically file the certification on their behalf.”
So, a labor contractor can assist in preparing and filing the pay data reports. However, an official of the client employer must either certify the report themselves or specifically authorize another person to file the certification for them.
Are labor contractors penalized if growers don't submit their reports?
The CA Pay Data FAQ says “The Department has the power to seek an order requiring an employer who was obligated to file a report and failed to do so to file a required report. The Department is also empowered to seek civil penalties of $100 per employee against an employer who fails to file a required report, with the penalties increasing to $200 per employee for a subsequent failure to file a required report. These penalties are assessable against a labor contractor that has failed to provide required pay data to a client employer.”
Labor contractors are required to submit pay data information to their growers. If they don’t, they can be penalized. However, if a labor contractor has submitted necessary data to the grower but the grower doesn’t submit their report, the labor contractor will at lease have proof that they sent the information. This should allow the labor contractor to avoid any penalties imposed on a grower who fails to submit.
What Information Must I Provide to Growers?
The instructions provided by the Civil Rights Department (CRD) envision the labor contractor providing data about each employee that worked for each grower (pay band, job category, race/ethnicity/gender, wages, hours worked) to each of their growers. For further details about what information is required, see CA Pay Data Frequently Asked Questions, Section V, items A through E.
A grower would then combine the employee detail information from all of the labor contractors that they hired and report it using the template spreadsheet that the CRD provides where the employee data is summarized. This is described in steps 6-8. This template is similar to the template used for the Payroll Data Report, except it includes columns for the labor contractor’s name and Federal EIN.
What does the Employee Detail Export Include?
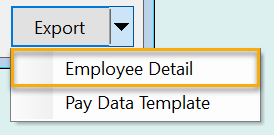
The Employee Detail Export fulfills the requirement for providing the employee information to your growers.
In practice, however, we expect that there will be few growers that have the technical expertise to take the detailed employee data and summarize it into the CRD’s template. This will require using either a database program, advanced spreadsheet skills, or software specifically designed for this task.
What does the Pay Data Template Export Include?
The Pay Data Template Export will generate the data in the CRD’s Excel template format. It will fill in the data required in columns M through W. You can provide this file to the grower; the grower, in turn, would need to add their own company specific establishment information in columns A through L.
If a grower has only hired one labor contractor, the grower should be able to use the Pay Data Template file that you provide to submit directly to the CRD.
As far as we know, the CRD requires a single Labor Contractor Report file to be submitted by each grower. This means that if a single-establishment grower has hired multiple labor contractors, and each labor contractor provides a separate Pay Data Template file, the grower will need to copy and paste the information from each file into a single template file, add their establishment information in columns A through L, and submit that single file to the CRD.
Do labor contractors generate/report both the Payroll Employee and Labor Contractor Employee Reports?
Labor Contractors generate and report to the Civil Rights Department their own Payroll Employee Pay Data Report if they have 100 or more employees.
Labor Contractors generate the Labor Contractor Employee reports to send to their growers if their growers have 100+ employees total. The growers can then report to the Civil Rights Department.
You can choose your own snapshot period for your own Payroll Employee Report; it doesn’t have to be the same as what you send to growers.
Is there an extension available to defer when reports are due?
A request can be submitted thru the Pay Data Reporting Portal to defer the due date to June 10th for the Labor Contractor Pay Data report only. This extension gives growers more time to compile information from LCs and make their report.
The Payroll Employee Report must still be filed by May 10th.
How do I handle multi-establishment growers?
If a multi-establishment grower has hired multiple labor contractors and each labor contractor provides employees for a single establishment and each establishment only has employees from a single labor contractor, the grower can still copy and paste the information from each labor contractor into a single file. The grower would then need to make sure the correct establishment information is entered in columns A through L for each labor contractor’s workers. In this situation, there is a one-to-one correspondence between the establishment and the labor contractor.
If a multi-establishment grower has hired multiple labor contractors and a labor contractor provides employees for different establishments, you will need to provide the grower with the Employee Detail Export and the grower will need to follow the CRD’s instructions for compiling the data into the template.
The reason for this is the labor contractor has no knowledge of the establishments that employees may have been assigned to. Since employees must be grouped by establishment, job category, pay band, and race/ethnicity, the labor contractor cannot group employees correctly without knowing which establishments each employee was assigned to. It is up to the grower to determine which employees were assigned to which establishments and compile the data accordingly.
We expect few growers to be multi-establishment reporters, and of those that are, they likely have the technical expertise to compile the Employee Detail Export into the CRD’s Excel template.
What may cause a mean hourly rate to be under minimum wage?
The mean hourly wage is calculated using the total wages and hours. Therefore, there may be problems with the calculation due to the difference in the way wages and hours are compiled (wages are compiled by check date; hours are compiled by work date).
What should I do if my growers have questions about Pay Data Reporting?
If growers have questions about what they need to report and how to do it, they should contact the California’s CRD and review the CRD’s User Guide and Frequently Asked Questions page, both available online.