Crew Sheets Using an Excel Template
One of the custom Crew Sheet options allows you to create a spreadsheet in Excel for use as a template. The program fills in the employee, crew, and pay period information on this template and prints out the crew sheet through Excel. By using this setting, you can actually create several different crew sheet templates.
To use the Excel Template option for the Crew Sheet printing, go to Tools > Program Setup > Payroll tab > Settings tab.
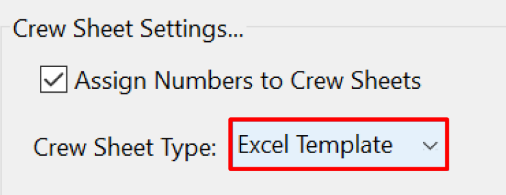
Under Crew Sheet Settings, select Excel Template as the Crew Sheet Type.
When you select Crew Sheet from the Employee Lists menu or click on the Print Crew Sheets button on the Crews window, the Print Crew Sheets window will appear:
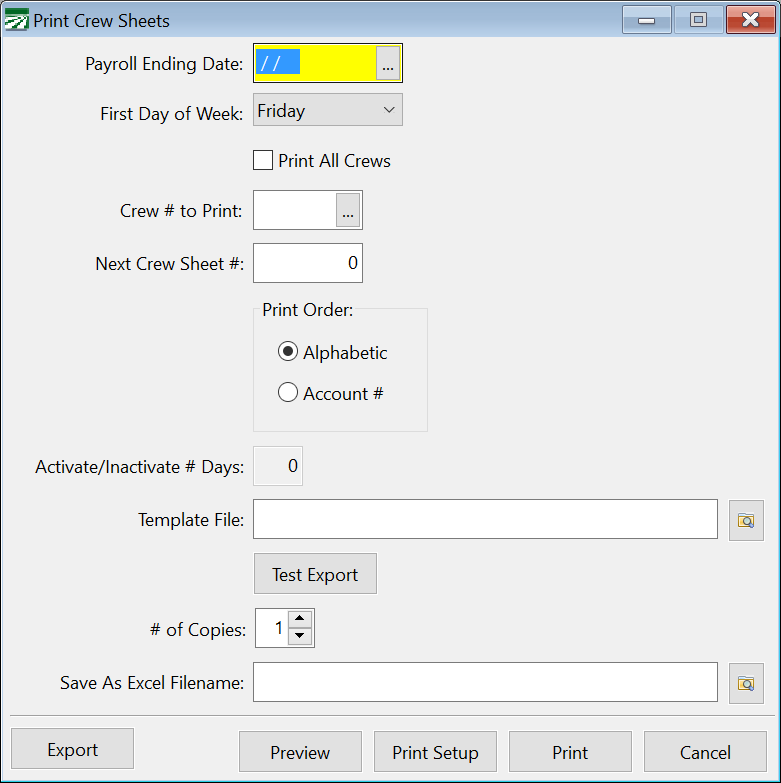
Note For instructions regarding the entries for this window (i.e. Payroll Ending Date, First Day of Week, etc.), see the Crew Sheets topic.
Template File
Enter the full path and file name of the Excel spreadsheet to use as a template here. Click on the button to the right to select the file from an Open File dialog.
You can press [F12] while the cursor is in this entry to open the template file in Excel for editing.
Test Export
Click on this button and the program will fill in the template and display the results in Excel. If there are more employees than will fit on a single page, additional worksheets will be added to the spreadsheet and all employees will be listed.
# of Copies
By default, one copy of the crew sheet will be printed. You may change this if you want multiple copies to print.
Save As Excel Filename
Instead of printing the crew sheet, you can export the crew sheet to another Excel file. After exporting, you can make changes to the crew sheet before printing it. If multiple pages are required to list all of the employees, a separate worksheet will be created for each page. When printing the finished crew sheet, you will need to select the Print Entire Workbook option under Excel Print Settings to print all of the worksheets.
Export
Click on this button to Export the crew sheet to a new Excel spreadsheet.
Creating a Template
You can create your own Excel template based on your needs.
The template that you create in Excel should print on a single page. The program will look at each cell for specific field names enclosed in square brackets and replace those field names with data from the employee file, crew, or pay period. After replace all of the fields in the template, the program will instruct Excel to print the spreadsheet. If there are additional employees to print (i.e. a large crew doesn’t fit on one page) then the template will be cleared, the additional employees will be entered into the template, and additional page that is needed will be printed.
Any data, formatting, borders, etc. that you have set up on the template will be printed as-is. For instance, if you enter you company name in cell A1, then it will print in this position on all crew sheets pages. If you format a field to print bold, then it will be printed in bold on the crew sheet.
Keep in mind as you are designing the form that you can use the Print Preview option in Excel to preview the crew sheet to make sure it fits on a single page. You can also use the Preview button on the Print Crew Sheets window to do a test printout of the crew sheet. Remember though that the program will process and preview one page at a time, so the Preview window will appear for each page. When testing your template, it is best to use a crew with just a few employees.
Field Names for Crew Excel Template
The following fields may be used to insert general information on a crew sheet Excel template:
[DATE_TIME_STAMP]
Inserts a date and time stamp for when the crew sheet was generated, similar to the date/time stamp that appears at the top of reports.
[COMPANY_NAME]
Inserts the company name (useful if you have multiple companies that use the same template files).
[COMPANY_PHONE]
The following fields may be used to insert information from the employee file on the crew sheet:
[EMPL_NAME]
This will insert the employee last name followed by a comma and then the first name.
[LAST_NAME]
This will insert the employee last name.
[FIRST_NAME]
This will insert the employee first name.
[FIRST_LAST_NAME]
This will insert both the employee’s first and last name.
[ACCT_NUM]
This will insert the employee account number.
[ACCT_NUM39]
This will insert the employee account number with asterisks appearing before and after the account number and use the “Free 3 of 9” bar code font for this cell, resulting in a Code 3 of 9 barcode.
[TITLE]
This will insert the employee title that is set up on the crew record. For supervisors, the program will automatically insert “Supervisor”. If you set up other employees on the Titles/Rates window from the Crew setup, the titles that you entered on that window will be printed here. Any other employees that are assigned to the crew will not have a titled printed.
[SS4]
This will insert the last four digits of the employee social security number.
[PIN]
This will insert the employee’s PIN. The PIN is normally the unique numeric identifier/account # used by a third party data collection system.
[BADGE_NUM]
This will insert the employee’s badge #. The badge number is normally set by importing it from a payroll data import file. The badge # is a six character alpha-numeric ID.
[PHONE_NUM]
Inserts the employee’s phone number.
[CELL_PHONE]
Inserts the employee’s cell phone number.
[CELL_OR_PHONE_NUM]
Inserts the employee’s cell phone number if one has been entered, otherwise inserts the employee’s phone number.
[COMP_CELL_PHONE]
Inserts the employee’s company issued cell phone number
[EMAIL_ADDR]
Inserts the employee’s email address.
[ALIEN_NUM]
This will insert the employee alien registration number.
[EXP_DATE]
This will insert the employee alien registration expiration date.
[PAY_RATE]
This will insert the employee’s pay rate.
[CREW_DESCR]
This will insert the Crew Description you have entered on the Employee Crews window.
[DEPARTMENT]
This will insert the employee’s department
The following fields may be used to insert information from the crew record. They would normally be used in the header section of the crew sheet.
[CREW_NUM]
This will insert the crew number/ID.
[SUPERVISOR]
This will insert the crew supervisor’s name.
[SHEET_NUM]
The program will insert the next available crew sheet number.
[HASH_TOTAL]
This will print the total of all of the employee account numbers that are printed on the time sheet. This total may be compared to the hash total on the Daily Payroll Entry window and Daily Payroll Reports (assuming that all of the employees on the crew sheet have time and no additional employees are manually added to the crew).
If some employees that are listed on the time sheet do not work, during data entry you can subtract their account numbers from the hash total. Likewise, if there are employees that are manually added to the crew sheet, you can add their account numbers to the hash total.
The following fields are related to the payroll period:
[PAY_PERIOD]
This will insert the payroll period starting and ending dates in the same cell, in the format “starting TO ending”.
[PAY_PERIOD_START]
This will insert the starting date for the pay period.
[PAY_PERIOD_END]
This will insert the ending date for the pay period.
[DAY1] … [DAY7]
This will insert the day of the week.
[DATE1] … [DATE7]
This will insert the date for each day in the pay period.