Crews
Setting Up Crews
Each employee account may be assigned to a different crew number. The Employee Crews window can be used to easily add, remove and move employee between crews.
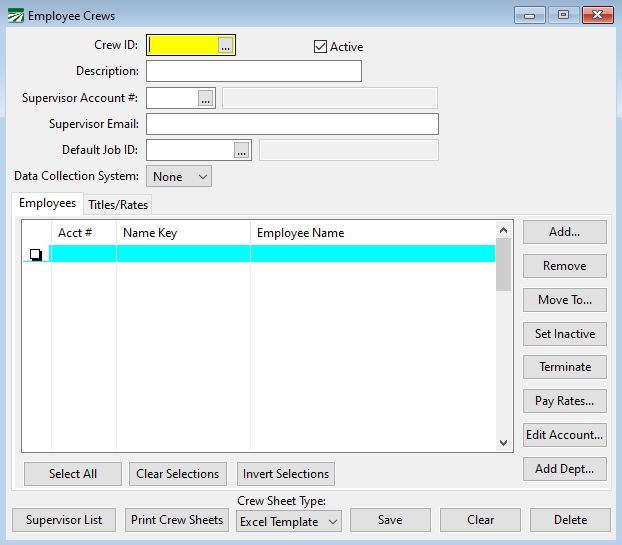
Go to Payroll > Crews.
Crew ID/Crew #
Enter the Crew #/ID you wish to create or edit, or select it using the lookup button.
If you are using numeric crews, you can assign a number from 1 to 9999. If you are using Alpha-Numeric Crews, you can enter any combination of letters, numbers or symbols up to 4 digits.
If you currently have Numeric Crews only and would like to enable Alpha Numeric, go to Tools > Program Setup > Payroll tab > Settings and then select the Alphanumeric Crew #'s checkbox. Click OK and restart the program to activate the setting.
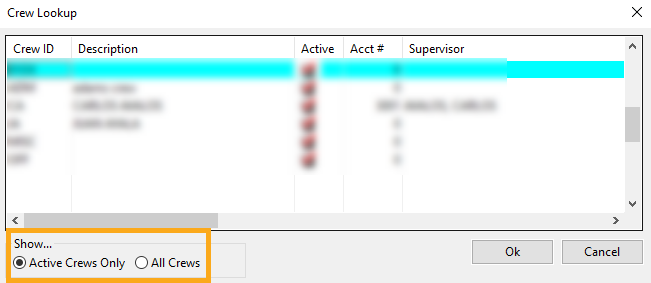
Note The Crew Lookup window has a filter that allows you to display either Active Crews Only or All Crews.
Active
Select this checkbox to indicate if the crew is currently active. If the crew is not active, deselect the checkbox.
Description
Add a description of the crew.
Supervisor Account # / Supervisor Name Key
Each crew may have a supervisor assigned to it. Enter either the account number or name key of the crew supervisor here. The employee's first and last names will be displayed next to the Name Key entry. Click on the lookup button or press [F4] to get the employee lookup.
Supervisor Email
This entry will default to the email address in the supervisor's account (if it has been entered). However, you can override that email address with a different one in this entry if needed.
Data Collection System
Select the Data Collection System used by the crew. This setting is used in conjunction with the option to Export Employees when you want to limit employees exported to those that are using a specific data collection system.
Example A farm labor contractor has crews working for growers that use a specific in-field time collection system. They also have crews using hand written crew sheets working for other growers. By assigning the data collection system to crews using field collection systems, the export will only include the employees on the crews using that system.
Employees Tab
Add…
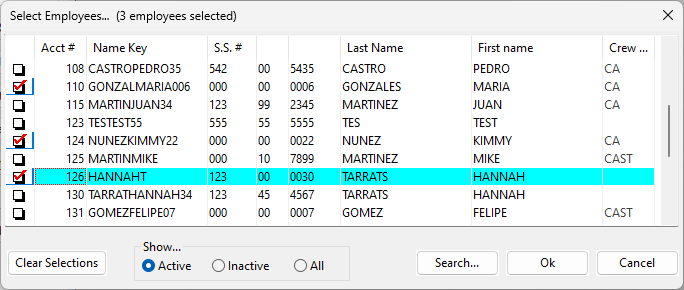
Clicking this button opens a lookup window from which you can select employees to add to the crew. You can search for a specific employee by clicking a heading, such as Acct # or Name Key. When you have located the employee, press the space bar or select the corresponding checkbox to add them to the crew. Then click Ok.
The following buttons will work on either a single employee account or multiple employee accounts:
Remove
This will set the crew number of the selected employee(s) to zero, removing them from this crew.
Move To…
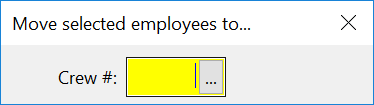
Click on this button to move the employees that you have selected to a new crew number. A window will appear for you to enter the new crew number.
Set Inactive
This will set the account status of the selected employee(s) to inactive. They will disappear from the crew list, but they are still assigned to this crew. (Since the account status is inactive, they will not appear on the crew list or other reports that only list active employees.)
Terminate
This option will terminate the selected employees.
Pay Rates…
Use this option to set or change the pay rate for the entire crew.
Edit Account…
Selecting this will open the employee information for the selected employee.
Add Dept…
Add a department for the selected employees.
How to select multiple employee accounts:
Click the mouse on the account number of each employee account you want to select. The box in the left hand column will be selected. Clicking a second time on an employee account will deselect it. Alternatively, you can press the space bar and use the arrow keys to select multiple employee accounts.
Once you have multiple accounts selected, the Remove, Set Inactive, and Move buttons will operate on the selected accounts. If you have not selected multiple accounts, this button will only operate on the highlighted account, whether it is selected or not.
The Invert Selections button will select the accounts that are not selected, and deselect the accounts that are selected. This is useful, for instance, if there are 30 employees on a crew, and you need to move 25 of them to another crew. Instead of selecting all 25 employees, you can select only the five that are staying on the crew, and then click on Invert Selections. The five will be deselected, and the other 25 will be selected. Then you can click on the Move button to move them to the other crew.
Titles/Rates Tab
Set up additional employees that have specific jobs and pay rates that are different from the rest of the crew. On the Crew Sheet Wizard, these pay rates will be used instead of the pay rates specified for the entire crew.
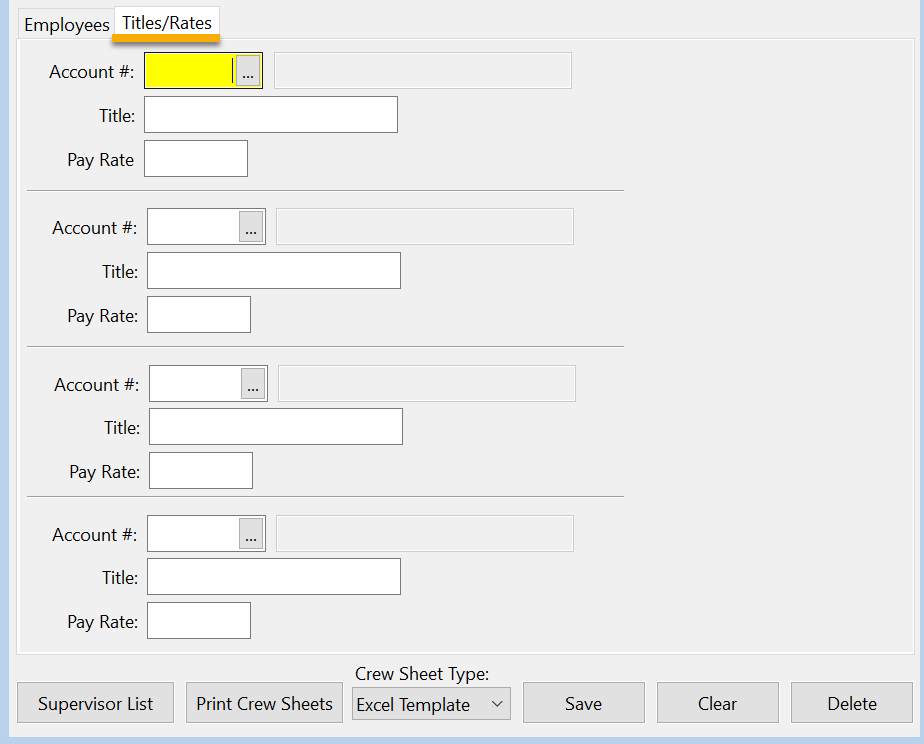
Enter the account number, title, and pay rate for up to four different employees.
The job title may appear next to the employee’s name on your crew sheet.
Note There are several different crew sheet formats, some programmed for specific customers, the crew sheet you are using may not print the titles. Contact Datatech if you would like changes made to how your crew sheet is printed.
Footer Options
Supervisor List
This button will print a list of all employees that are assigned to be supervisors on crews.
Print Crew Sheets
This button will open the Crew Sheets report window.
Click here for help with printing a crew sheet.
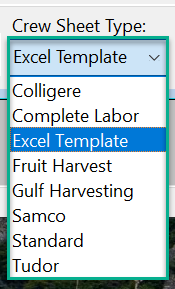
 Crew Sheet Type: Drop-down
Use the Crew Sheet Type drop-down to choose the format for printing your Crew Sheet.
Below are examples for each type:
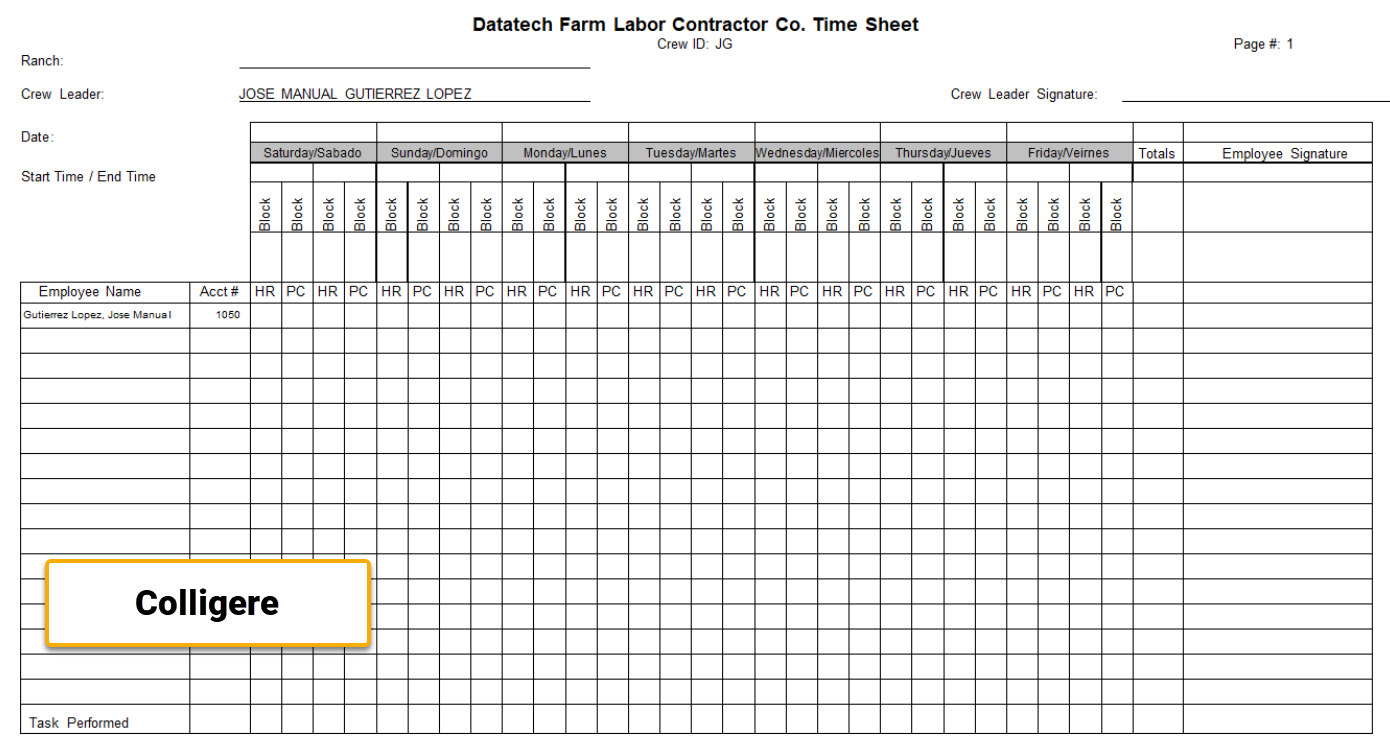
Colligere
The Colligere format is a weekly time sheet and is designed to be printed on legal sized paper. It notes the Ranch at the top and organizes the employees by Day and Block.
Complete Labor
This format is obsolete.
Excel Template
See Topic: Crew Sheets Using an Excel Template
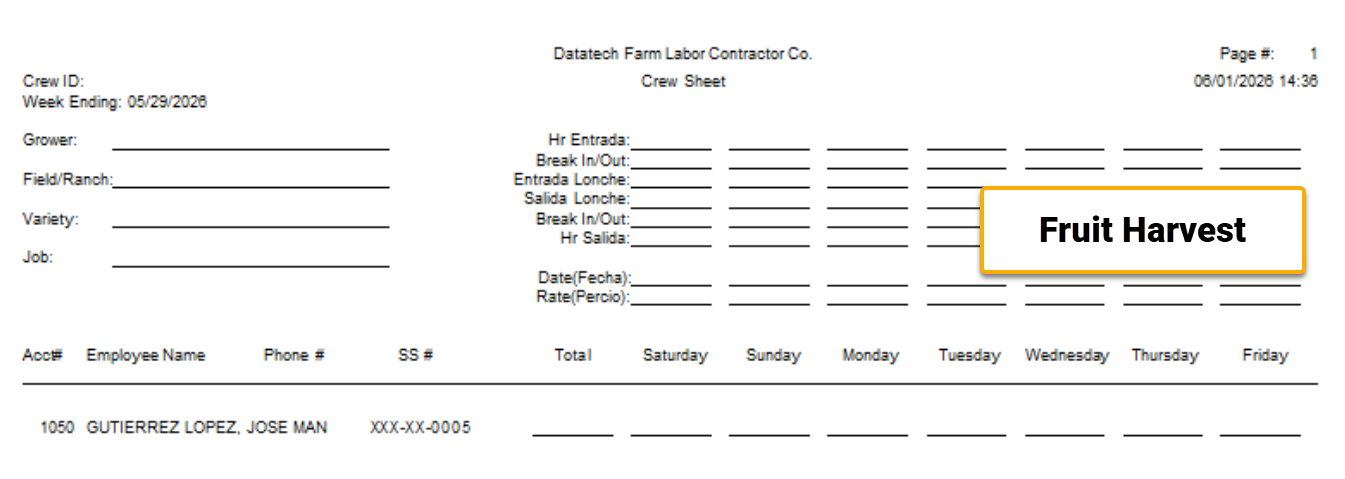
Fruit Harvest
The Fruit Harvest format is a weekly timesheet that can be used for piecework, allowing you to add seperate Units/Hrs for each day. It notes the Grower, Field/Ranch, Variety, and Job on the side. In, Out, Breaks, and Lunch punches for each employee, with hour totals per day, appear at the bottom.
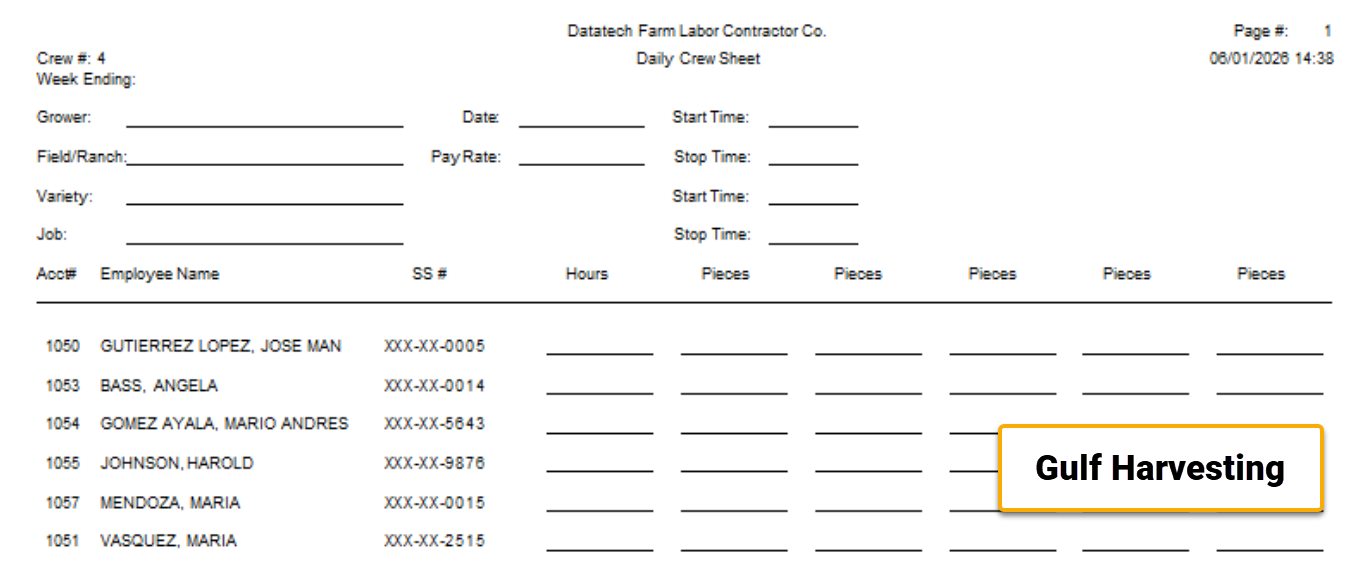
Gulf Harvesting
The Gulf Harvesting format is a daily sheet that provides columns for tracking multiple piece counts (i.e. counts by row or pay rate). It notes the Grower, Field/Ranch, Variety, and Job, as well as the Pay Rate and Start and Stop times at the top. It details the total Hours and Pieces for each employee at the bottom of the page.
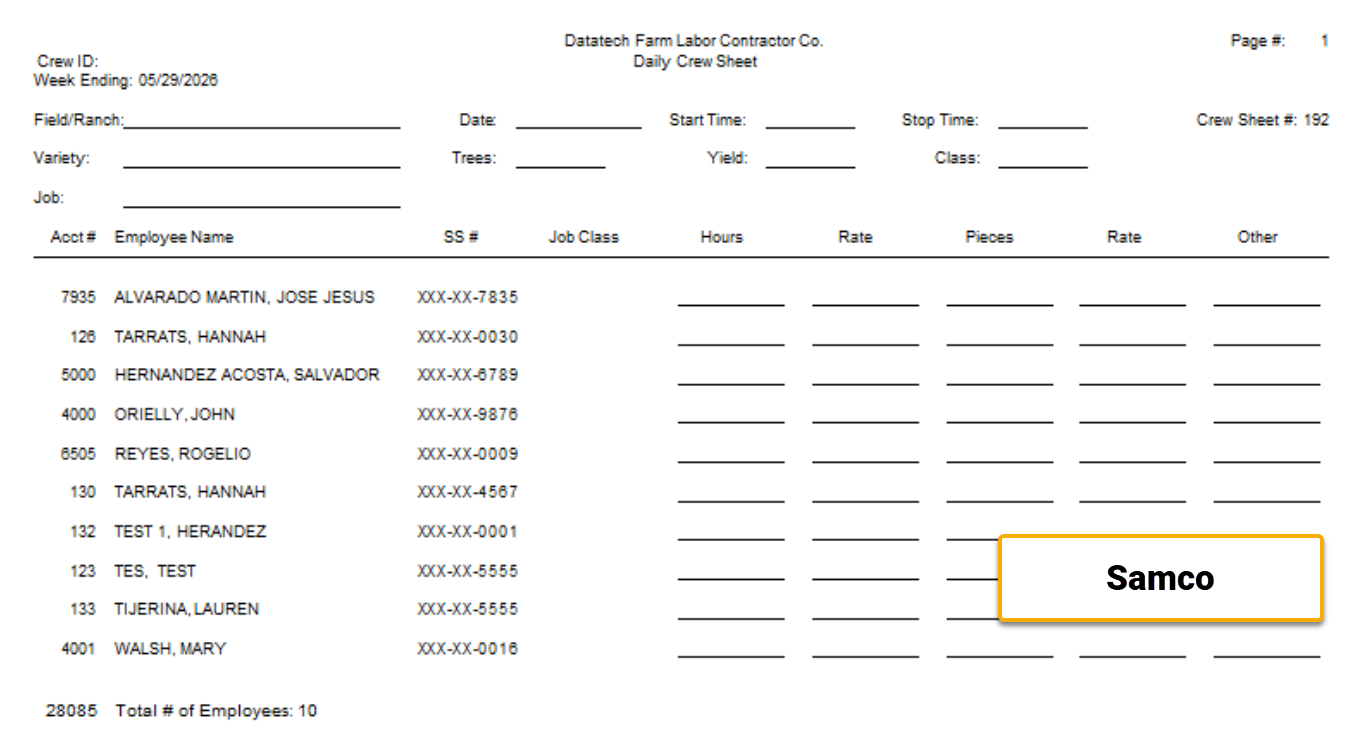
Samco
The Samco format is a daily time sheet. It notes the Field/Ranch, Variety, and Job, as well as the Trees, Yield, Class and Start and Stop times. It details the Hours, Rate, Breaks, Meal Times and Pieces for each employee at the bottom of the sheet.
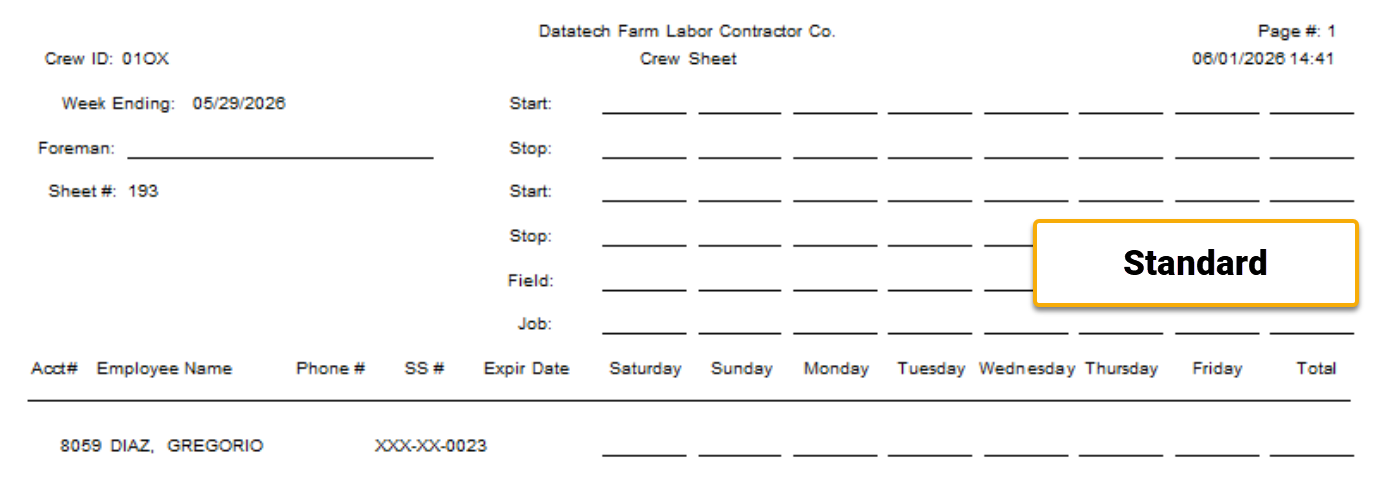
Standard
The Standard format notes the Foreman as well as the Start and Stop times for each day, the Field, and Job. At the bottom of the page, it details the totals for each day for each employee.
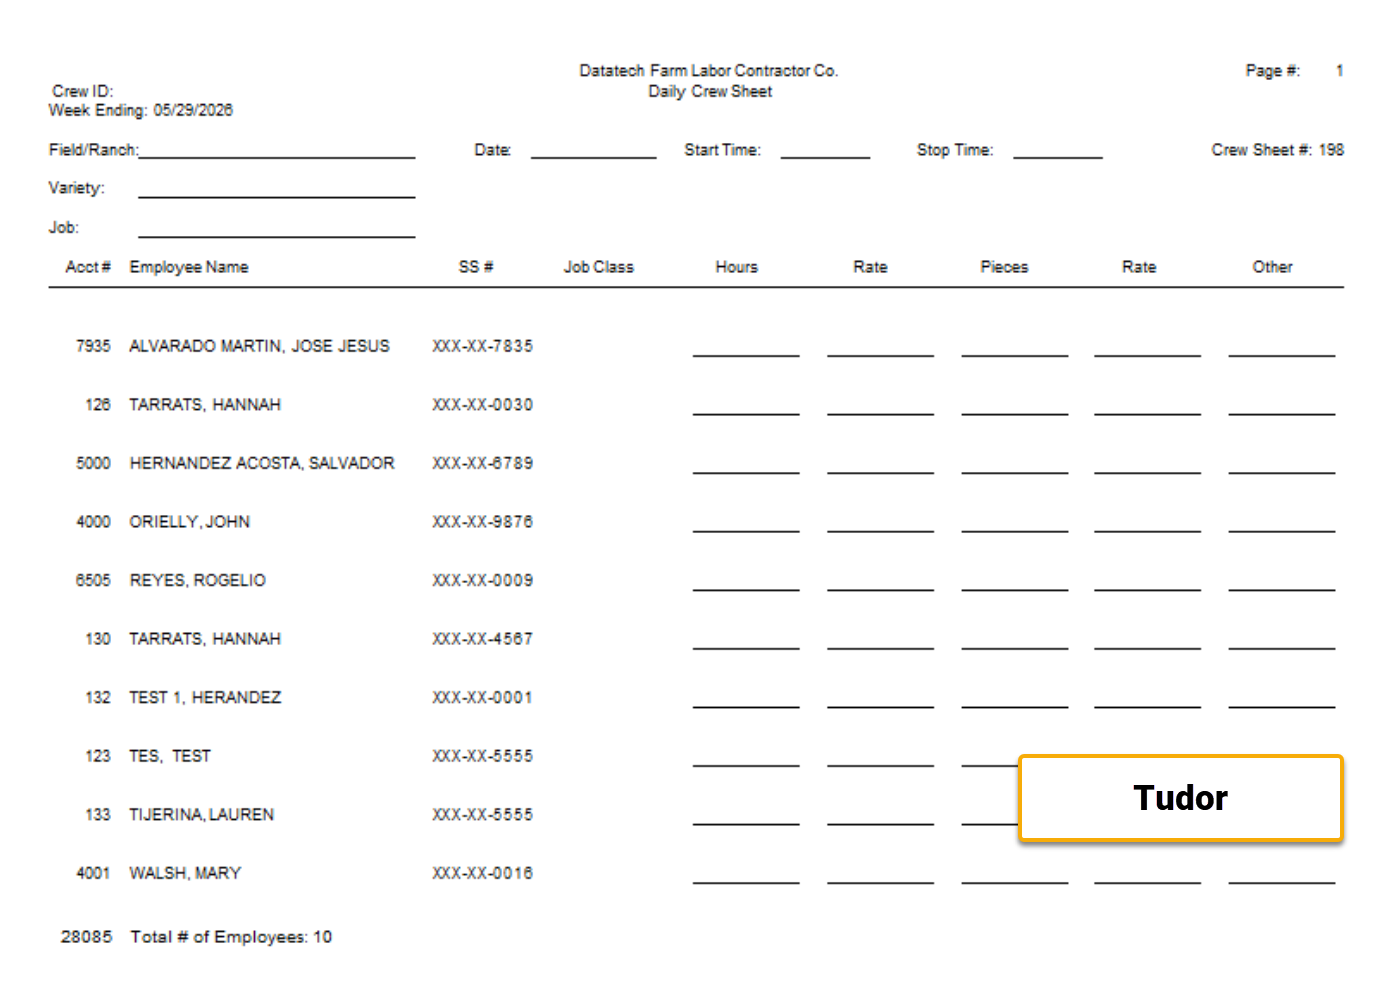
Tudor
The Tudor format is a daily time sheet that notes the Field/Ranch, Variety, and Job, as well as the Start and Stop time. At the bottom of the sheet, it shows the Hours, Rate, Breaks, Meal Times, and Pieces for each employee.
Crew Sheets Using an Excel Template
See Topic: Crew Sheets Using an Excel Template