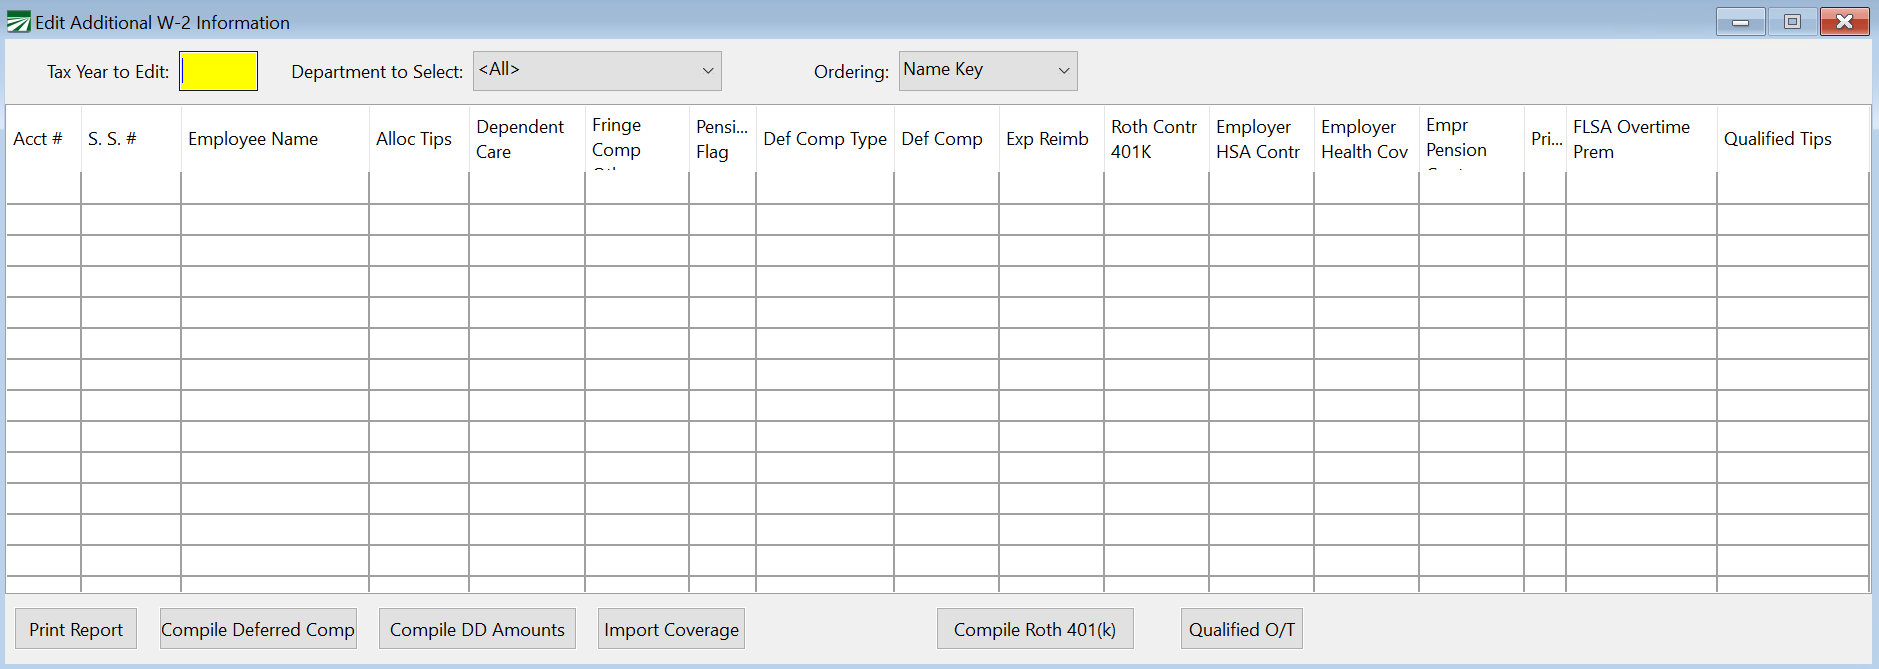
Edit Additional W-2 Information
This window allows you to easily edit the additional W-2 Info fields for all employees on a grid.
-
Go to Payroll > Payroll Tax Reports Control Center > Year End Closing tab > W-2 Information button.
-
Additionally, this window can be accessed by going to Payroll > Year End Tax Reporting > Edit YTD Archive File.
Tip For instructions on adding overtime to W-2s, see section below: FLSA Overtime OT (QOC).
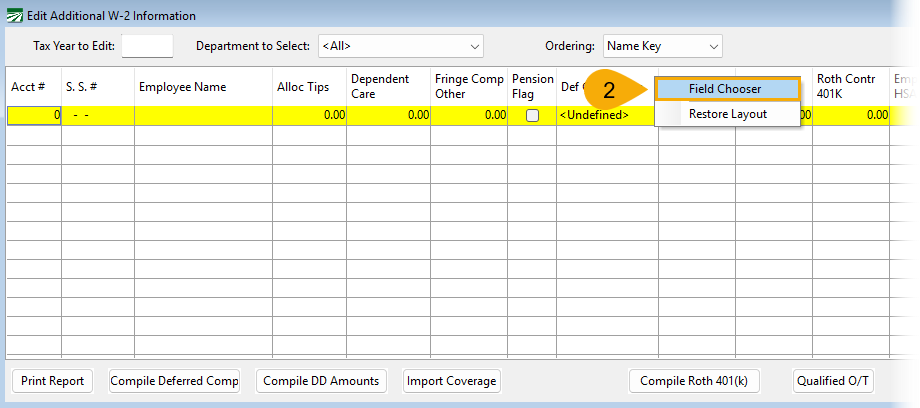
When using the Edit Additional W-2 Information window, it is helpful to select just the columns you need to modify. Use the Field Chooser to select which columns to display. Then, edit the amounts, box descriptions, and/or print settings as needed.
To open the field Field Chooser, follow these steps:
-
Right-click in the header.
-
From the menu, select Field Chooser.
-
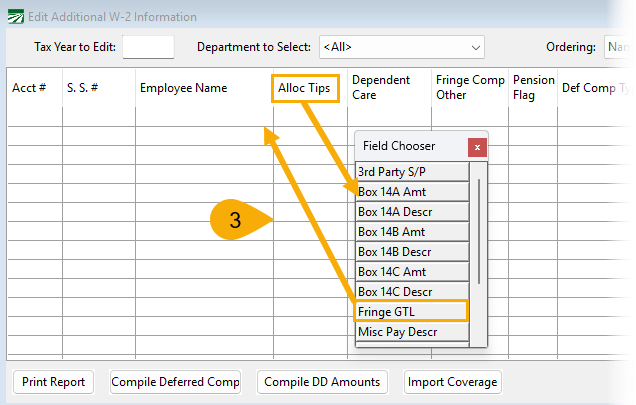
To add or remove a column, click on the item and drag it to or from the Field Chooser. In the example below, Allocated Tips is being removed and Fringe GTL is being added.
-
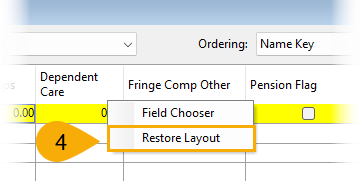
To restore the header to it's original layout, right-click anywhere in the header and select Restore Layout from the menu.
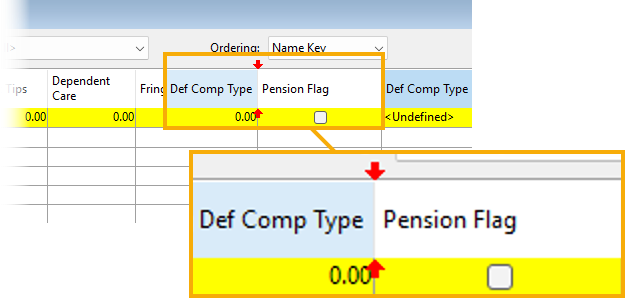
If you want to change the order of the columns in the header, click on any column and drag it to where you want it to be placed; two red arrows will appear above and below the item you're moving to indicate where it can be placed. In the example below, Def Comp Type is being moved so that it appears before Pension Flag.
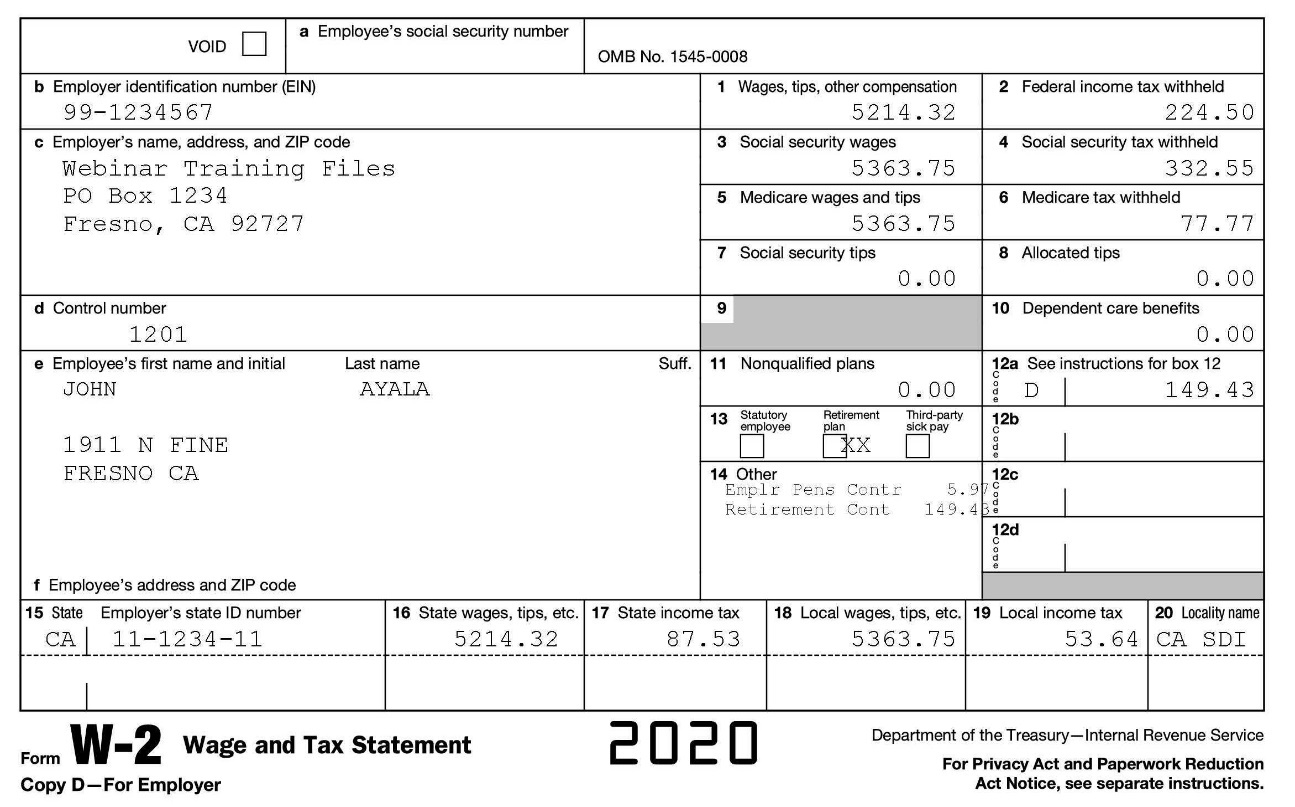
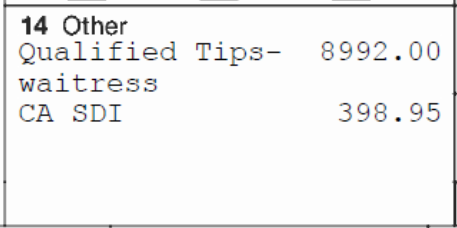
You can edit the information in the Archive file at any time. When W-2 forms are printed, the information entered on this tab will print in Box 14:
To use the grid entry:
Tax Year to Edit
Enter the tax year, 4 digits, e.g. “2025”. After entering the tax year, the employees with wages in that year will be displayed in the grid.
Department to Select
If you need to edit a selected group of employees by department, enter the Department to Select.
Compile DD Amounts
For the Employer Health Care Coverage amount (reported under code DD in box 12) there are two methods available to add these amounts automatically to the W-2.
The first option may be used if you are not using the Human Resources Management software from Datatech. Create a wage type that is not taxable using the “Memo Wages” base pay type. This wage type can be used on a check to add the annual amount of the employer provided health coverage. Once this is done, you can use the Compile Deferred Comp button and select “DD-Health” for the Type of Deferred Income to add these amounts to the W-2.
The second approach uses the employee benefit records to compile the months that each employee is covered under a health plan along with the cost information that has been set up for each health plan to determine the amounts to report under the DD code on the W-2. For this option to work, you must have the correct enrollment dates for each employee and the correct cost information on your health plan setup. Refer to the Human Resources documentation for more information about doing this.
Importing Coverage
The Import Coverage button will import coverage information from a spreadsheet file provided by your insurance company. The program currently supports importing information from UABT and Western Growers/Pinnacle. This option is designed to accomplish two things:
-
Import the employer’s cost of coverage for each employee and update the W-2 information with the total cost for the year.
-
Compare the coverage dates and enrolled plan(s) to the benefit records in the Human Resources Management system. A report will be generated so that you can review the information in both the insurance companies file and in the HR system. You can then choose to import the information from the insurance company’s spreadsheet. This will update your existing records and create new records if necessary in the HR system.
After you click on the button, the program will ask you to select the spreadsheet to import. The program will read the information from the spreadsheet, and then produce two reports.
The first report will have the annual employer health coverage cost amounts on it. After the preview window for the report appears, the program will ask if you want to update the employer sponsored health insurance amounts. Currently, only UABT provides the cost information. If no costs are included in the spreadsheet, then the program will display the report but it will not ask you to update the amounts.
The second report will list the employee enrollment dates from the import file and from your records in the Human Resource Management program. The Group or Plan # will be listed on this report along with the starting and ending dates from both the import file and the current HR benefit records. The rightmost column on the report will print zero to three checkboxes, depending on whether of not the information matches between the import file and the HR records.
The first two checkboxes indicate whether the starting and ending dates match. The third checkbox indicates whether the insurance plan matches.
If three checkboxes appear in the Match column on the report, then your records match the insurance company’s information exactly. If the first or second checkboxes is missing, then either the starting date or ending date of enrollment does not match. If the third checkbox is missing, then the plan on the benefit record could not be matched to the plan in the insurance company’s file.
If no checkboxes appear in the Match column on the report, this could indicate that the employee was enrolled in coverage but this information was never entered into the HR program. (For instance, the employee was enrolled through a manual process and not through an electronic enrollment file.)
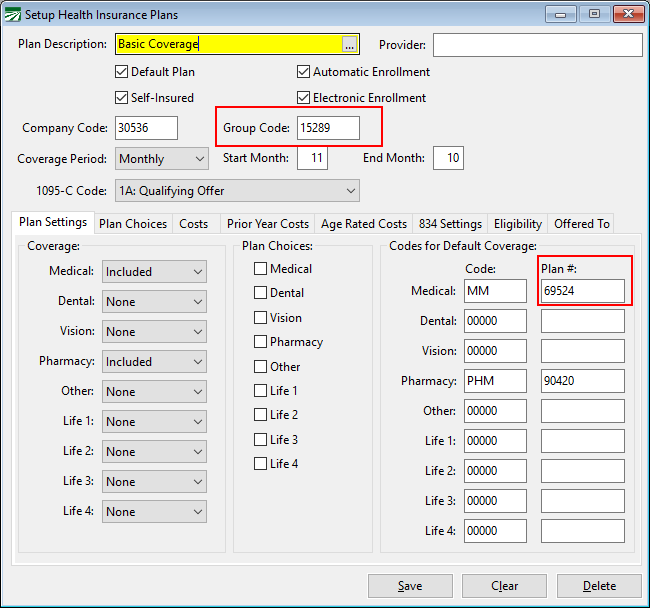
UABT provides a “Group Code” in the spreadsheet to identify the plan. Your medical plan setup must have a plan with a match group code for the program to be able to match the plan selected on the HR benefit records to the information in the spreadsheet.
Western Growers provides a Plan Number in the spreadsheet to identify the plan. Your medical plan setup must have a plan with a matching Plan # for the program to be able to match the plan select on the HR benefit records to the information in the spreadsheet.
After the preview window for the second report appears, the program will ask if you want to update the HR coverage records. Answer No if you want to review the benefit records in the HR program before importing the information.
Matching Employee Accounts
For both reports, there may be cases where the program is unable to identify the employee accounts listed in the insurance company’s spreadsheet. Usually the insurance company will have the employee’s social security number. If you have corrected the employee’s Social Security Number (for example, a data entry error was made when the employee was originally set up) then the insurance company may have enrolled the employee under the original, incorrect S.S. #.
You may also have a situation where a person is enrolled in coverage but they are not an employee. For instance, the owner of a company may not receive a payroll check, but still be enrolled in coverage. In this case, the program may not be able to find an archive record for the individual. In this situation, nothing may need to be done. If the individual is not going to receive a W-2 because he or she did not receive any wages, then reporting a DD amount is not relevant.
If the program cannot identify the account number for an individual based on the Social Security Number, it will display a zero for the Account # on the reports. For the Health Coverage Enrollment Dates Report, it will also not be able to find any health benefit records, so the Match column will not have any checkboxes.
The program will not be able to import any amounts or enrollment dates if it cannot identify the employee account based on the social security number. In these cases, you have two options:
-
Manually find the correct employee accounts and review/update the information as needed.
-
Determine the correct social security numbers for the individuals and edit the insurance company’s spreadsheet so that it has the correct information. You can then re-import the file and the program should then find the correct accounts.
FLSA Overtime OT (QOC)
Under the “One Big Beautiful Bill Act” (OBBBA), if you are processing payroll for a non-ag business, you must report qualified overtime compensation to employees.
Note Agricultural overtime does NOT qualify for the new federal tax deduction. This is because agricultural work is exempt from federal overtime rules according to the Fair Labor Standards Act (FLSA). Any work in conjunction with farming operations would not qualify for the overtime deduction. This means that no employees in an ag operation would be eligible for the overtime deduction, even office and non-field workers.
For a more detailed breakdown of the reason why agricultural overtime does not qualify for the deduction and what employers need to do, see our blogs:
No Tax on Overtime: What Qualifies & What We Know About 2025 Reporting
No Tax on Tips & Overtime Bill Now in Effect
Warning Bi-Weekly Payroll Notice:
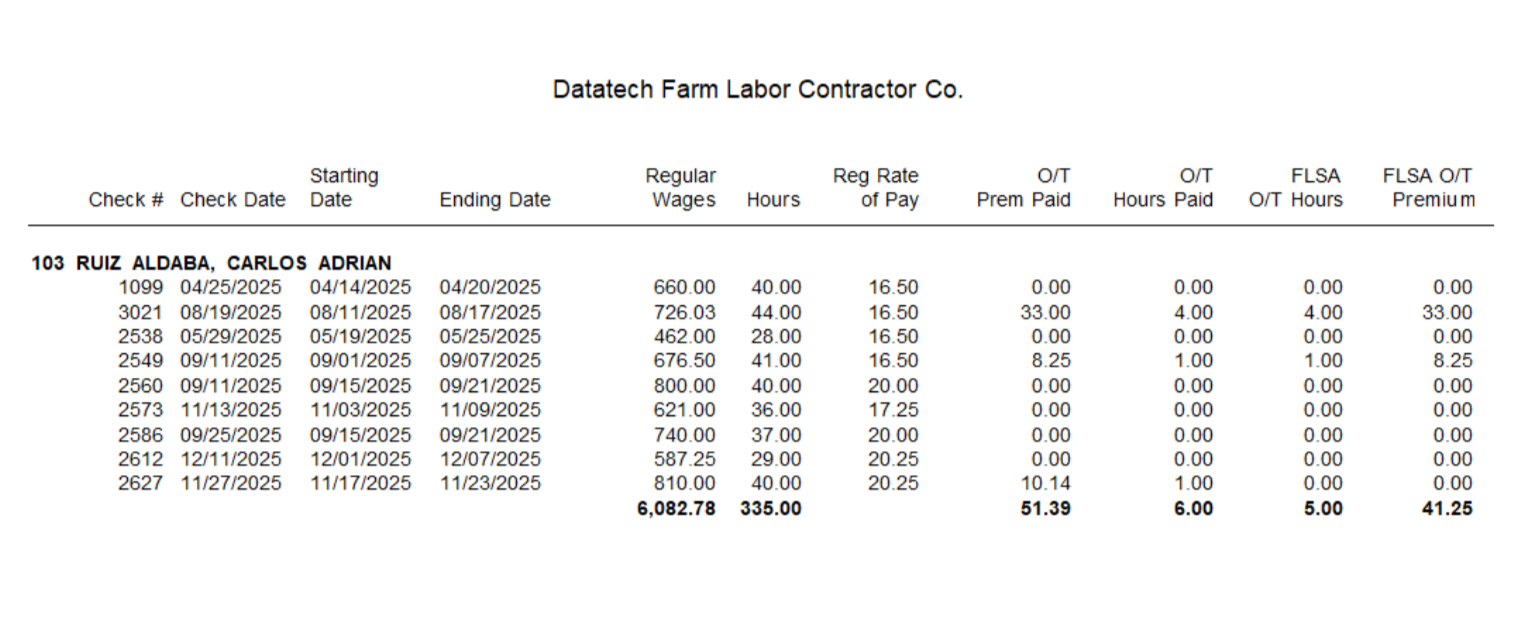
To correctly calculate FLSA overtime, the paycheck must include daily or weekly time entries with dates worked that fall within the applicable workweek. These dated entries are required for the report to determine eligible overtime.
If the bi-weekly hours and overtime were not split by week, this report cannot be used. In that case, the FLSA Overtime Premium must be calculated and entered manually in the FLSA Overtime PREM Column in the Edit Additional W-2 Information window.
If you are a business, for example a staffing company, providing both ag and non-ag employment, you can use the selection criteria to only update the qualified overtime for non-ag employees.
Click Qualified O/T to open the Qualified FLSA Overtime Report window.
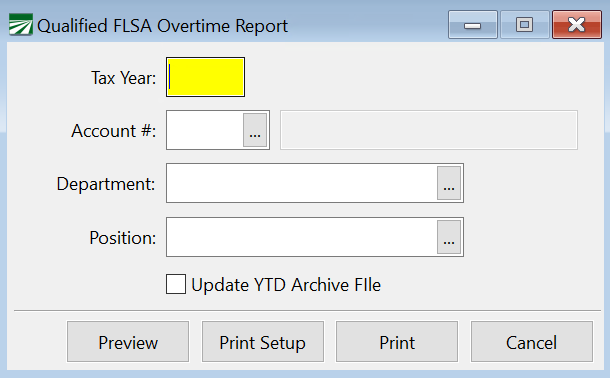
Tax Year
Enter the Tax Year for this report.
Account # / Department /Position
You can select by Account #, Department, or Position. If you would like a report for just one employee, enter their Account #. Leaving this entry blank will print a report for all employees. It can then be filtered by Department or Position.
Update YTD Archive File
When this is selected, the YTD Archive File will be updated when you click Preview or Print.
Qualified Tips
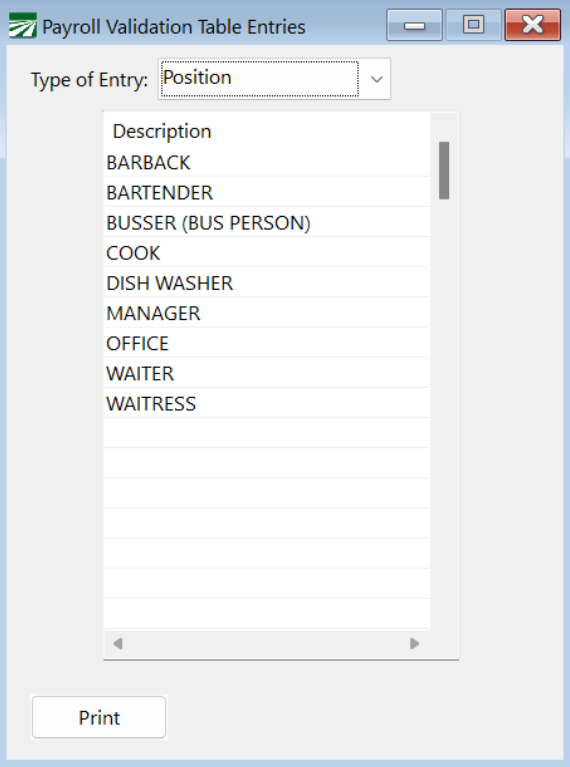
Setting Up Positions
For 2025 reporting, Qualified Tips will be included in Box 14 of the W-2. You will need to set up a Position that will print along with the Qualified Wages.
Note For 2026, Tips will be printed in Box 12 along with an occupation code in a new Box (14b).
-
If you are not using Positions go to Payroll > Setup > Department/Position/Types.
-
Add any Positions that receive tips to the grid.
-
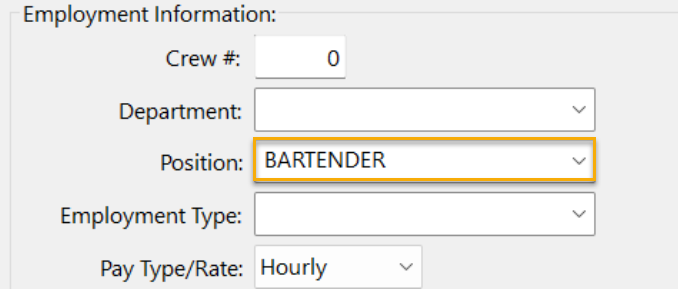
Add the Position to the Employee record(s):
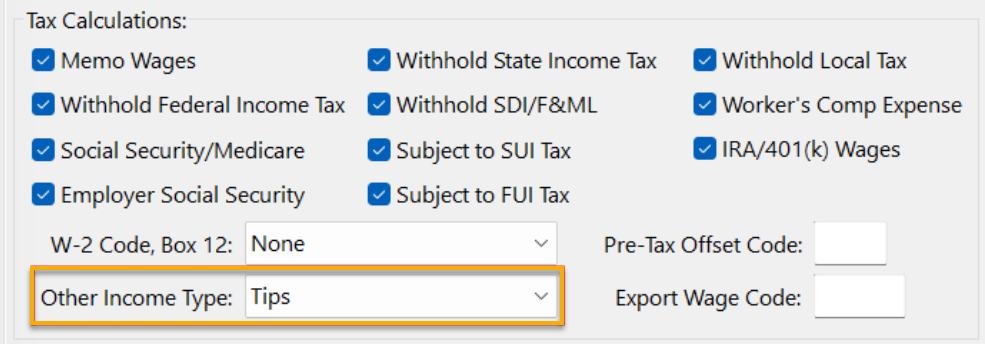
Archiving YTD Totals
When archiving year-to-date totals, any wages
-
posted to a Wage Type
-
that is set to Tips in the Other Income Type
will be included in the Qualified Tips.
Note Qualified tips must be paid voluntarily by the customer and not be subject to negotiation. Qualified tips do not include certain service charges. For instance: if a restaurant imposes an automatic 18% service charge for large parties and distributes that amount to waiters, bussers, and kitchen staff, the amounts distributed are not qualified tips because the customer cannot disregard or modify the charge.
If you have been using the same wage type for voluntary tips AND service charges, you can edit the amount reported on the W-2 using the Edit Additional W-2 Information window.
Going forward you should use an alternate wage type for service charges.