Using the Program
As much as possible, we have designed The Farmer’s Office to have the same "look and feel" as other standard Windows based applications. This will make learning how to use The Farmer’s Office easier for those who are already familiar with other Windows programs.
The Button Bar
Located just below the main menu, the button bar gives you an easy way to control file operation with the mouse. If you ever forget any of the functions of the buttons, just hold the mouse pointer over one and a "ToolTip" will appear to let you know what it does.

The first four buttons on the left are used for finding records in files. In order from left to right, they are:
-
Find First Record in File
-
Find Previous Record in File
-
Find Next Record in File
-
Find Last Record in File
In the next group of buttons, the magnifying glass will activate a pop-up selection list (if one is available for the entry that the cursor is currently on). The middle button will clear the current record that you are looking at. The button on the right will clear all files in the current window.
The next group of three buttons are the standard windows functions of cut, copy and paste. You can cut or copy information from any data entry window into another.
The last group of buttons are different from the others: these buttons open specific windows. From left to right, the buttons open the Checkbook Register, Employees, Cost Centers, and Crop Notes. Depending on your version of The Farmer’s Office, your button bar may have different buttons available.
Note The Find buttons behave differently depending on which entry field the cursor is in. For example, in the G/L Chart of Accounts window, if you press the "Find First" button in the Account # field, the first account number will be displayed. If you press it when the cursor is in the Description field, then the first account description will be displayed in alphabetical order.
Using the Keyboard
Wherever possible, we have designed The Farmer’s Office to provide a great deal of flexibility in terms of how you operate the program. There are often several different ways of doing something, both with using the keyboard and the mouse. For instance, to save an entry, you might press [F2], click on a button labeled "Save" in the data entry window, press the [Ctrl]+[S] key combination, or click on the Disk icon on the toolbar.
On data entry windows, you can move from one entry to the next by pressing [Enter] or [Tab]. Use [Shift]+[Tab] to move to the previous entry. You can also move the mouse pointer to a specific entry field and click on it to move the cursor there.
When a button is selected, pressing [Enter] or [Space] has the same effect as clicking on the button.
As you begin to use The Farmer’s Office, you'll notice that the color of the data entry windows turns yellow as the cursor moves into them. This is just a visual aid to help you locate the current "active" field (in technical terms, the "focus"). When the "focus" is on radio buttons, or checkboxes, or buttons, you'll notice a dotted outline instead of a yellow highlight.
Function Keys
Function keys have been defined for common actions:
[F1] Help
[F2] Save
[F3] Close Window
[F4] Lookup
[F5] Clear
[F6] Move to next area/tab page
[F7] Find Previous
[F8] Find Next
[F9] Find
[F10] Menu
[Shift+F2] Delete
[Alt + F5] Clear All
[Alt + F4] Exit Application
Finding Records and Lookups
You can get a lookup list for each of the main files (such as vendors, general ledger accounts, employees, cost centers, etc.). These lookup lists are activated by clicking on the button with the mouse pointer or by pressing [F4] in the entry field. Entry fields where lookups are available, are indicated by a lookup button with three periods added to the right end of the field, as shown below:
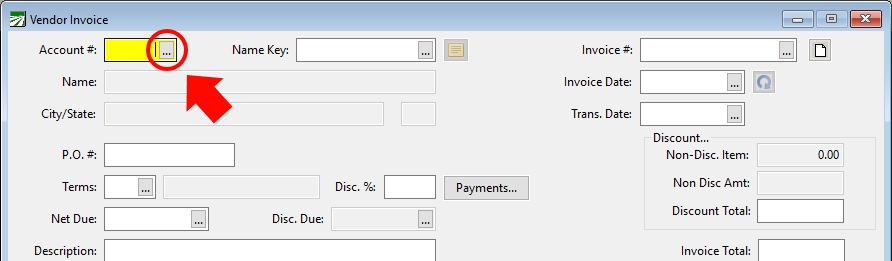
In this example from the Vendor Invoicing window in Accounts Payable, there are lookups available on the Account # and Name Key entries that will allow you to select a vendor account. There is a lookup button on the Invoice # entry also which will allow you to choose an existing invoice from the Invoice Lookup. There is also a lookup on the Terms entry which will allow you to select a different vendor terms record.
Lookup buttons also appear on the Invoice Date and Net Due entries. These buttons will activate a calendar window where you may select a date to be entered.
Without using the lookup, you can also perform finds in these fields. For instance, suppose you are entering a chemical application and you are looking for the chemical DIBROM 8 EC. You might type in just "DIBR" and press [F9] to find the product. The program will attempt to find the closest match to what you have typed in. If the chemical that is displayed in not the one you want, you can use the [F7] and [F8] to find the previous and next chemicals.
Keyboard Shortcuts
Shortcut keys provide an alternative to using the mouse. You don't have to use keyboard shortcuts, but they are provided as a faster way of using the program. By using a keyboard shortcut, you don't have to move a hand from the keyboard to the mouse and back. Keyboard shortcuts are indicated by an underlined letter. In most cases the options on a popup menu will also have shortcuts listed.
There are two different types of shortcuts: menu shortcuts and navigation shortcuts.
Each menu option on the main menu has a letter underlined:

Instead of click on the menu options, you can hold down the [Alt] key and press the letter that is underlined. For instance, to access the Payables menu, you would press [Alt]+[Y]. You can use these keyboard shortcuts at any time, except when a modal dialog window is open.
Once you have activated one of the main menu options through the keyboard shortcut, each submenu item can be accessed simply by pressing the first letter of the submenu.
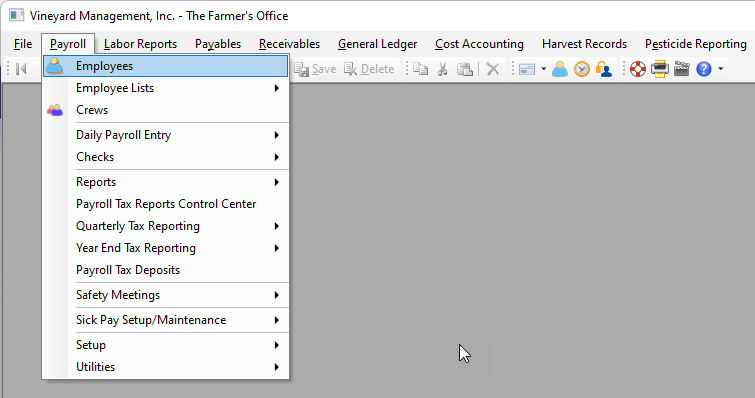
In this example, you can access the Crews screen by pressing [C] or press it again to switch to the Checks sub menu by pressing [C], etc. Pressing [E] will alternate between the "Employees" and the "Employee Lists" option.
Report Print Preview Window
All reports can be previewed on the screen before you actually print them on paper. The report preview window looks similar to the following:
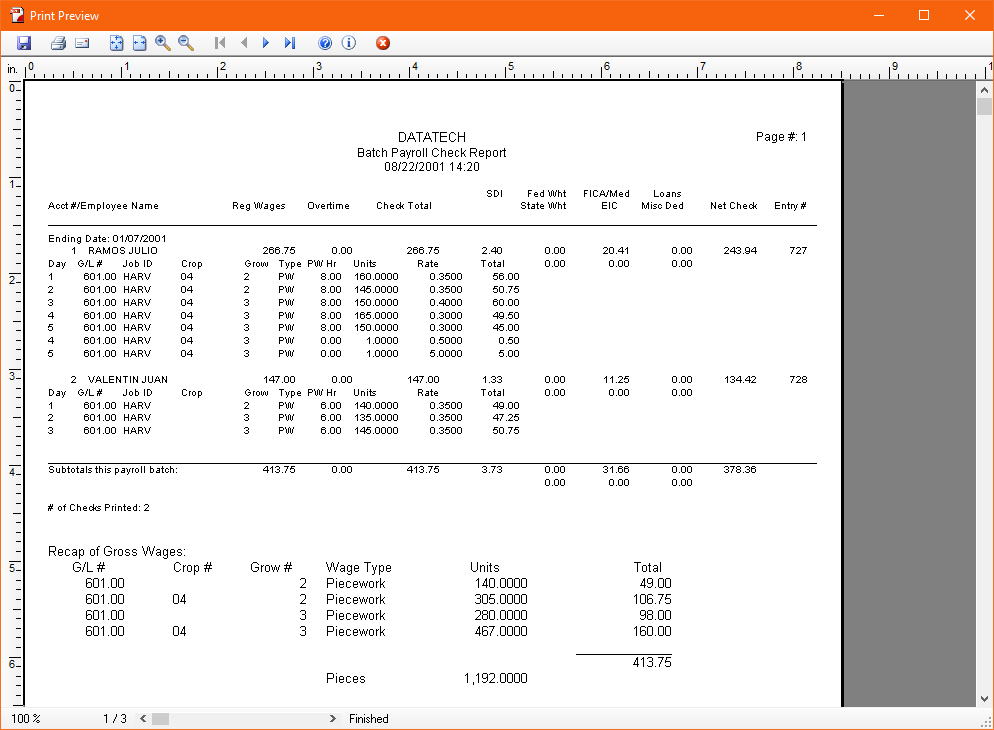
The preview screen has a button bar. The button functions (from left to right) are: save, print, email, show full page, fit page width, zoom in, zoom out, first page, previous page, next page, and last page, help, about, and close.
Use the scroll bar at the right edge of the window to scroll up and down if the entire page is not visible on the screen.
To jump to a specific page number, click on the page number at the bottom of the window.
If you click on the Print button, the standard Printer dialog will appear for you to select which printer you want the report to be printed on.
When you click on the email button, the Compose Message of your email program window will appear. The report will be automatically attached to this email in Adobe Acrobat (PDF) format. The recipient will need Adobe Acrobat Reader to view or print the report.