Operator Setup
Setting Up Operators
Datatech Accounting software uses a permissions-based security system. Each user is assigned a login name and password which must be entered before the user can gain access to the Datatech Accounting Software.
By default, each user has complete access to the entire accounting system. The system administrator can then deny access to specific areas (modules) or individual windows within the accounting system. These restrictions can be applied to either individual users or groups of users.
In addition to general access rights (open, save, delete, create, edit) certain views may have additional custom permissions that you can grant or deny users.
Making the System More Secure
If any user is able to access the Operator Setup window and makes changes, the system is not very secure; users could remove their restrictions and give themselves more permissions.
Therefore, as the system administrator you should grant yourself complete access to the Operator Setup window (view name: SYS.OperatorSetup). Then, to secure user settings, it is a good idea to restrict access to the Operator Setup window at the EVERYONE group level.
Next you should decide if there are any areas of the system that, in general, you do not want anyone to access unless you give them access. For example, it is common to restrict access for all users to the Payroll and General Ledger modules.
Remember that by default, all users have access to all program options. If you want to change this so that by default all users cannot access any options, then you could set up the permissions on the group EVERYONE to deny access by default. Since this can be done on a module basis, you would only need to make a few entries in the permissions list to do this.
You could then set up other groups that grant access to certain parts of the software. For instance, you could have groups for Salesman, Payables, Payroll, and Receivables. Then each user could be assigned to one of these groups, depending on which modules they need to access.
If a certain user needs access to more options than are included in the group he or she is assigned to, you can add these extra settings in the individual operator permissions.
Each person who will be using the Datatech Accounting software may be assigned a user name and password. If you have not set up any users yet, the program will not ask for a user name and password when it is started up. Once you have set up one or more user names, you will be prompted to log in before you can do anything in the Datatech Accounting software.
To set up your users, go to Tools > Setup Operators.
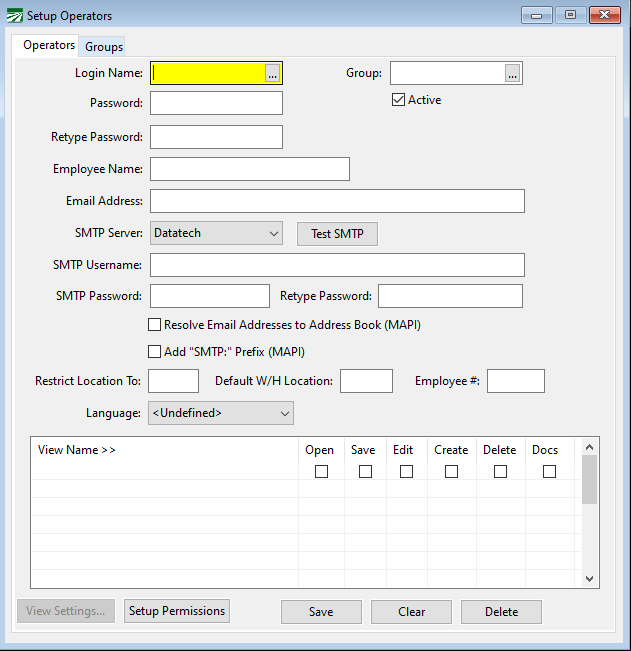
The login name and password are the minimum requirements for setting up a user.
Login Name
The login name may be up to 16 letters. Only uppercase letters are allowed.
Password / Retype Password
Enter the password, also up to 16 letters. The password is not case sensitive, i.e. it does not matter whether the Caps Lock key is on or off when you type in the password.
As you type in the password, asterisks will be displayed for each letter. Since you cannot see what you are typing in as you are typing it, you must retype the password in the next entry to confirm the password. If the two entries do not match, the program will give you a warning message and will not save the operator information until the passwords match.
Employee Name
You may enter the employee’s full name here. This is an optional entry.
Email Address
The user’s email address can be entered for your reference.
If you are using the SMTP option, this email address will be used for the “From” field.
SMTP Server
An SMTP Server that has been previously set up in the Program Setup window must also be selected.
Test SMTP (Testing Procedures)
A test email can be sent once the required information has been entered.
Once the SMTP username and password have been set up on the operator account and the server settings have been set up on the Program Setup window, you can send a test email to see if everything is working.
If the settings and login information is correct, a test email will be sent to the operator’s own account as well as the Datatech Support email account. Otherwise, an error will be displayed and the program will display the SMTP log file for the test email. Examine the error log to determine why the test failed.
Common problems include incorrect passwords or user names and incorrectly configured email server settings.
SMTP Username / SMTP Password / Retype Password
If you are using SMTP for sending emails and your server requires authentication, enter the username and password to use for logging into the SMTP server.
Resolve Email Addresses to Address Book (MAPI)
This setting tells the program whether or not to access the address book. If you have trouble sending emails with Outlook, try selecting this box if it is not selected; deselect it if it is selected. This setting may need to be different for each user when different versions of Windows or Outlook are used by each user.
Single users might not have an operator name set up. In this case, the same setting may be changed in Tools > Program Setup > Fax and Email Settings.
In either case, after changing the “Resolve Email Addresses to Address Book” setting, restart the program, and see if this fixes the problem.
Note This option only affects emails sent via the MAPI protocol. It does not affect the SMTP emailing.
Add “SMTP” Prefix (MAPI)
This option only affects emails sent via the MAPI protocol, it does not affect the SMTP emailing.
Employee #
Enter the employee account number for this user.
The Restrict Location To: and Default W/H Location: settings are only used by customers using The Shipper’s Office program with Multi-Location Inventory enabled.
By setting up the login names and passwords, you can control who has access to the Datatech Accounting system. If you also want to control which parts of the system these users can access, you will also need to set up access permissions. Each access permission may grant or deny access to a specific menu option or window. It can also grant or deny access to all of the options in an entire module (such as Payroll, Accounts Payable, General Ledger).
Adding Access Permissions
Each window in the Datatech Accounting system has a “view name”. The view name is used to identify windows on the permission list. By adding views to the permission list, you can control (1) which options each user may access; and (2) whether or not they can save or delete information from that view.
Each view name starts with a two or three letter module ID code, followed by a period, then the view name. For example “AR.Customers” is the view name for the Enter/Edit Customer window in the Receivables module.
In addition to controlling access to specific windows, you can control access to entire modules, e.g. all Payroll options, all General Ledger options, etc. This is done by adding an entry with just the module name.
Module Names
The following module names are used in the program. Depending on what accounting software package you are using, you may not use all of them:
-
AP: Accounts Payable
-
AR: Accounts Receivable
-
CA: Cost Accounting
-
GL: General Ledger
-
GR: Grower Accounting
-
INV: Inventory
-
LC: Labor Contractor Reports
-
OE: Order Entry
-
PE: Pesticide Reporting
-
PR: Payroll
-
SYS: Program Setup
Controlling User Access
The grid in the bottom half of the window is where you will enter information to control user access.
Click View Name > > to access a lookup of modules and their corresponding windows.
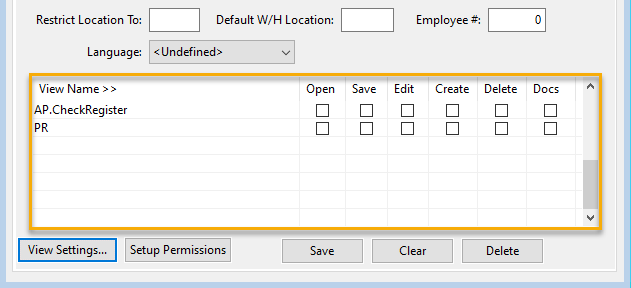
The example above shows two lines in the permission list. The first line is for the Checkbook Register window; the second line is for the entire Payroll module. In both cases, access is denied completely because the Open checkbox is not selected.
There are five different permissions that you can enable or disable for each view that is listed:
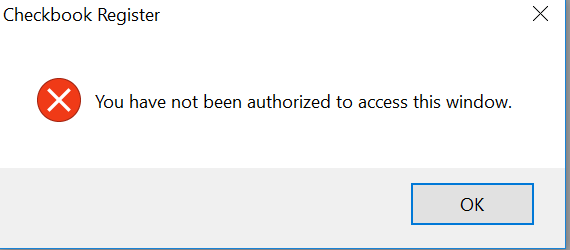
Open: This checkbox determines whether or not the user can open the window. If this box is not checked, the user will see the following message when attempting to access the window:
Save: This checkbox controls whether or not a user will be able to save information in this window. If this is not selected, the user can view information in this window but not modify existing records or create new records.
Edit: This controls whether or not the user may edit existing records in this view.
Create: This checkbox allows you to control whether or not the user may create new entries in this window. If it is not selected, the user may only edit existing records (assuming the Edit box is also selected).
If the Save box is not selected, it does not matter whether or not the Edit or Create boxes are selected or deselected —no saves will be allowed of any type. The Save box must be selected in order for new entries or changes to existing entries to be saved.
Delete: This checkbox determines whether or not the user will be able to delete records from the window.
Additional Settings
In addition to the standard options of Open, Save, Edit, Create, and Delete, individual windows may have additional permissions that you can set. These will vary from window to window. Most windows do not have special view settings. The View Settings… button will be disabled if the currently highlighted window does not have any additional permissions.
Note When the View Settings… button is enabled, you should click on it to review the additional security settings that are available for that window and make the appropriate selections.
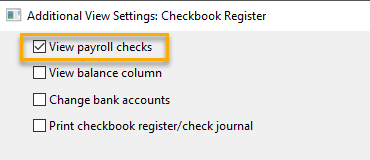
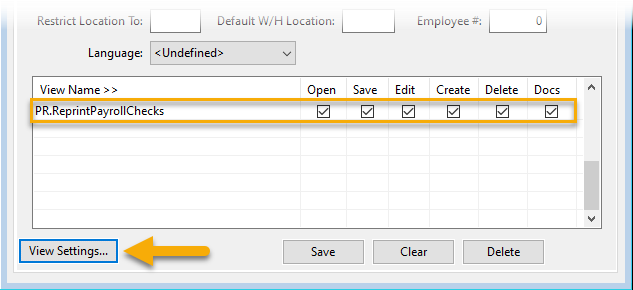
Click View Settings… in the lower left corner of the window to open the Additional View Settings window:

Select the boxes to indicate what additional access you want the user to have. These options will vary based on the option selected. In the example below, the user has been given access payroll checks.
As mentioned earlier, most windows do not have Additional View Settings. In most cases, additional view settings are added based on user requests. Therefore, if there is a particular operation or feature that you want to be able to control access to within a specific window, please contact Datatech Support.
View Settings Option to Unfinalize Checks
An option has been added for users who have permission to reprint payroll checks (PR.ReprintPayrollChecks). When that permission is added to a user profile, then after clicking View Settings you will see the check box Allow operator to unfinalize checks. Select this check box if you want to allow the user to unfinalize payroll checks.

Note If a user already had permission to reprint payroll checks at the time this option was added, the Allow operators to unfinalize checks check box will automatically be selected. If you do not want to allow the user to unfinalize payroll checks, you will need to deselect the check box.
Groups
Permissions may be assigned to individual users as well as groups of users. This is done by assigning users to a group and defining the access rights for that group. By assigning access rights to a group, you only need to set the access list up once. Additionally, when you need make changes or addition to a group’s access rights, this will automatically affect all users in that group.
There are several situations where using groups is useful. For example, you may have several salespeople that you want to be able to access the Order Entry module but not any other part of the program. Or you may want to restrict access to the Payroll module for all employees except the person who does the payroll.
1) To assign an operator to a group, click on the Groups tab in the Setup Operators window.
2) Enter the group name on the Operator Setup tab. You may click on the lookup button or press [F4] to select a group from the lookup.
3) The permission list is set up in exactly the same way as permissions for individual operators.
Example In this example, the group EVERYONE is denied access to the payroll module: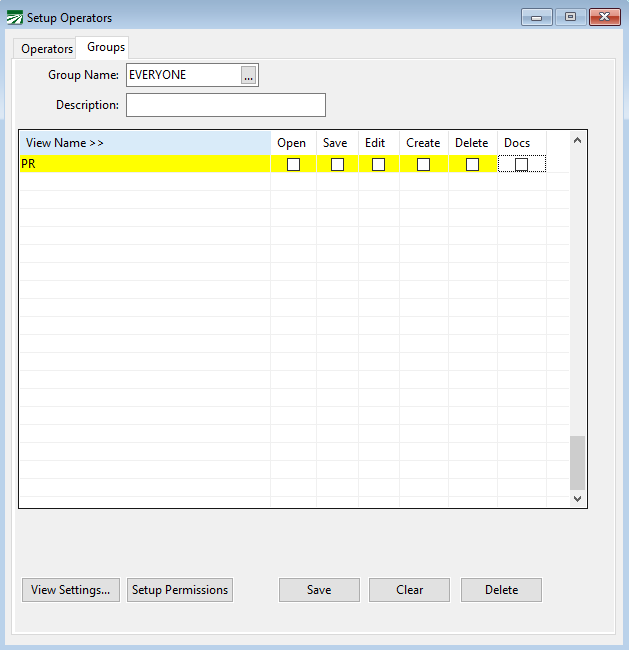
EVERYONE Group
Each user may be assigned to a single group. In addition to this, all users automatically belong to the group called EVERYONE. That means if you set up permissions for the EVERYONE group, you do not need to enter EVERYONE for the group on the Operator Setup tab. If you set up other groups (e.g. SALES and ACCOUNTING) you need to select the group name on the Operator setup tab to assign a user to that group.
How Permissions Are Applied
Access permissions may be assigned at any of three different levels. They may be assigned to the EVERYONE group, to the group a user is assigned to, and to the user. How does the program resolve conflicts? For example, what happens when an individual user is given permissions that are different from the group to which he is assigned?
The following rules are applied to determine which rights a user actually has. First, all permissions from the group EVERYONE is applied. Then if the user is assigned to a group, all of the settings for that group will override settings for the EVERYONE group. Finally, any settings set up for the user will override settings both for the user’s group and the EVERYONE group.
At each level, the program first checks to see if there is a permission entry for the individual window. If an entry is not found, it will check to see if there is an entry for the module that the window belongs to.
The entries at the user level are checked first, then the entries at the group level are checked (if the user is assigned to a group), then the entries for the EVERYONE group are checked.
Changing Your Operator Account Settings
If you need to change your operator account settings - including the password and email settings - click the following button located in the tool bar just below the program menu options:
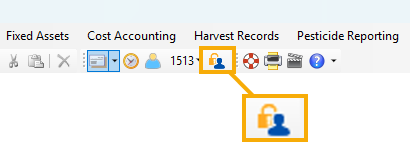
In the window that opens, make the needed changes and then click Ok.
