Set Up RPC’s
Identify Product Packed in RPC’s
The Shipper’s Office can track your RPC usage. To use this feature, there is some setup required. Separate product codes (or pack styles if using pack style/size) must be set up for items packed in an RPC. Follow Steps 1-15 (if applicable) to complete the setup:
-
Ensure your RPC option is enabled.
Note If it is not enabled, contact Datatech Customer Support.
Product Code RPC Tracking
If you are using the product code alone to identify each item and size, follow these steps:
-
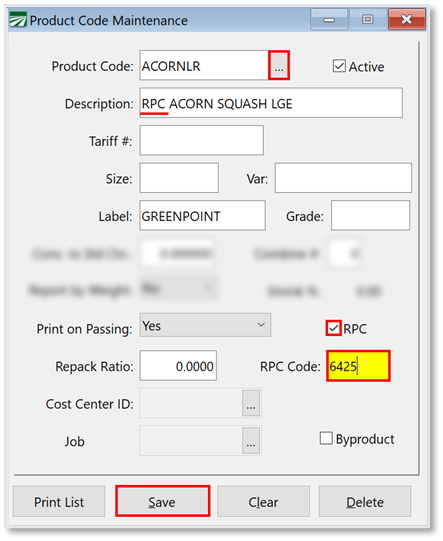
Go to Inventory > Product Codes.
-
Open or enter an item that will be packed in an RPC. (Ensure you have entered ‘RPC’ in the description.)
-
Select the RPC checkbox.
-
Enter the code for the RPC container being used in the RPC Code entry. Only customers who do not use the Pack Style/Size will be able to define their RPC codes in the Product Code Maintenance Window. All other customers must use the Pack Style/Size entry screen. See the following section for more information.
Note This would be the code that the manufacture uses to identify the RPC size. For instance, most produce RPC’s supplied by IFCO will have a 4-digit code. The RPC code may be up to 6-digits.
-
Click Save.
-
Repeat this process for each item that is packed in an RPC.
Pack Style/Size RPC Tracking
If you are using the Pack Style/Size method of identifying products, enter the RPC information in the Pack Style window.
-
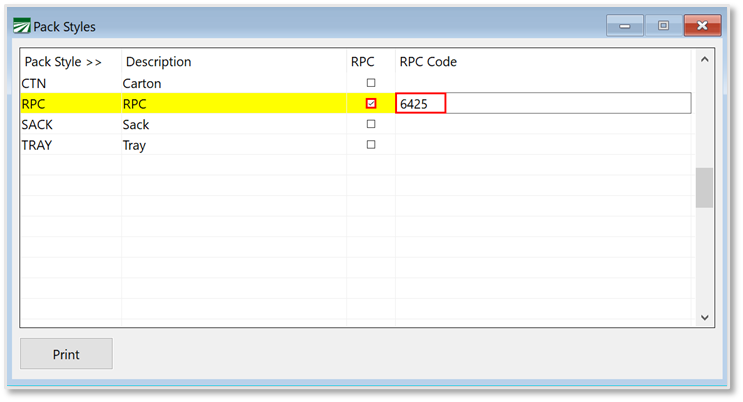
Go to Inventory > Setup > Pack Styles.
-
Create a line for your RPC. (If you have more than one RPC code to track, enter each RPC on a different line. Examples of labeling multiple RPC’s: RPC6425, RPC6428… RPC1, RPC2…)
-
Select the RPC checkbox.
-
Add the RPC Code.
Define Your Supplier
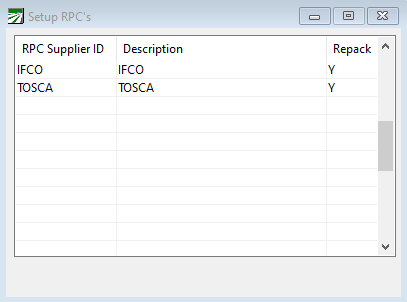
On the Setup RPC’s window, you can now define one or multiple suppliers.
You may also need to set up multiple suppliers if you have one grower with two different RPC codes for the same product. For example, you order 100 cantaloupes from a grower. That grower sends 50 cantaloupes from IFCO and 50 from TOSCA. In this case, you would need two lines set up for each RPC. Then you can assign both codes accordingly.
-
Go to Inventory > Setup > Setup RPC’s.
-
Add your current supplier. (If only one supplier is entered, each grower account will default to that supplier.)
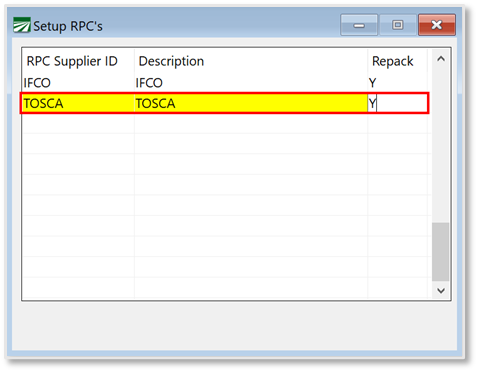
If you need to add an additional supplier for an individual grower, follow Steps 14 & 15.
-
Add that supplier to the Setup RPC’s window.
-
Restart your program and then define that supplier on the Grower Entry window for that individual grower. (Shown in the following image.)
Note If you enter more than one Supplier in the Setup RPC’s window, you must define each grower account with a supplier.

Track and Report RPC Usage
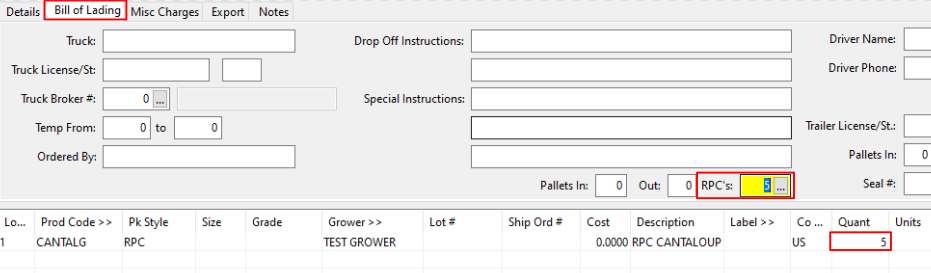
The program can now track and report on RPC usage. On the Order Entry and Invoice Entry windows, you will see the RPC’s entry.
-
Open/Create an order or invoice.
-
Enter items as usual. Any items in RPC containers will be identified by the program from the information you have set up in the Product Code window.
-
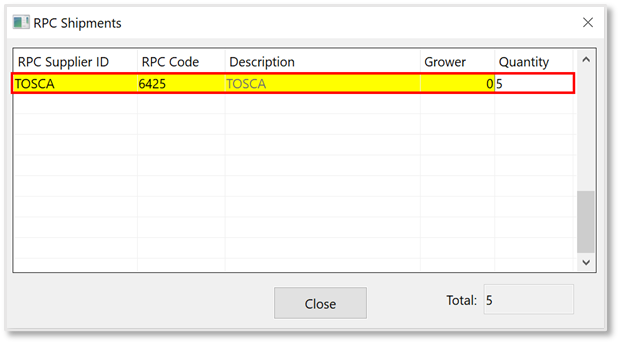
Click the Bill of Lading tab and use the RPC’s lookup to open the RPC Shipments window. Then, that window’s grid will automatically be filled in based on the information you have entered. (Shown in the following image.)
-
Use the RPC Shipments window to split up the RPC Supplier ID’s by quantity if needed.
Note You do not have to click the lookup button; the program will find the RPC’s when you run an RPC Shipment Report.