Shipper Setup
Order Entry
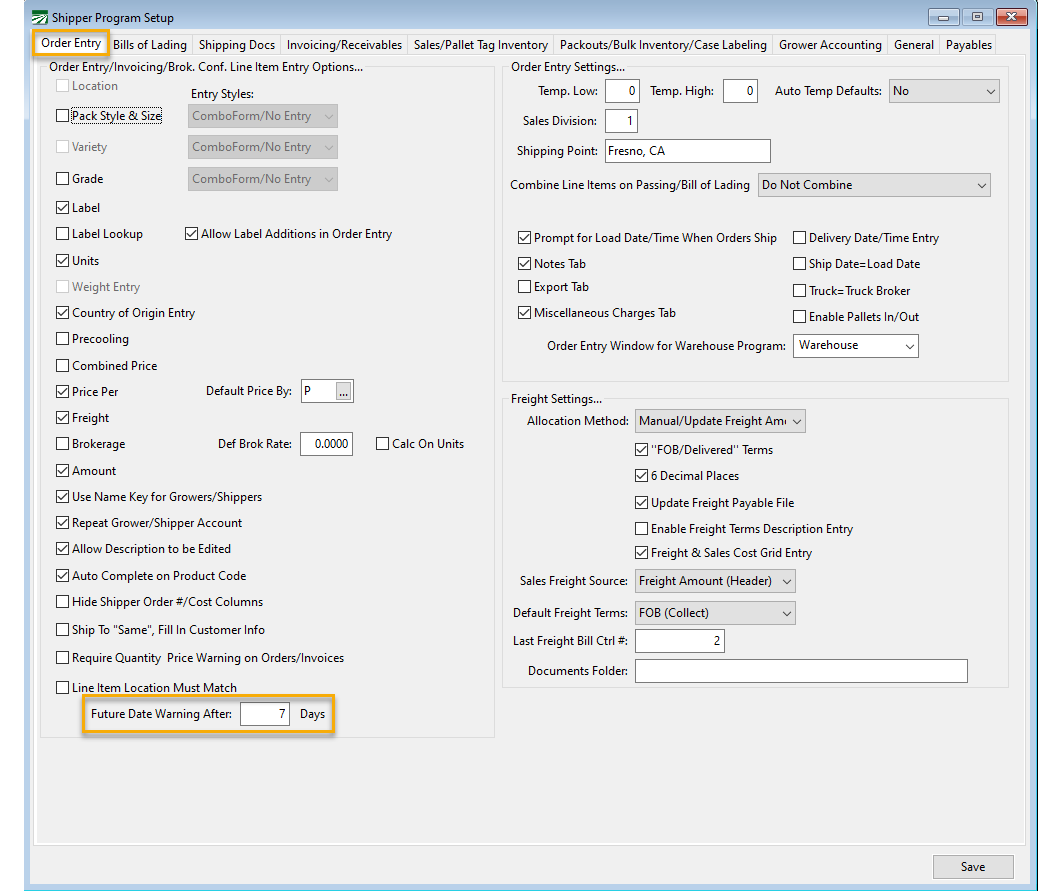
Order Entry/Invoicing/Brok. Line Item Entry Options
Future Date Warning After ____ Days
Here you can set the number of days in the future to trigger the Future Date Warning. You may want to adjust this setting if you regularly enter orders two weeks or more in advance.
Bills of Lading
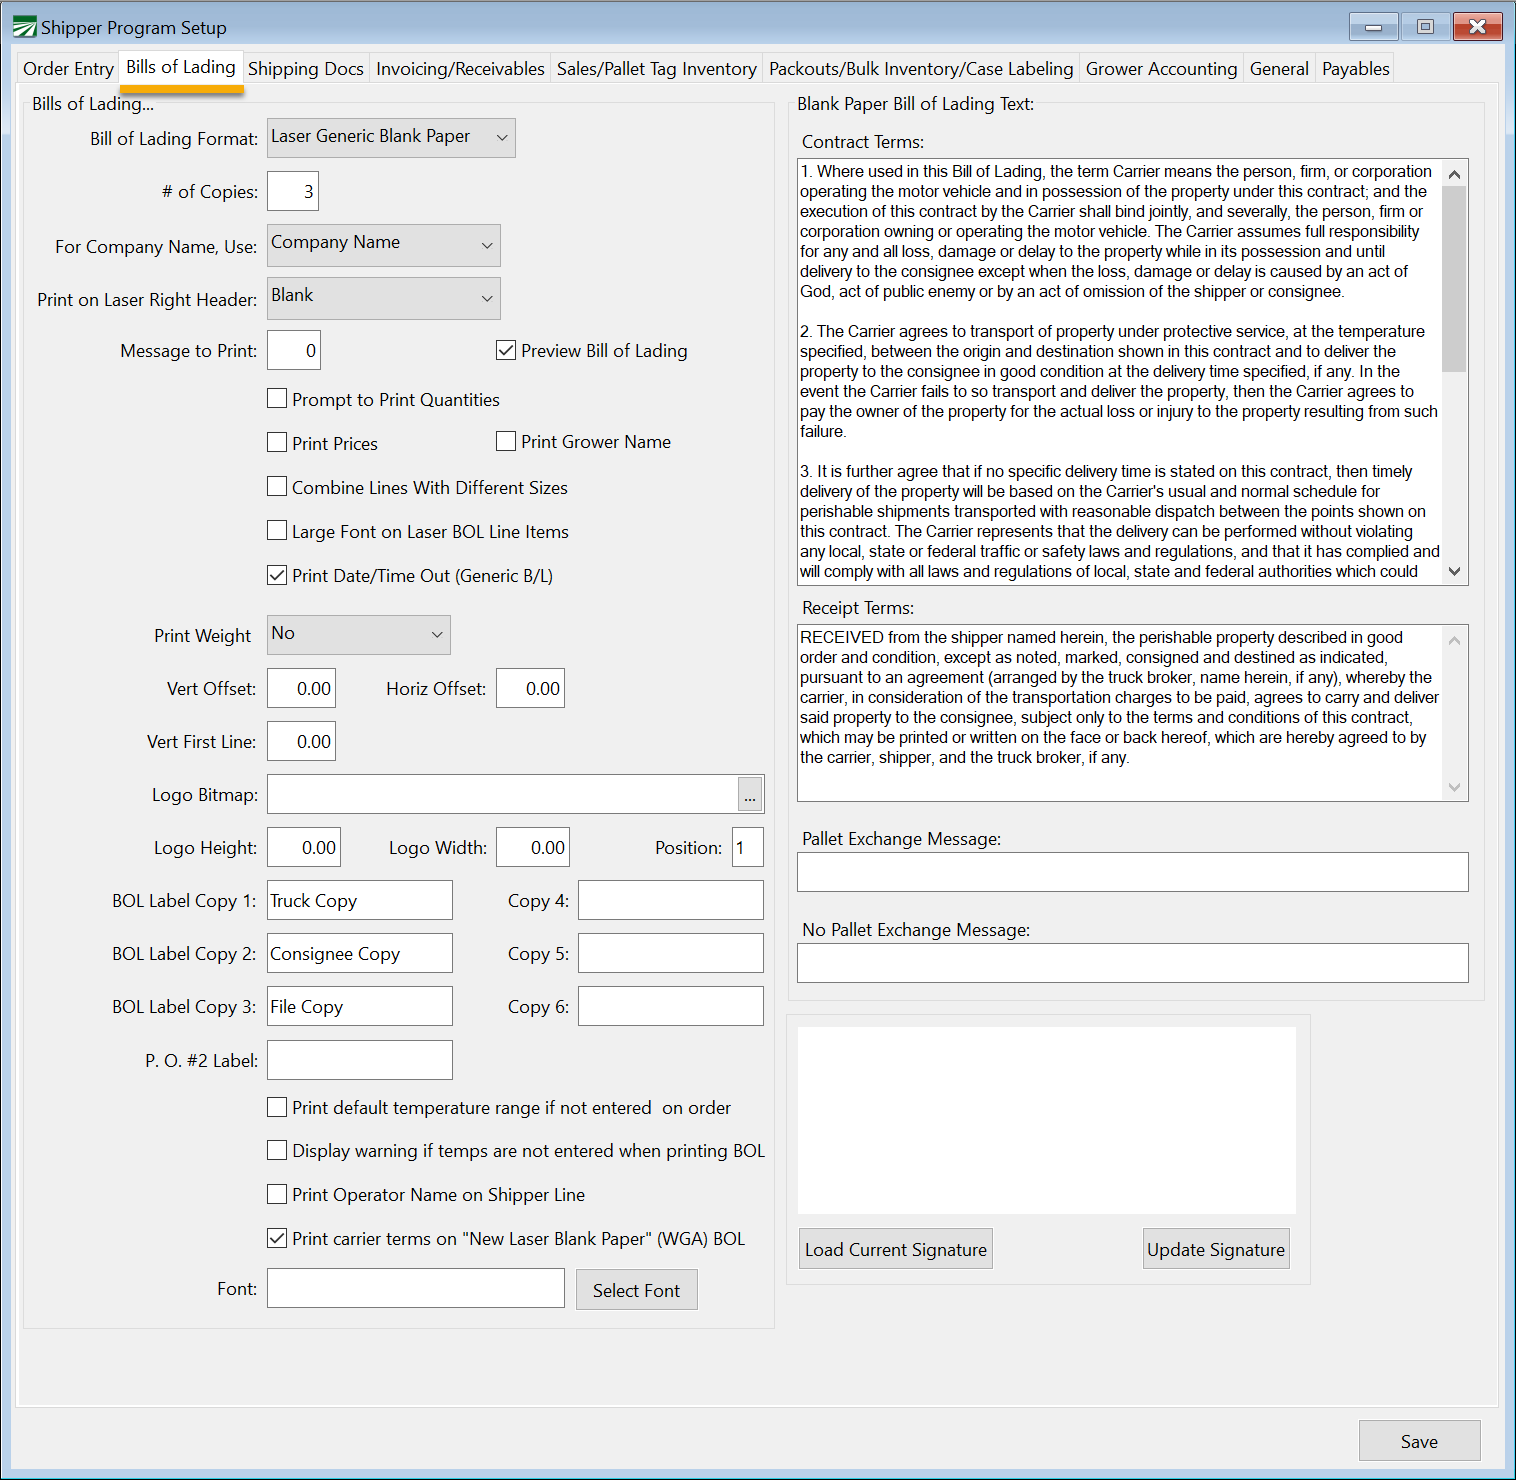
Bill of Lading Format
There are several format options to choose from. This setting will determine which bill of lading format the program will use when you print from the invoice.
Tip If you are in California and need to add a TRU compliance message, see topic: Messages. You will be able to set up your message based on the template type you choose.
Shipping Docs
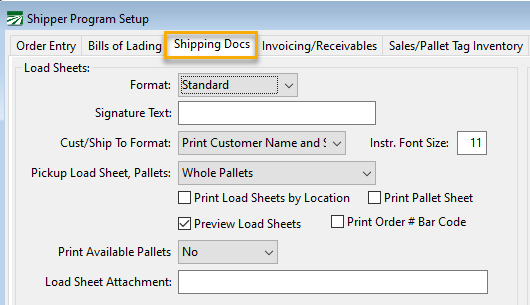
Load Sheets
Load Sheet Footer Message
Do you need to set up a custom footer message to print on your Load Sheets? See our Load Sheet Footer Message instructions.
Invoicing/Receivables
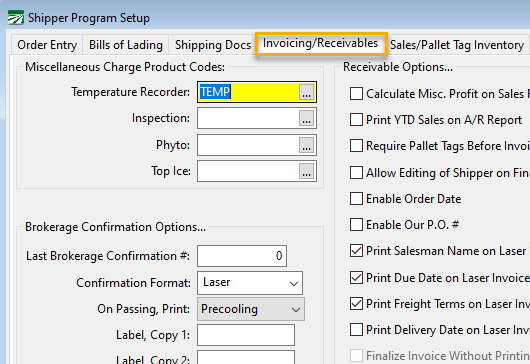
To enable Divisions By Product Code:
1. Go to Tools > Shipper Setup > Invoicing/Receivables tab.
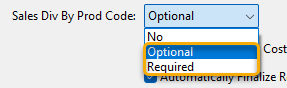
2. On Sales Div. By Product code, choose Optional or Required.
3. Restart your program.
4. This feature will now be available at Receivables > Setup > Divisions by Product Code.
Finalize Invoice Without Printing
When this option is selected, your receivable invoices will not require the invoice to be printed prior to finalizing. This means when you click Print Invoice on the Enter/Edit Customer Invoice window, that invoice will be finalized.

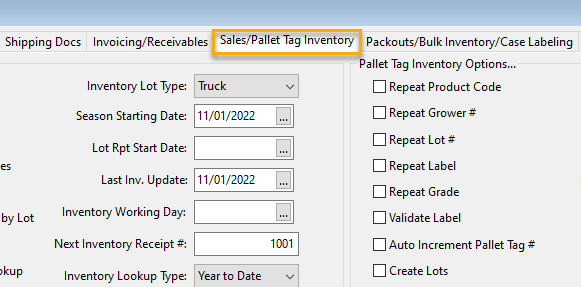
Sales/Pallet Tag Inventory
This sections includes settings that control how the inventory system works and what options are available.
Sales Inventory Settings
Inventory by Location
Check this box if you have multiple warehouses and need to track separate balances for each warehouse.
Season Starting Date
The sales inventory system operates with beginning date for the current season. Every product starts with a zero balance as of this date. Transactions posted prior to this date will not be included in inventory balance calculations.
Normally at the end of a season, all product received should be shipped, so all products should have zero balances to start the next season. If for some reason this is not the case, the season starting date allows you to select a starting point where everything will start out at zero.
Last Inventory Update
Ending balances for each day are maintained by running the Daily Inventory Report. The system keeps track of the last date that this report was run.
Inventory Working Date
As noted above, if you want to be able to use the Holdover, Received Today, and Shipped Today balances, the system needs to know what the current inventory working date is. Normally this is the same as today’s date. There may be cases, however, when you are still working on a previous day’s inventory or you are entering orders and receives after the fact. In this case, the Inventory Working Date will not be the same as today’s date.
If you do not want to see the Holdover, Received Today, and Shipped Today quantities, you do not need to enter an Inventory Working Date. However, once you do enter a date, the program will prompt you to do beginning of day processing each time the program starts up and the Inventory Working Date is different from today’s date.
Inventory Lookup Type
Select Year to Date to view recevied and shipped quantities on the lookup, or Daily Balances if you want to biew Holdover, Received Today and Shipped Today on the lookups.
Lot # Template
A template can be entered if you want the program to automatically create a lot # for you on new inventory receive entries. The template can include the following items:
YY – This is replaced with two digits from the current calendar year.
Y – This is replaced with the last digit in the current calendar year.
# - This is replaced with the receive #
* - This is replaced with the Last Lot # serial number.
III – This is replaced with the Lot Prefix from the grower account setup.
Last Lot #
This is a serial number that can be used with the Lot # Template. If an asterisk (*) is included in the template, this number will be incremented and used in the next receive that is entered.
Inventory Receives Entry Options

Payables Method
From the drop-down menu, choose one of following options: A/P Invoice, G/L Transactions, or Hybrid. The following images will show how each option will affect your Inventory Receives window (Inventory > Inventory Receives).
A/P Invoice: Allows payable to be created if you are using accounts payable.

G/L Transactions: Automatically updates the G.L with no payable being created.
Hybrid: This option allows for both a payable to be created and for the G.L to automatically be updated.
Pallet Tag Inventory Options
Ignore Buy/Sell on Shipments
When this box is checked, the program will not attempt to match up pallet tags to buy/sell product on an invoice unless you have scanned tags for shipper accounts.
Allow Multiple Lots
Check this box if you will be mixing product from different lots from one or more growers on the same pallet tag number. When you enter a pallet tag with a quantity less than the default number of packages per pallet, the program will ask if you want to enter another grower or lot for this tag.
When you enter multiple growers and lots on a single pallet tag number, the two entries have the same pallet tag number and the program uses the “split” entry to distinguish between them. The split number will be automatically incremented each time you a new grower/lot, until you tell the program that there are no more growers/lots to enter.
Packouts/Bulk Inventory/Case Labeling
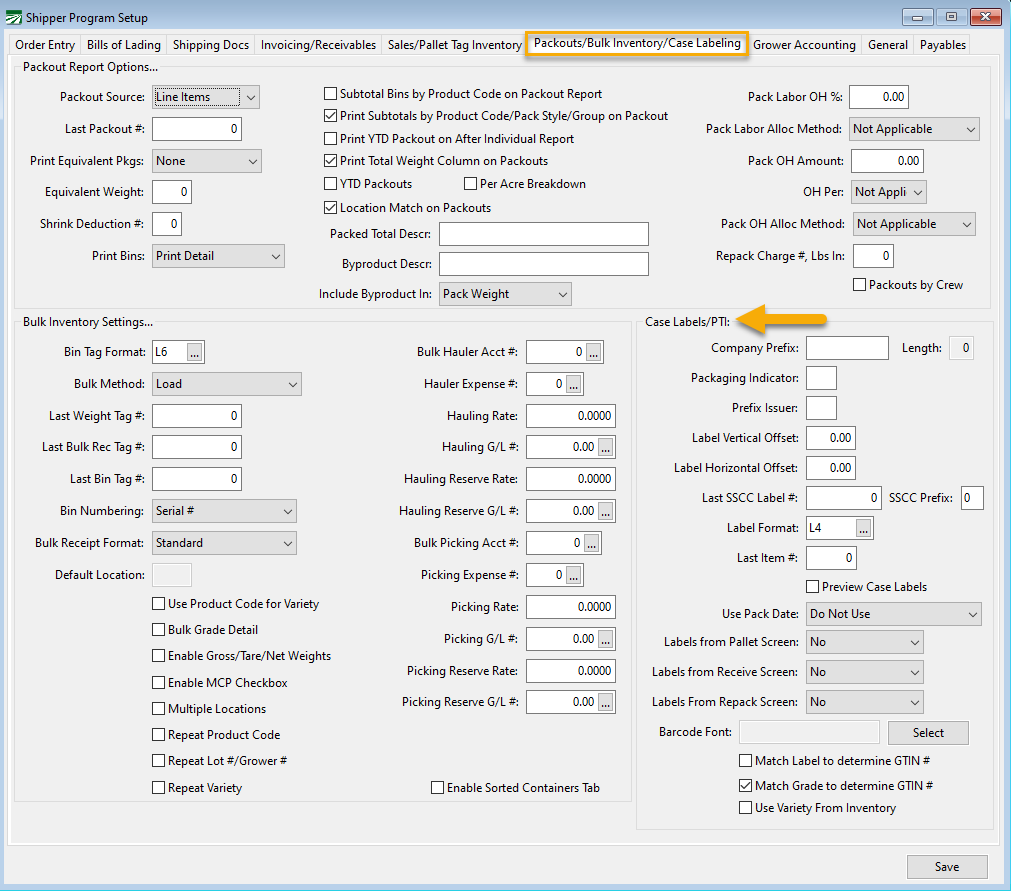
Case Labels/PTI
Initial setup includes defining your Company Prefix, the type of label you will use, and whether or not you will print the date as a part of your case label identification.
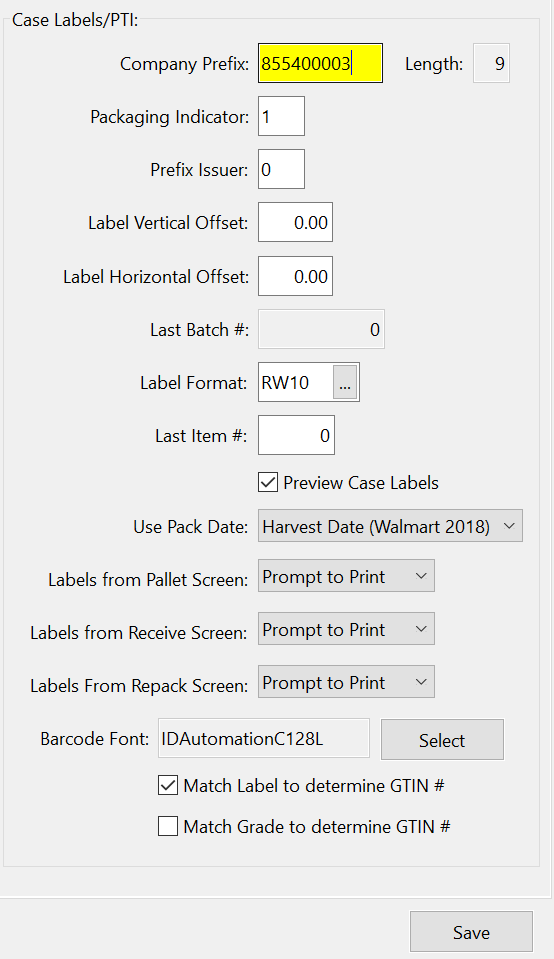
Company Prefix
Enter the company prefix as issued by the GS-1 organization. Do not enter the leading zero.
Packaging Indicator
This is normally the number 1, but you can also use 2 through 8 if you need more GTIN numbers than are allowed by your company prefix.
For instance, if you have a 9-digit company prefix, you can have up to 99 GTIN numbers. After reaching this number, you can change the packaging indicator to 2, and you can then generate another 99 GTIN numbers.
Prefix Issuer
Enter a zero for the United States. This is the leading zero that may appear on your company prefix.
Label Vertical Offset
This is an offset for adjusting the vertical printing of your label. Any value (in inches) that you enter will move all printing on the case label down by that amount. You can leave this blank until you print test labels, and then make any needed adjustments.
Label Horizontal Offset
This is an offset for adjusting the horizontal printing of your label. Any value (in inches) that you enter will move all printing on the case label to the right. You can leave this blank until you print test labels, and then make any needed adjustments.
Last Batch Number
Not currently used. Leave this entry blank.
Label Format
When the program is installed, Datatech will advise of the correct label format to use.
Last Item Number
This is the unique number that makes up a part of the GTIN; it will start at zero. If you let the program insert this number, it will increment automatically.
Preview Case Labels
The preview is used ONLY when troubleshooting label printing. Normally, since you are printing a large quantity of labels you would not use this feature. Instead, you would send the print job directly to the printer.
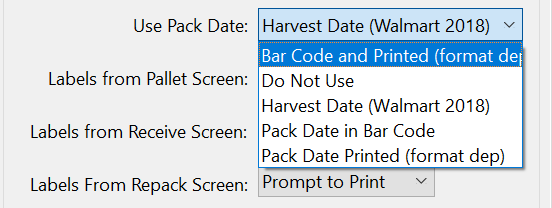
Use Pack Date
The bar code on each case label (and the human readable information) must identify the product (GTIN), field, and pack date. If you are using a unique lot number for each day’s packout, you do not need to include the date.
However, if you are using the Field ID or Block ID as the lot number, you do not have a unique identifier for the day it was packed. In this case, you would need to include the pack date as part of the bar code.
Labels From Pallet Screen
For this and the next two prompts, there are three options:
-
No: Case labels will not be printed from this screen.
-
Prompt: When printing a new pallet tag, prompt to print case labels.
-
Automatic: When a pallet is printed, automatically print case labels.
Labels From Receive Screen
There are two situations in which you would print case labels from this screen:
-
When product arrives at the warehouse, pallet tags and case labels need to be printed. In this case, you can set this option to Prompt (it will ask if you want to print case labels to match the pallet tags that are printed) or Automatic (case labels will print automatically to match the pallet tags).
-
Product is being packed and you want to print case labels ahead of time. In this case, you would set the option to Prompt, which gives you a case label button on the screen. You would then enter the products you are packing for the day, click on the case label button, and enter the number of case labels you need to print.
Labels From Repack Screen
Same as Receive Screen.
Barcode Font
Select the bar code font you need for your labels. This will normally be handled by Datatech during installation of the case labeling option.
There are three fonts commonly used: IDAutomationC128XL for 4” X 2” labels; IDAutomationC128M for 4” X 2” labels where a smaller barcode is needed to leave room for added text; and IDAutomation C128XXL for 4” X 3” for larger labels. The difference between these fonts is the height of the bar code.
Note Datatech will install the barcode font. This can be found in the customers installation folder; W:\Shipper\Fonts. There should be two fonts 1. IDAutomationC128M and 2. IDAutomationc128S. The (M) and (S) represent medium and small. The small font is currently required by Walmart.
General Tab
Warning The only setting on this page that applies to the new style quote sheet is the Print zero price items checkbox. For the new style, the dash line is not supported, items are always floated on the new style, and the headings and footers are defined on the quote sheet setup window.
Float Items on Page
The Quote Sheet is printed in two columns of 46 lines each. If this box is unchecked, then the program will print the first 46 lines in the first columns and the rest of the lines in the second column. This gives you control over exactly what is printed in each column.
If you check this box, and some items are not printed (because of the Print Zero Price Items setting) then the products will “float”. Items that might normally end up in the second column could be printed in the second column.
Print Zero Price Items
If the Print Zero Price Items is checked, then items without a price will be printed on the Quote Sheet. When unchecked, the program will not print anything in the area that an item would normally appear when the Float Items on Page is unchecked. If Float Items on Page is checked, then the program will move other items up to print in the space where
Print Dash Line
When this box is checked, a series of dashes will be printed from the end of the product description to the price. This can make it easier to read a long series of prices.
Heading Message
Enter a one-line message that will appear at the top of Quote Sheet.
Footer Message
Enter a multi-line message that will appear at the bottom of the Quote Sheet.
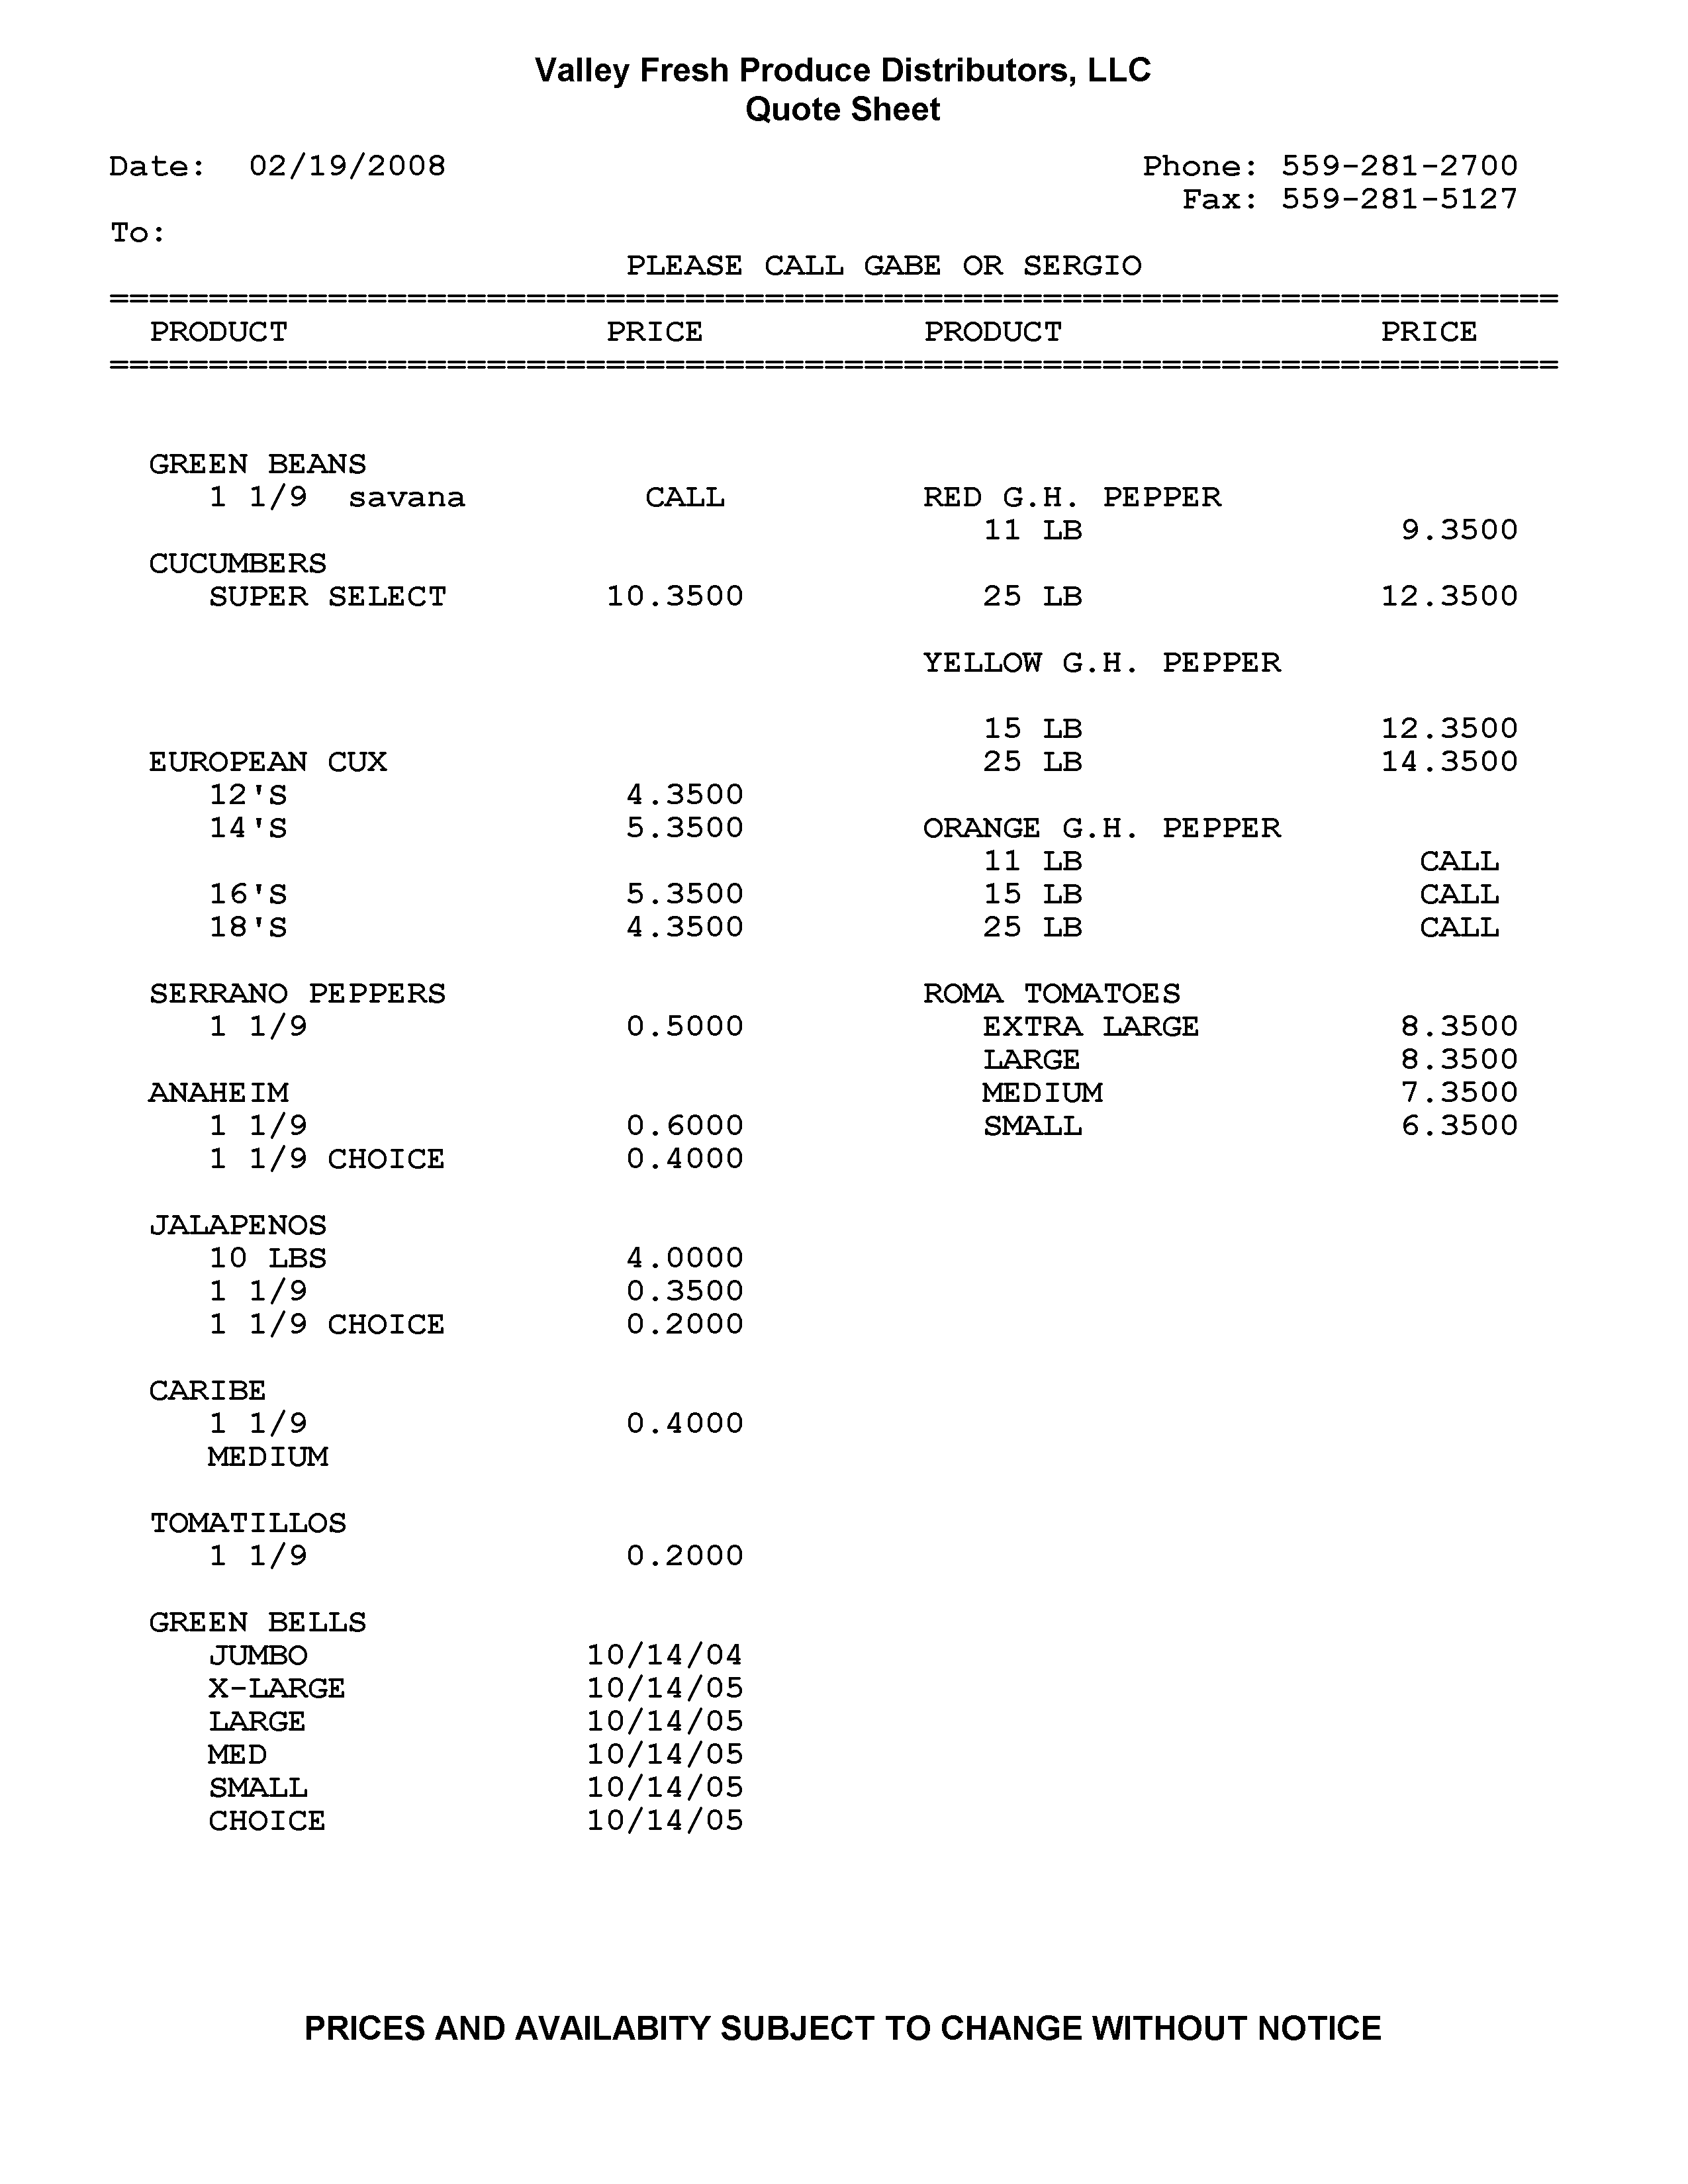
The Sample Quote Sheets drop-down shows the effect of using the Float Items and Print Zero Price Items checkboxes in combination with each other.
All of these sample quote sheets were printed using the “old style” to illustrate the effects of changing the Quote Sheet Settings in the Shipper Setup window.
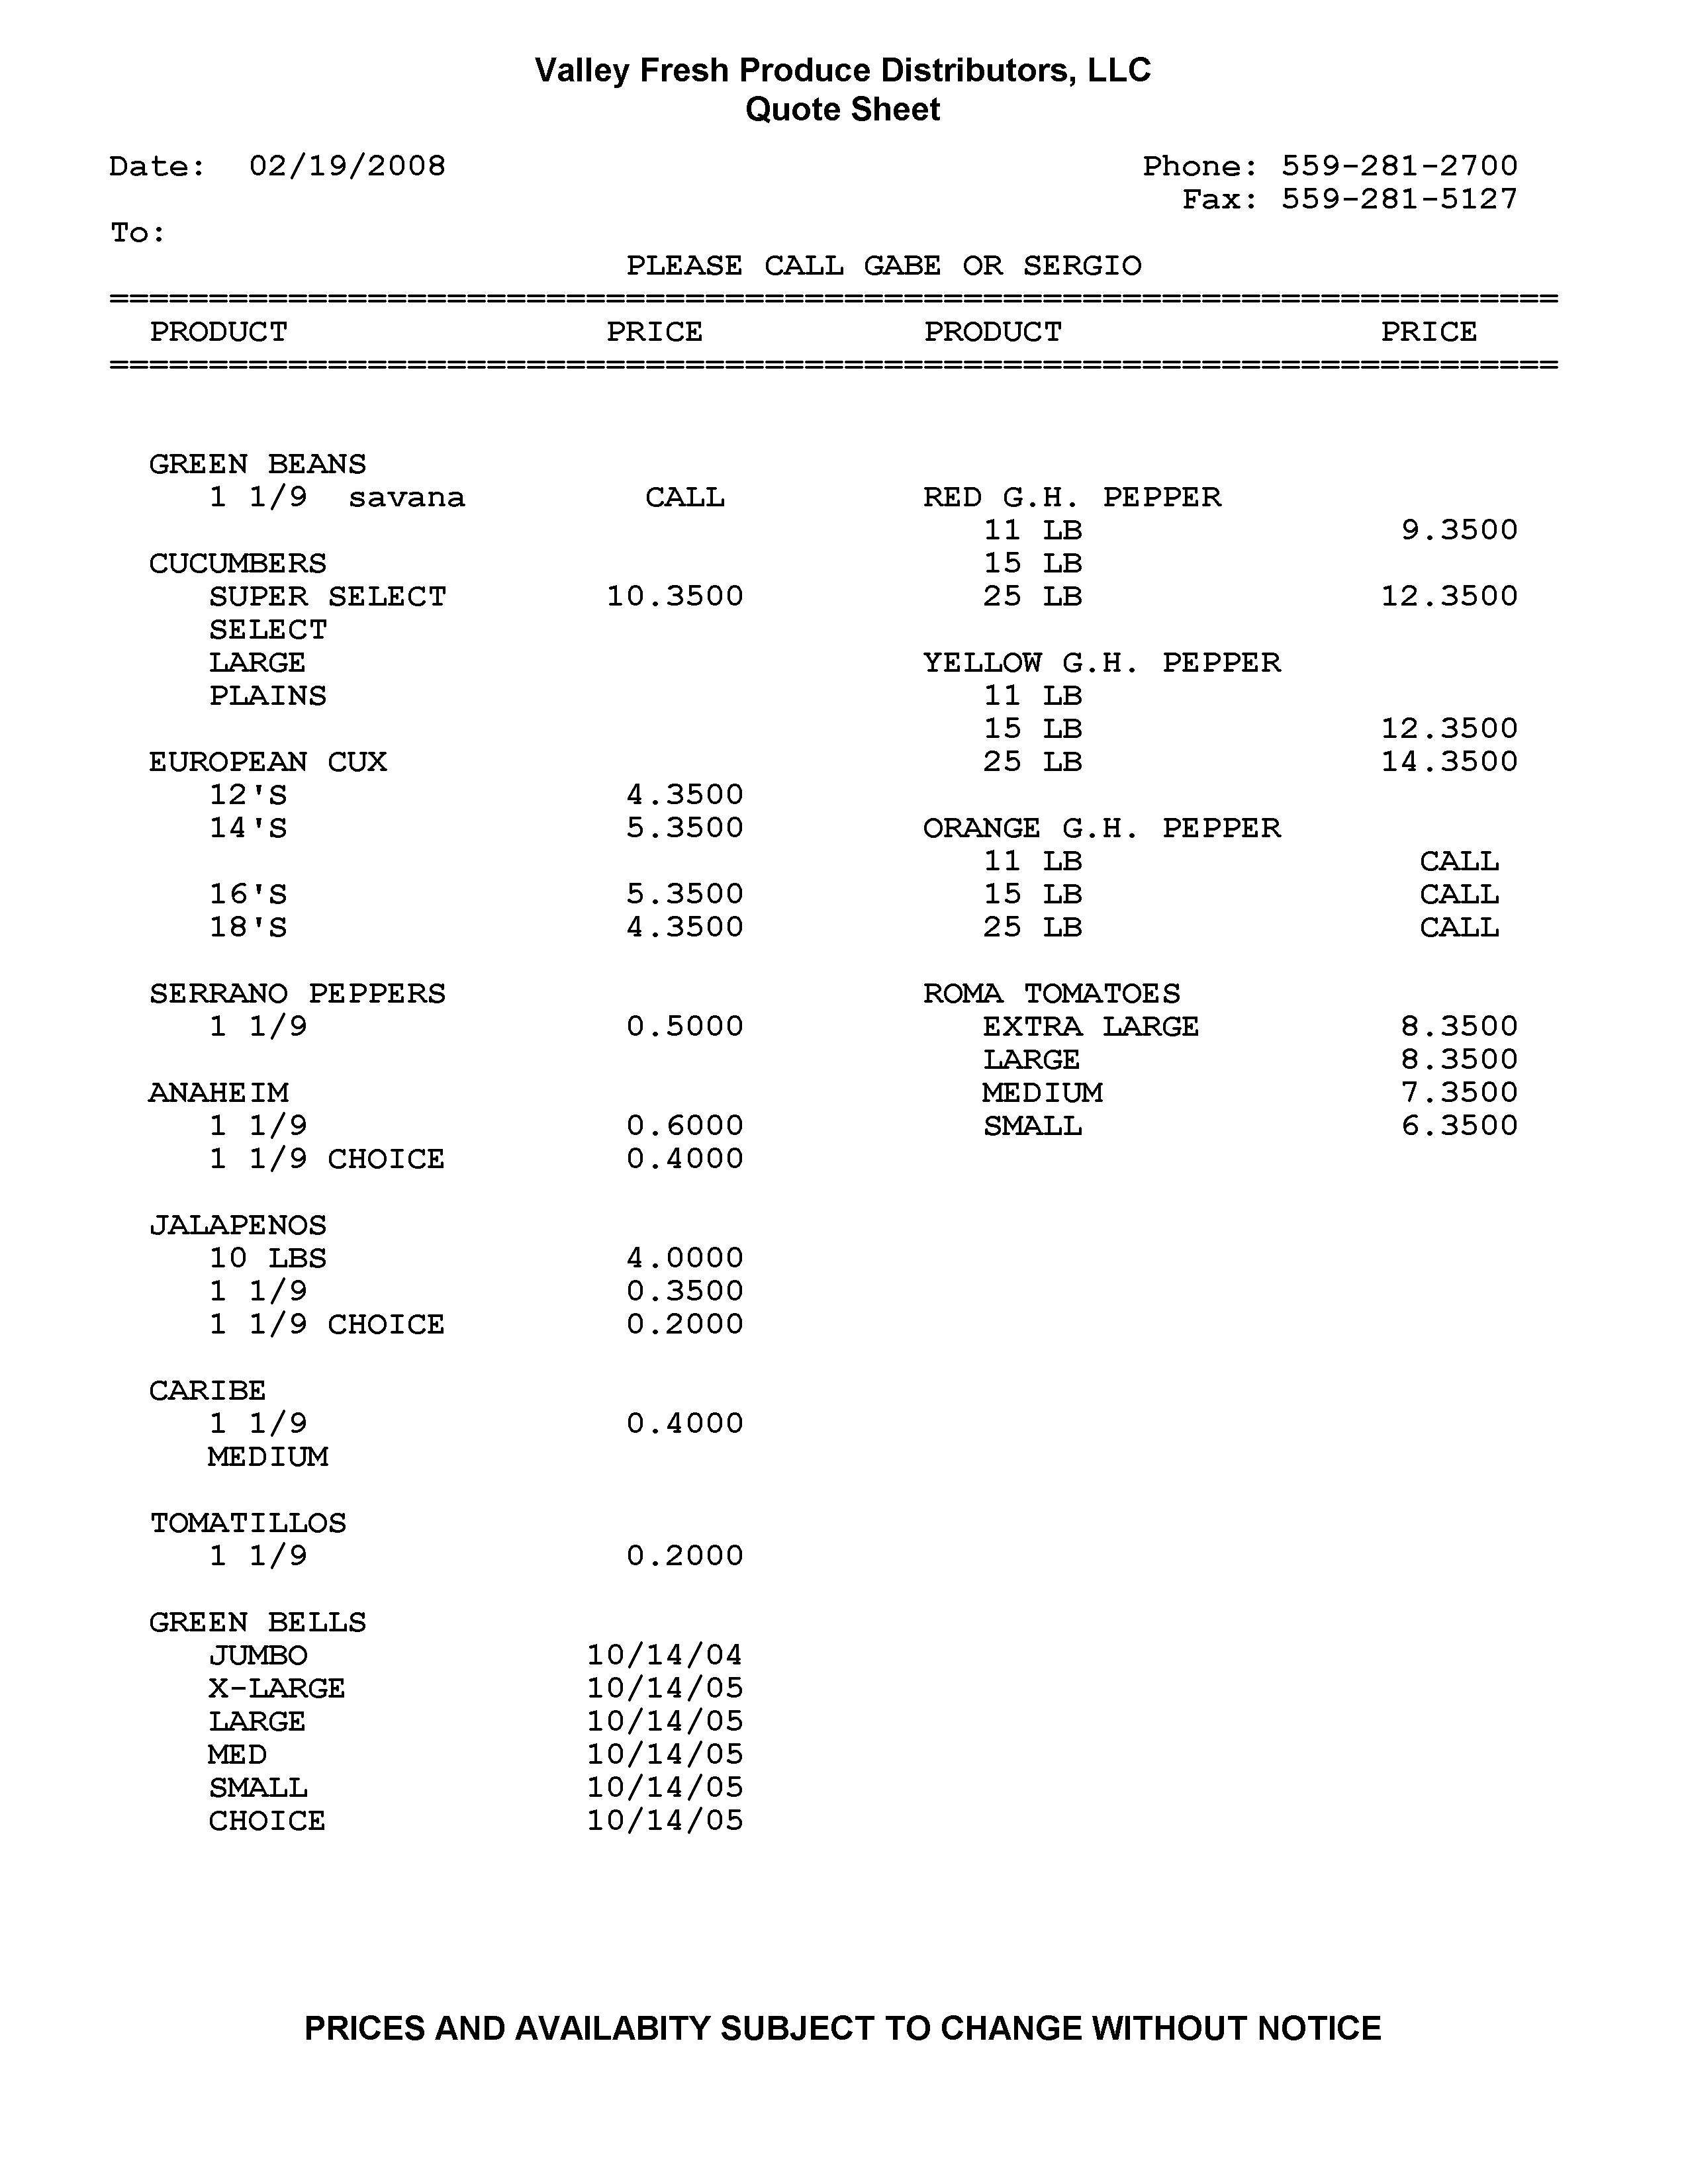
This quote sheet was printed with the Float Items option turned off and the Print Zero Price Items turned on. Notice that Select, Large, and Plains are listed under cucumbers even though no prices have been entered for these sizes.
This Quote Sheet was printed with the Float Items option turned off and the Print Zero Items turned off. Note that the Select, Large and Plains are not listed under cucumbers on this quote sheet. Since the Float Items is not turned on, that space is blank—the rest of the prices are not moved up to fill that blank area.
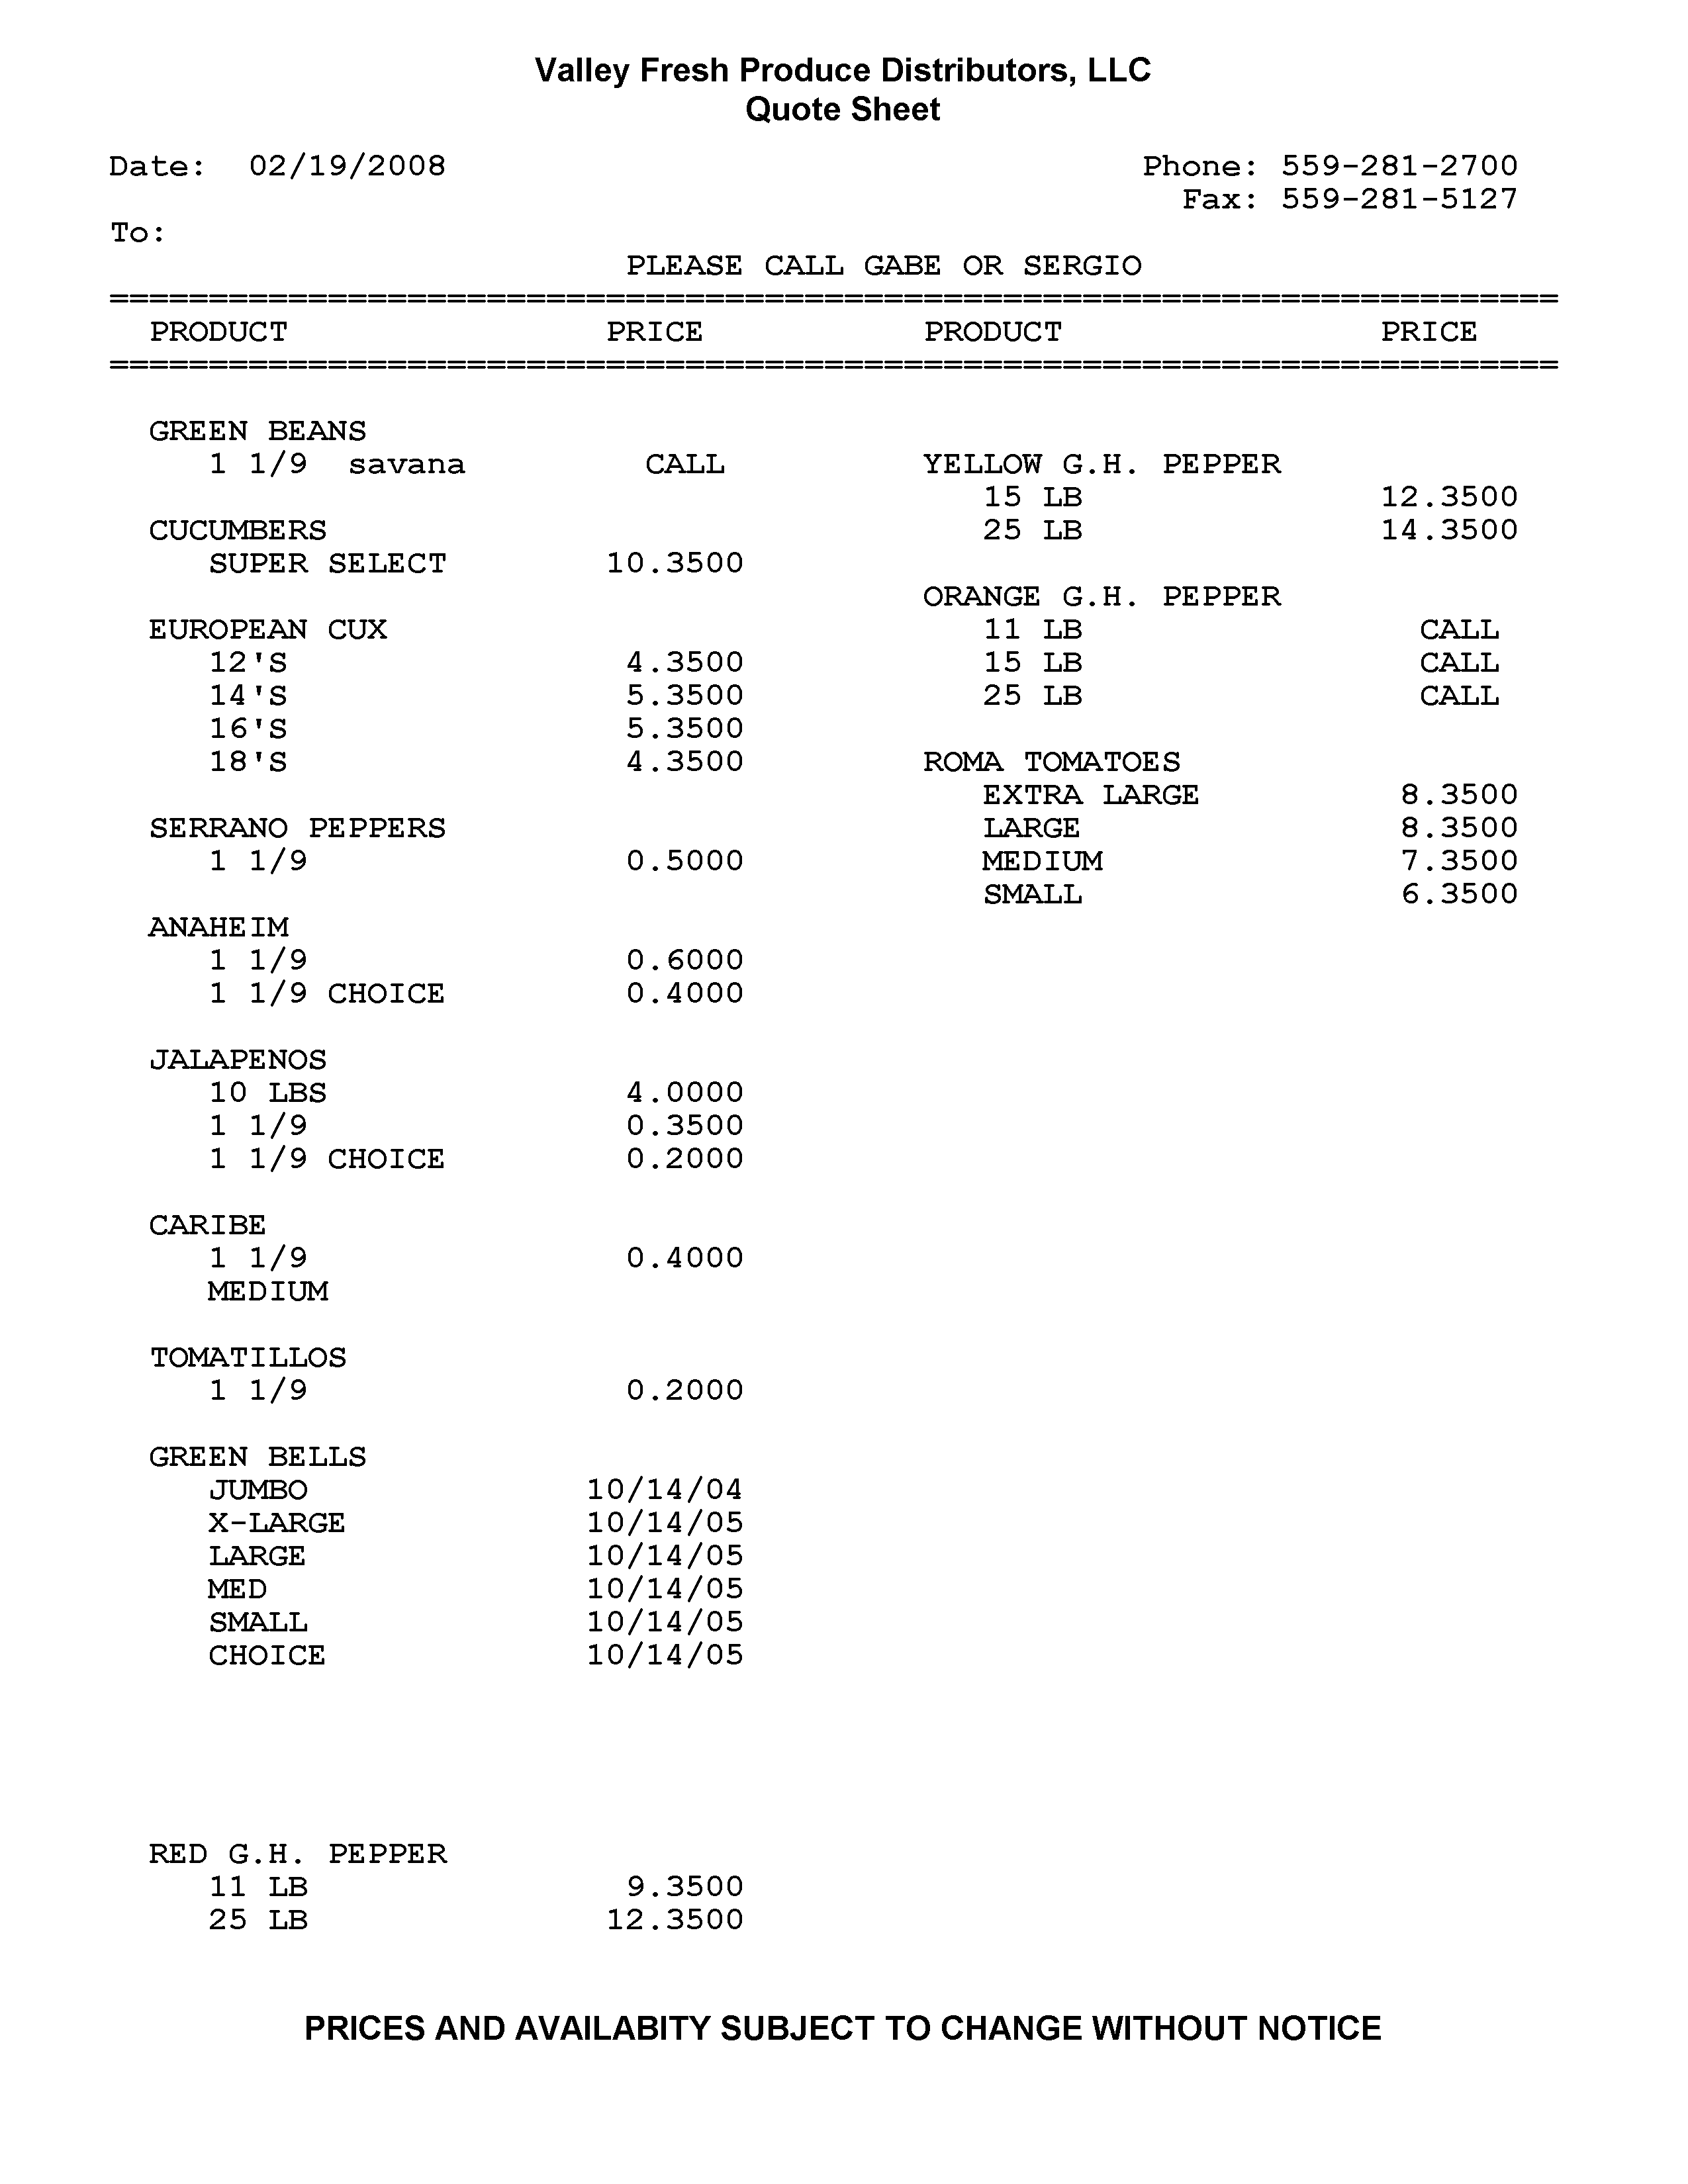
This Quote Sheet was printed with the Float Items turned on and the Price Zero Price Items turned off. Here the space that was taken up by the Select, Large and Plains cucumbers is filled up because items that do have prices are “floated” up to fill that area. Because the item are floating, the Red G.H. Peppers appear at the bottom of column one instead of the top of column two as on the other quote sheets.