Grower Entry
Grower Entry Walk-Through Video
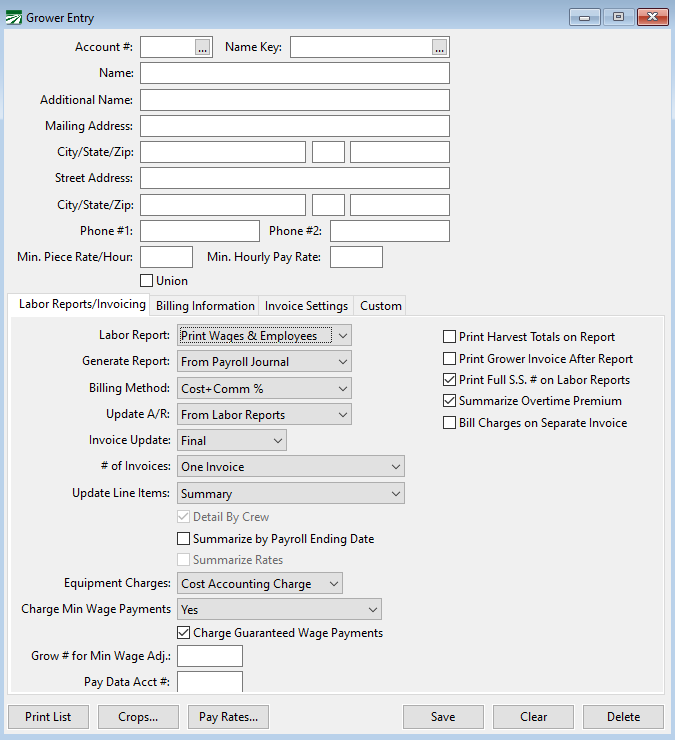
An account must be set up for each grower you perform work for. Each Grower account has settings which control how the grower is billed for labor.
If you are using the optional Accounts Receivable system, each time you enter a new Grower, a corresponding account will be created in the customer file (and vice versa). If you make changes to a Grower account (name/address/phone #'s), then the corresponding customer account will be updated with the same changes. Because of this, your Grower file and your customer file should mirror each other as far as the names, contact information, etc., are concerned.
To set up a Grower account, go to Labor Reports > Grower Entry.
Account #
Enter an account number for the Grower. To edit an existing Grower account, type in the account number or click on the lookup button.
Name Key
Enter an abbreviation of the Grower name. This entry is used for alphabetizing Grower accounts within the program.
Name
Enter the actual name of the Grower. This can be either a personal name or a business name.
Additional Name
This is an optional entry and can be used for additional name information.
Mailing Address / City / State / Zip
Enter the Grower's full mailing address n these boxes.
Street Address / City / State / Zip
Enter the grower’s street address, if this is different from their mailing address. If entered, the street address will be printed on the payroll check stubs instead of the mailing address.
Phone #1 / Phone #2
You may enter up to two phone numbers.
Min. Piece Rate/Hour
Enter the minimum hourly rate that employees working for this Grower should be paid when they are paid using a guaranteed rate wage type. This entry is optional, but it should be used if you have different guaranteed hourly rates for different Growers.
Guaranteed wage adjustments will be calculated using the higher of (1) this rate; (2) the employee’s hourly rate - if entered; or (3) the minimum hourly rate specified by the pay rate table.
Min. Hourly Pay Rate
Enter the minimum hourly rate that employees working for this grower should be paid when they are paid using a straight hourly wage type (e.g. regular hours, overtime, and double time). This entry is optional.
If you enter a rate here, it may be used as a default rate during check entry. (Whether or not this rate is used depends on whether you have set a different default rate elsewhere.)
Labor Reports/Invoicing
Labor Report
The default option is to print both the gross wages and the employee recap sections on the Grower Labor Report. You have the option of selecting the employee recap section only, or not printing a Grower report at all.
Print Harvest Totals on Report
Select this box if you are going to enter harvest totals for the Grower account and want the Grower Labor Report to print the Harvest Analysis section.
If you are using the Cost Accounting module, you may enter harvest totals for the Grower account but not want them to appear on the Grower Labor Report. In that case, do not select this box.
Print Grower Invoice After Report
Select this box if you don’t want the generic grower invoice to print after the labor report. It may not be necessary to print this invoice if you are updating the invoice to Accounts Receivable and printing the invoices from A/R.
Print Full S. S. # on Labor Reports
This option is selected by default and determines whether or not the employees’ full social security number is printed on the Grower Labor Reports. This is a requirement under Federal law (MSPA) and may be required by state law (e.g. this is a requirement under California state law).
If you have customers that you provide workers for that are not covered by the MSPA or relevant state law, you may deselect this box to suppress printing the employees’ social security numbers on the Grower Labor Report.
Generate Report
This setting controls when the Grower Labor Report data will be generated. The default setting is to generate the labor report data after the Payroll Journal report has been updated. You also have the options of generating report data when the Create Checks option is used from Daily Payroll or when manually generating the report data.
When the Create Checks option is selected, you will be able to print the Grower Labor Report and generate an invoice immediately after you use the Create Checks option. However, there are some disadvantages to using this method.
Check information can be edited after checks have been created. Because of this, if you make corrections or additions using the Batch Check Entry window, the Grower Labor Report may not contain acreage information.
Additionally, since checks have not yet been printed, the Grower Labor Report will not print a check number in the Employee Recap section.
If you select the Manual option, then the program will not generate labor report entries for this grower at any point during the work flow. You can use either the Generate Labor Report option in Daily Payroll or the Compile Prior Period Report option on the Labor Contractor menu to create the labor report entries for this grower.
Billing Method
Select the billing method you want to use for this grower:
-
Cost+Comm %: The grower will be billed for the labor plus the commission rate(s) specified in the Billing Information section below. Use this option is you charge a flat commission or if you bill for individual employer taxes plus a commission.
-
Fixed Rate: Use this option if you pay the employees one rate per hour or unit and bill the grower a different rate. The grower is billed a flat rate for labor performed, based on the amounts in the Pay Rate file. The Pay Rate file allows you to set different billing rates for different growers, fields, and jobs.
-
Fixed+Comm %: This option is a combination of the prior two methods. The grower is billed a flat rate for labor performed, based on the amounts in the Pay Rate file, plus a commission rate specified in the Billing Information section.
-
Costs+Workers: This option will bill for labor, taxes and worker’s comp plus a fixed amount for the total number of days worked (entered in the first billing description) and a fixed amount for the total number of workers (entered in the second billing description).
-
None: If this option is selected, then no invoice will be printed after the Grower Labor Report.
Update A/R
This setting controls whether or not an invoice is automatically created in the optional Accounts Receivable module and at what point it is created. If you are not using the Accounts Receivable system, then this setting will have no effect.
Select From Labor Reports to have the program create an invoice when the Grower Labor Report is printed and finalized. This is done after checks have been printed and the Payroll Journal has been updated. This is the default option.
Select From Create Checks if you are using the Daily Payroll Entry window and want to create an invoice when you use the Create Checks option. Because checks have not been finalized at this point, it is possible the check information may be edited and the grower invoice information could become inaccurate. In this case, you would need to edit the invoice yourself to reflect any changes or corrections made to checks. However, because the grower invoice is created earlier in the workflow, you are able to produce an invoice and deliver it to the grower before you have printed checks for the employees.
Select No if you are entering the invoice yourself or doing the billing manually.
Invoice Update
This controls the status of invoices created in receivables. The invoice status may be either Trial, Final, or Batch Print. A final invoice will appear immediately on the receivables report and sales journal. Updating an invoice as a Trial or Batch Print will allow you to edit it before finalizing it, so invoices will not appear on the receivables report and sales journal until you finalized them in the receivables system.
The Trial option is recommended if you will be finalizing invoices one at a time in the receivables module. If you want to print and finalize invoices together, use the Batch Print option.
# of Invoices:
This entry controls how many invoices are generated for each grower for each run of the grower labor reports. There are several different options available:
-
One Invoice: This is the default setting which generates one invoice per grower. This option may include work done at different crop/fields/ranches/locations but all under the same grower account.
-
One Invoice per Crew: Creates a separate invoice for each crew that worked for a single grower.
-
One Invoice per Crop: Generates one invoice per crop, field or location. This will group multiple jobs performed at the same location together on one invoice.
-
One Invoice per Crop/Job: Generates a separate invoice for each job performed at each crop/field/ranch/location.
-
One Invoice per Crop/Job Group: Generates one invoice for a Crop ID that includes multiple related job codes.
Note Using this option requires setting up the Job ID's on the Cost Accounting Job Setup window and assigning the group that each job is assigned to.
-
One Invoice per Date Worked: This can be used with the "General Invoice/Crop,Date" option under Update Line Items to produce an individual invoice for each combination of date(s) worked and Crop ID's entered.
-
One Invoice per Ranch: Used if your grower wants one invoice per ranch but needs subtotals for each field on that ranch. For this setting to work properly, you must enter the ranch name in the Description column for each field. Then enter the field number, name or commodity in the Commodity column. Be sure that the Crop ID numbers that you assign for each field within a ranch are consecutive, and that the ranch name matches exactly for each of the crop entries on that ranch.
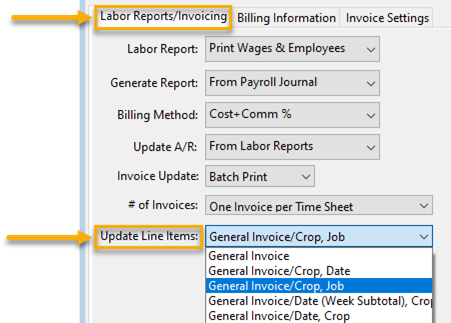
Update Line Items
Click here for an explanation of each option and an example of what prints on the invoice when each option is selected.
Detail by Crew
This option is available only when you have selected General Invoice/Crop, Date for the Update Line Items option. When selected, the labor for each crew is itemized separately. If you deselect this box, the invoice will combine labor for multiple crews working in the same Crop ID together. This will result in a shorter invoice because there are fewer detail lines.
Summarize Overtime Premium
This check box will be selected by default. The program will combine minimum wage adjustments, overtime/double-time premium, and rest & recovery wages into lump sum amounts.
If you deselect this option, the program will generate a separate line item for each pay rate.
Example Two employees work two hours of overtime each at a regular hourly pay rate of 12.75 (4 hrs x 6.38 OT Prem = $25.52). One employee works 1.5 hours of overtime at a regular hourly pay rate of 13.05 (1.5 hours x 6.53 OT Prem $9.80). When this box is selected, the program will generate one line item with a quantity of 1 and a price of 35.32, the total overtime premium payments for the three employees. When Summarize Overtime Premium is deselected, the program will generate two line items: one with a quantity of 4 and a price of 6.38 for a total of 25.52; and another line with a quantity of 1.5 and a price of 6.53 for a total of 9.80.
Bill Charges on Separate Invoice
This option controls how grower charges will be billed on invoices. By default, this box will not be selected. Grower charges will be billed out along with the labor and overhead charges. To create a separate invoice that lists only the grower charges, select this box.
Charge Minimum Wage Payments
This option will act differently depending on the verification method you are using.
See Topic: Minimum Wage Adjustment Options
Charge Guaranteed Wage Payments
When an employee is receiving piecework wages and does not make the guaranteed wage, the program will automatically add a line to make up the difference. This check box controls whether or not those wages are charged to the grower.
Grow # for Min Wage Adj
If you would like to connect two or more grower accounts when calculating minimum wage, enter the same grower number in this entry on all growers you are wanting to connect. The grower number you enter will be the grower charged for any minimum wage adjustments between the connected grower accounts.
Example Grower 1, 2, and 3 are all under the same company. This company would like Grower 2 to be charged any minimum wage adjustments between the three growers. To do this, simply enter 2 in the Grower # for Min Wage Adj entry on all three grower accounts.
Pay Data Acct #
See Topic: Generate California Labor Contractor Pay Data > How to Combine Multiple Grower Accounts into One Pay Data Report.
Billing Information
There are times when you’ll need to assign a commission rate to a specific Job ID.
To begin, go to Receivables > Setup > Billing Descriptions.
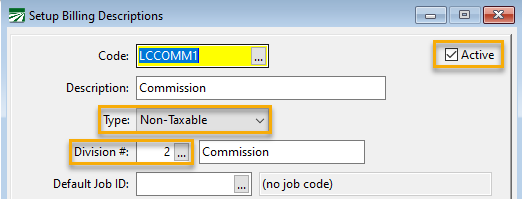
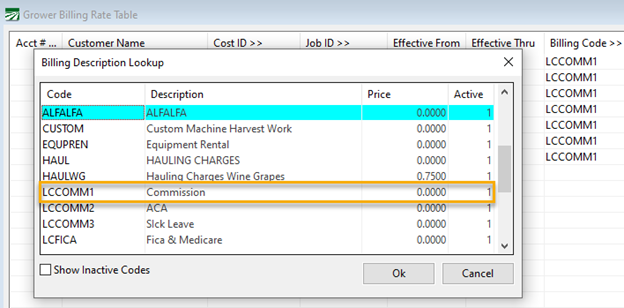
1. In the Code entry, enter LCCOMM1. (The program will look for this billing description when creating invoices to automatically calculate the commission rate that has been set up.) Then click Ok.
2. In the Setup Billing Descriptions window, ensure the Active box has been selected, the Type has been set to Non-Taxable, and the appropriate Division has been selected. Click Save.
3. Now you will need to link the commission rate to a Job ID. Go to Labor Reports > Billing > Setup Add-on Rate. This will open the Grower Billing Rate Table.
4. Enter the customer’s Acct # or click on the Acct # heading to look up and select the customer.
5. The Cost ID can be left blank so that the rate applies to any Cost ID or select a specific Cost ID for this rate.
6. Enter the Job ID or click on the Job ID heading to look up and select the appropriate Job ID.
7. Enter the Effective From date and Effective Thru date.
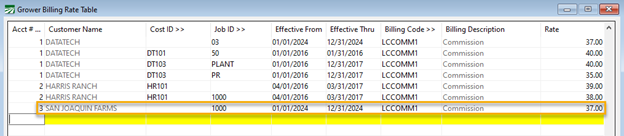
8. In the Billing Code column, press the [F4] key, select the LCCOMM1 code from the Billing Description Lookup, and click Ok.
9. Enter the commission Rate and then press enter to complete the line item.
Steps 4 – 9 will need to be repeated for any grower that has different commission rates for different jobs.
Note If the Effective dates or the Rate for a Job ID need to be updated, a new line item should be added to the Grower Billing Rate Table instead of editing an existing line item. This is a best practice since it allows historical information to be kept for reference, e.g. if a labor report needs to be run for a prior season.
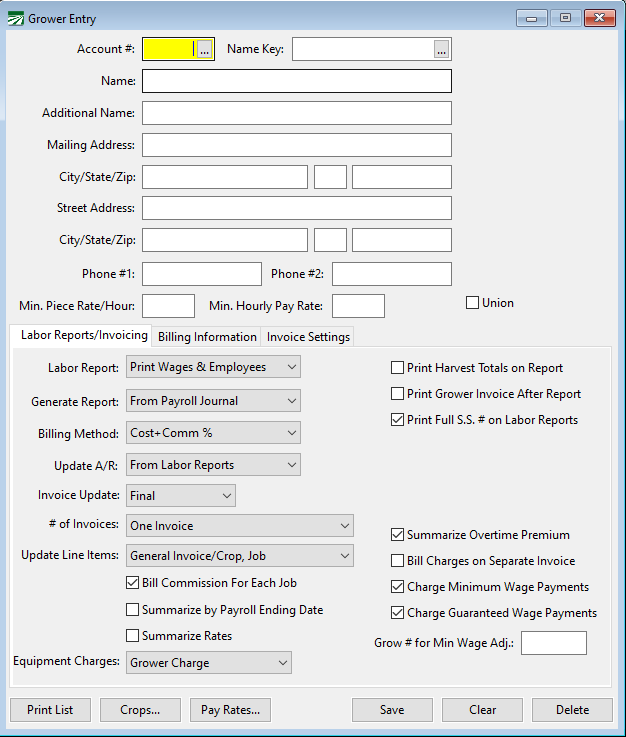
10. Go to Labor Reports > Grower Entry. Select the Grower Account #.
11. Under the Labor Reports/Invoicing tab, go to Update Line Items. Select the appropriate setting from the drop-down menu. This setting must include a Job (e.g. General Invoice/Crop, Job) so that the commission rate can be billed to the grower.
12. Click on the Billing Information tab. Under Billing Descriptions, type in the LCCOMM1 code. The % Rates does not need to be added since this has already been defined in the Grower Billing Rate Table.
Note You can also add a general commission rate if the grower has one.

13. Click Save.
The Billing Information tab page contains the rates and settings to use when the Cost+Commission or Fixed+Commission options are selected for the grower account:
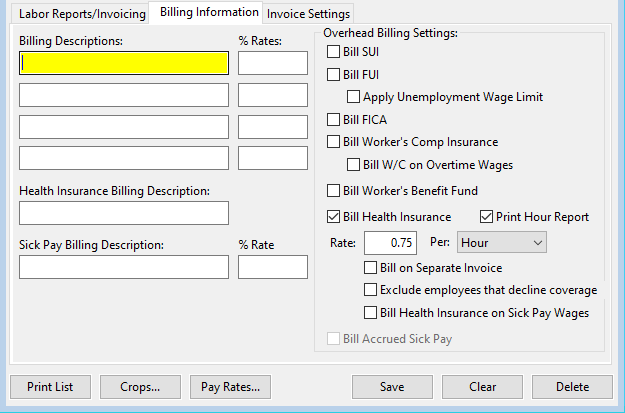
Billing Descriptions / % Rates
These entries are used when the Cost+Commission or Fixed+Commission options are selected for the grower account:
You can enter up to four different descriptions and percentage rates to be billed on the grower invoice. Each description and rate will appear on the invoice.
If you are using the Costs+Workers billing method, instead of a percentage enter the dollar amount per day to bill in the first rate entry, and the dollar amount per worker to bill in the second rate entry.
Health Insurance Billing Description
Enter the text that you want to appear on the line item that bills the grower for health insurance costs.
Sick Pay Billing Description / % Rate
Enter the description to use for billing sick pay amounts along with the commission rate that you want to charge for sick pay wages (whether accrued or paid).
Overhead Billing Settings
Selecting these boxes will result in the grower invoice billing SUI, FUI, FICA, and/or worker's comp insurance on the grower invoice as separate amounts. These items will be billed in addition to any billing descriptions and rates entered in the previous section.
If an FUI Credit Reduction rate applies to your state and you have the Bill FUI box selected, the program may bill the extra credit reduction rate to growers. This is controlled by a setting in the Program Setup window, Charge Credit Reduction Tax with FUI on FLC Invoices.
Apply Unemployment Wage Limit
Select this box to apply the state and federal wage limits to the unemployment taxes. Once employee YTD earnings are over the wage limits, the grower will not be billed for the unemployment taxes.
Bill Health Insurance
Costs for providing health insurance coverage to employees may be billed to the grower along with commission and other overhead items. Enter the Rate to bill health insurance for, and select whether the rate is billed Per: Day/Employee, Hour, or Regular Hours.
Print Hour Report
When you select this option, the Grower Labor Report will generate an additional report, the Health Insurance Billing Hours report, for each invoice posted to A/R.
Note For this report to print you must have the grower account’s ‘Update Line Item’ setting set to ‘General Invoice/Employee’.
The invoice number will be listed at the top of the report. A PDF copy of the report will be saved automatically.
The report will list each employee that worked, their health insurance status, and the number of hours worked by pay type (regular, overtime, double-time, piecework, overtime premium, double-time premium) and the number of billable hours for each employee, with totals at the bottom.
This report may be helpful in verifying that the correct amount of hours is billed for ACA insurance.
Rate / Per
The Rate setting determines how much Health Insurance will be billed.
The Per setting allows you to specify whether the health insurance billing will be based on the total of all hours worked (both straight hourly and piecework hours), regular hours worked (excluding both straight overtime and piecework overtime hours), or per employee/per day.
Note Currently, the Day/Employee selection only works for the General Invoice/Crop, Data option for updating line items. When Day/Employee is selected, the daily amount will be prorated between all cost centers an employee works for each day.
Bill on Separate Invoice
If this box is selected, the grower labor report will bill all health insurance overhead items on a separate invoice instead of including the charges with the overhead item(s) on the main invoice(s).
Exclude Employees That Decline Coverage
If this box is selected, then the program will exclude hours worked by employees that have declined coverage. As a result, fewer hours will be billed and you will likely need to bill a higher rate per hour (because the total costs of providing coverage will not change and you are billing the grower based on fewer hours).
Bill Health Insurance on Sick Pay Wages
By default, the program will not bill growers the per hour Health Insurance charge on Sick Pay Wages. By selecting this box, the program will include those hours when calculating the total hours to bill the health insurance charge.
Bill Accrued Sick Pay
Select this box to bill out the accrued sick pay. This option is only enabled when the Update Line Items option (on the Labor Reports/Invoicing Tab) is set to General Invoice/Employee or General Invoice/Crop, Date.
When that option is set to General Invoice/Employee, the program will bill sick pay as another line item on each invoice for each employee plus commission.
When that option is set to General Invoice/Crop, Date, the program will bill out a prorated share of accrued sick pay by Crop ID plus commission.
Invoice Settings
The Invoice Settings tab allows you to tell the program which AR divisions to use when creating invoices. These settings are normally used with the Labor Contractor Invoice option for the Update Line Items setting.
Enter the division number to use for labor, commission, and insurance in the following entries:
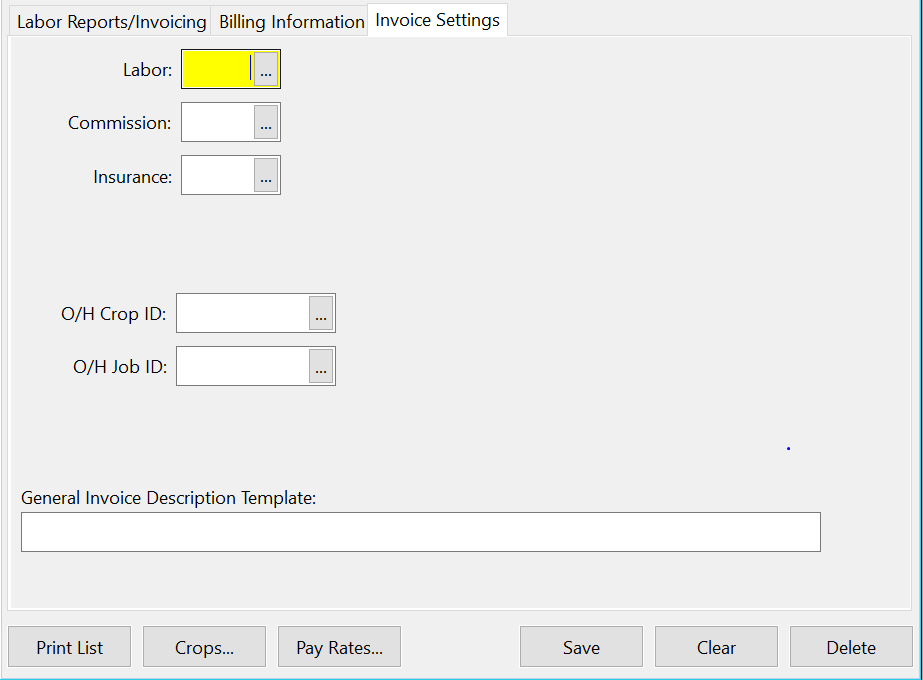
Labor
Press [F4] or click on the lookup buttons to select a division number from the lookup.
Commission / Health Insurance / W/C Insurance
In this entry, you can select a specific cost center and/or job code to use on the overhead (commission, tax, w/c, and health insurance) line items on the customer invoice. Press [F4] or click on the lookup button to make your selections.
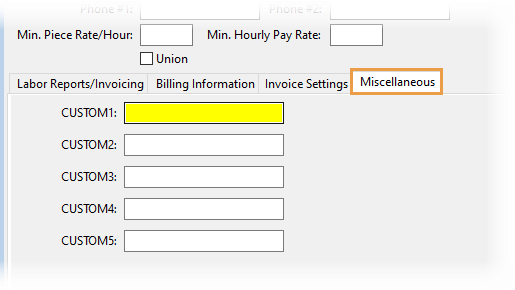
Custom
Entries under this tab can be used to store additional information about the grower, e.g., if they have different locations, phone numbers, etc.
The F11 and F12 keys can be used to make the following changes while under the Custom Tab.
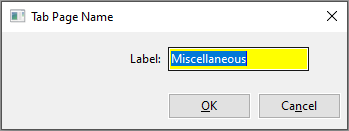
F11 - Press this key to rename the tab. For example, to change the name of the tab from Custom to Miscellaneous:
-
Press F11.
-
In the Tab Page Name window that opens, enter Miscellaneous in the Label entry.
-
Click Ok.
-
Close and reopen the program. When you open the Grower Entry window, you will see that the tab name has changed to Miscellaneous.
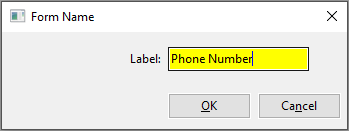
F12 - Press this key to rename the labels for the entries under this tab. For example, to change the CUSTOM1 entry to Phone Number:
-
Press F12 while in the CUSTOM1entry.
-
In the Form Name window that opens, enter Phone Number in the Label entry.
-
Click Ok.
-
The CUSTOM1 entry is immediately changed to Phone Number.

Print Grower Lists
Click on the Print List button at the bottom of the Grower entry window to print a list of your growers. The following window will open:
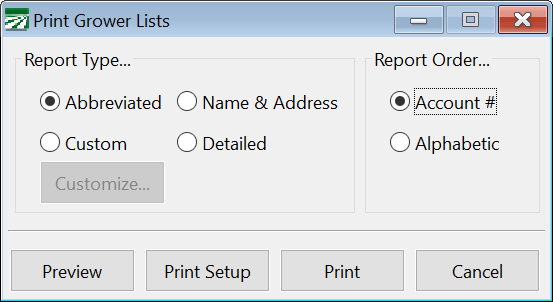
Select the order that you want to print the report in and the type of report. The Abbreviated report will print one line per grower with the account number, name key, grower name, and phone #1. The Name & Address option will add the address and phone #2. The Detailed option will add the commission billing rates to the report.
Click Print or Preview to run the report.
Support Information (add conditional text for support help target)
To copy grower accounts to the customer file, press F11 on the grower entry window.