Enter Orders
The Shipper Order Entry window is used to enter new orders, edit and ship existing orders, and print forms (such as the load sheet, passing, and bills of lading).
Go to Order Entry > Enter Orders.

Order #
You can assign your own order numbers, or the order number may be assigned automatically by the program. (To have the program automatically assign numbers, go to Tools > Program Setup > Receivables and select Automatically Number Invoices.)
If the automatic numbering is turned off, you must enter an order number here. If the program is set to automatically number orders, you can leave the Order # entry blank.
Account # / Name Key
Select the customer account for this order by entering either the account number or the name key. You can click on the lookup button  or press [F4] to select an account from the customer lookup.
On either the account # or name key entries, you may press [F12] to display the most recent order for a given customer. Simply enter the account number or name key and then press [F12]. The program will display a message if there is no open order for the customer you have entered.
Order Date
Enter the date the order was taken. This will automatically default to today’s date.
Ship Date
Enter the date the order was shipped or is scheduled to ship if the order has not been shipped yet. This will automatically default to today’s date.
If this date is in the future, you will receive the following warning:

If you entered the wrong date, you can simply click No and correct the date.
Note If you regularly enter orders two or more weeks in advance, this warning can be adjusted based on your needs.
Transaction Type
This entry will always appear as Order.
Consignment
After finishing the top section, additional information may be filled in or you can skip directly to the line item entry below by using the mouse to click on the line item grid.
There are four different tab pages where you can enter additional information for the order. As you finish the last entry on each tab page, the next tab page will be activated. Each page is covered in a separate section below.
Shortcut Keys are available to switch to each tab page:
-
Ctrl+E = Details
-
Ctrl+B = Bill of Lading
-
Ctrl+M = Misc Charges
-
Ctrl+R = Export
There are four different tab pages where you can enter additional information for the order. As you finish the last entry on each tab page, the next tab page will be activated.
Each page is covered in a separate section below along with topics you may find helpful.
Details
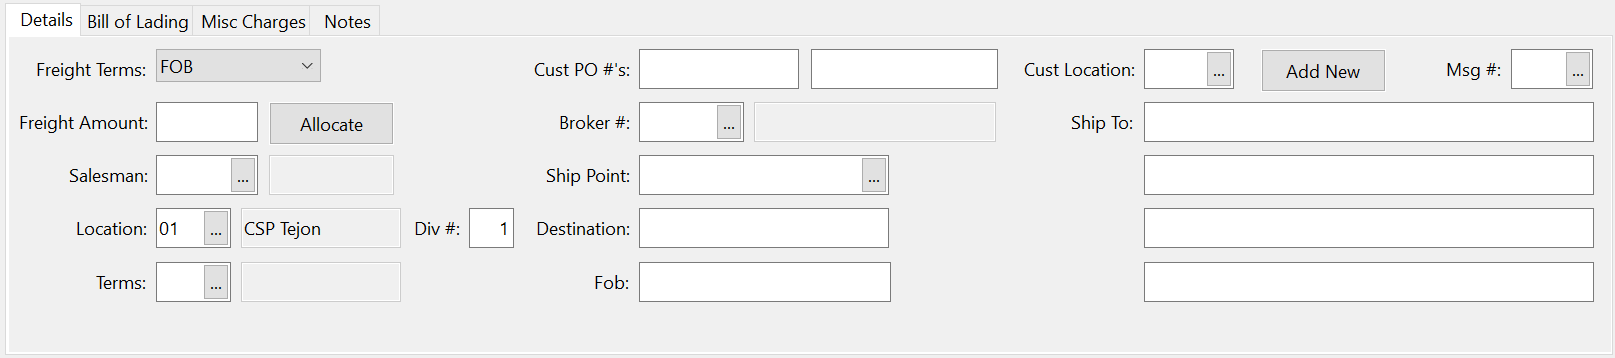
Freight Terms
Select either Collect or Prepaid for the freight terms.
Freight Amount/Allocate*
When you select Prepaid for the freight terms, you can enter the total freight amount here. As you enter the line items, you can enter the freight amount for each line (if you have already calculated what the amounts should be).
Or, you can skip the freight amount entry on each line item. Then when you have entered all line items, click on the Allocate button next to the Freight Amount entry. The program will calculate how much each line should have in freight based on the gross weights recorded in the product code file.
Note
Depending on your settings, this option may say Add Freight.
Salesman
Enter the salesman number here. The salesman name will appear to the right.
Important: If you would like your salesperson automatically assigned to orders when they are signed in as an operator, leave this field BLANK. For instruction on how to do this, see Setup, Salespeople.|topic=Salespeople
Division #
Enter the division number for this sale. By using divisions, you can group sales together and track total income by division. For instance, you might use different divisions for sales that are made from different locations. Sales for each location can be posted to different income accounts in the general ledger, which means your Profit or Loss reports can give you a breakdown of total income by location.
Terms
Most of the time, all customers have the same terms. If necessary, you can set up different terms (“Net 7 Days”, “Net 10 days”, etc.) and use different terms for different customers.
The program will default to the terms set up on the customer account. Or, if you only have one terms definition set up, the program will always use that terms entry.
Cust #
If the customer has a purchase order number, enter it here. This entry may be required if the “ # Required” box is checked on the customer’s account.
Broker #
If there is a broker for this order, enter the broker’s account number here (broker accounts are set up in the accounts payable vendor file). If a broker has been set up on the customer’s account, that broker will be entered as a default.
When a broker has been selected, the program will allow you to enter an amount for brokerage (per package) on each line item.
Ship Point
The shipping point (city and state) will be automatically entered for you. Change it if necessary. (The default value for the shipping point is set on the Order Entry page of the Shipper Program Setup option.) The shipping point is printed on the bill of lading.
Destination
The city and state from the customer file will be entered automatically for the destination. If you select a different ship to location, the destination entry will be changed to match the city and state of the ship to address. This entry will appear on the Load Sheet.
Customer Location
Each customer account has a default customer location of 1, which is “SAME”. If you have entered different ship to address for the customer account, you can enter the ship to location number here, or click on the lookup button or press [F4] to get a list of shipping locations to choose from.
Bill of Lading
The second tab page contains entries for information that is printed on the Bill of Lading.

Truck
Enter the truck name here.
Truck License/St
Enter the license # and state of the truck.
Truck Broker #
If there is a truck broker, enter the account number here. Truck brokers are set up in the accounts payable vendor file.
Temp From … To
Enter the minimum and maximum temperatures for shipping. Defaults will appear automatically (default values are entered on the Order Entry tab on the Shipper Setup Window).
Ordered By
Enter the name of the person that placed the order.
Drop Off Instructions
There are two lines for entering drop off instructions. These instructions will appear on the Load Sheet as well as the bill of lading.
If you enter a backslash “\” first, the instructions will print on the Load Sheet but not on the bill of lading.
Special Instructions
There are three lines for entering additional special instructions. These instructions will appear on the Load Sheet as well as the bill of lading.
If you enter a backslash “\” first, the instructions will print on the Load Sheet but not on the bill of lading.
Driver Name
This is an optional entry. The driver name is printed on some custom bill of lading formats.
Driver Phone
This is an optional entry for the driver’s cell phone number. This is printed on certain bill of lading formats.
Trailer License/St
Enter the trailer license and state.
# of Pallets, CHEP, Regular
If you are using CHEP pallets, you can enter the number of CHEP pallets on this order here. It will print on the CHEP Pallet Shipment Report (for reporting to CHEP). If you are using the pallet tag inventory system and have defined a CHEP pallet code, then the number of CHEP pallets should be entered for you automatically after you have scanned the pallet tags.
Seal #
This is an optional entry that will print on certain custom bill of lading formats.
RPC’s
Click here for the Set up RPC’s and Track & Report RPC Usage Help topics.|topic=Setup RPC's
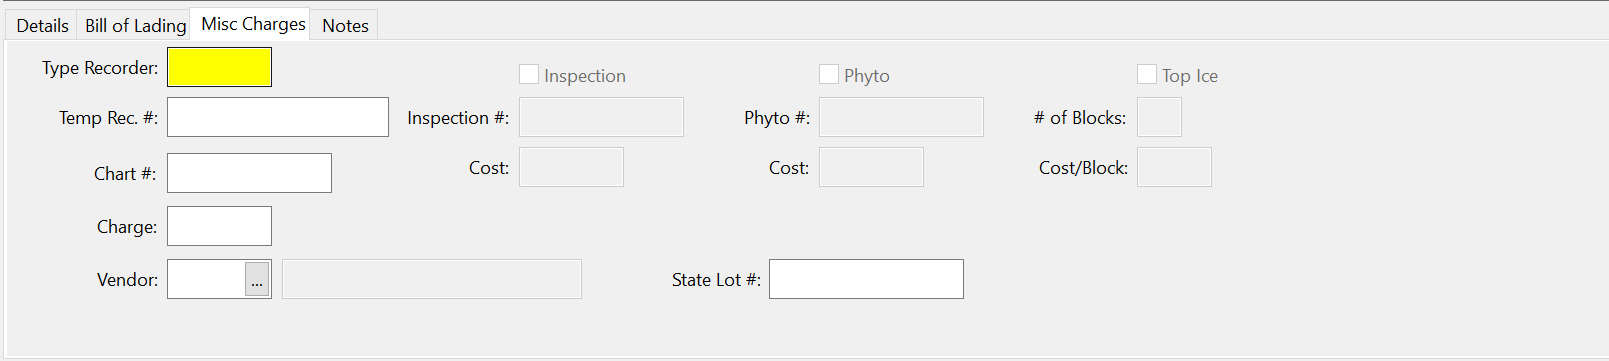
Misc Charges
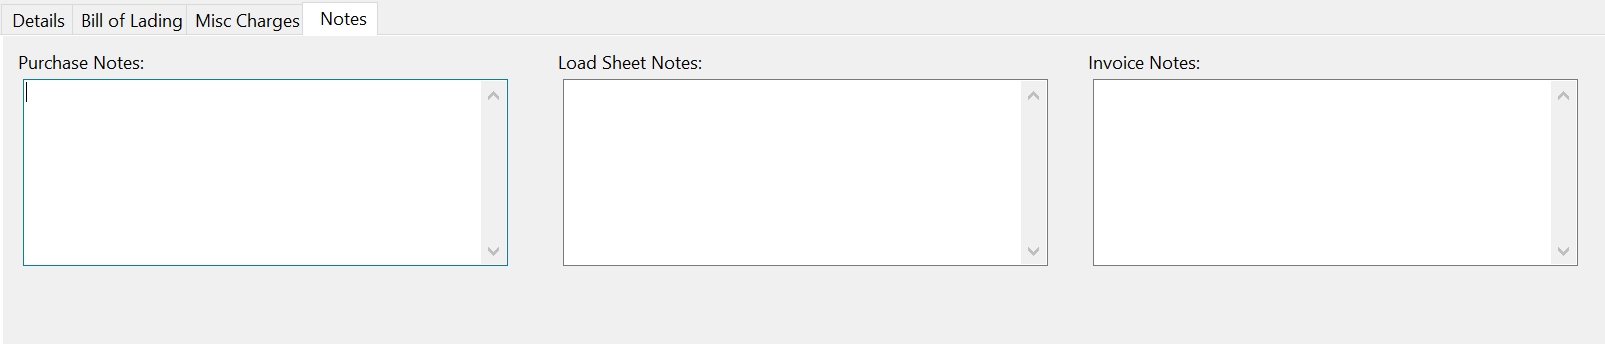
Notes
Export
The Export tab page contains entries for additional information that is required for export orders.
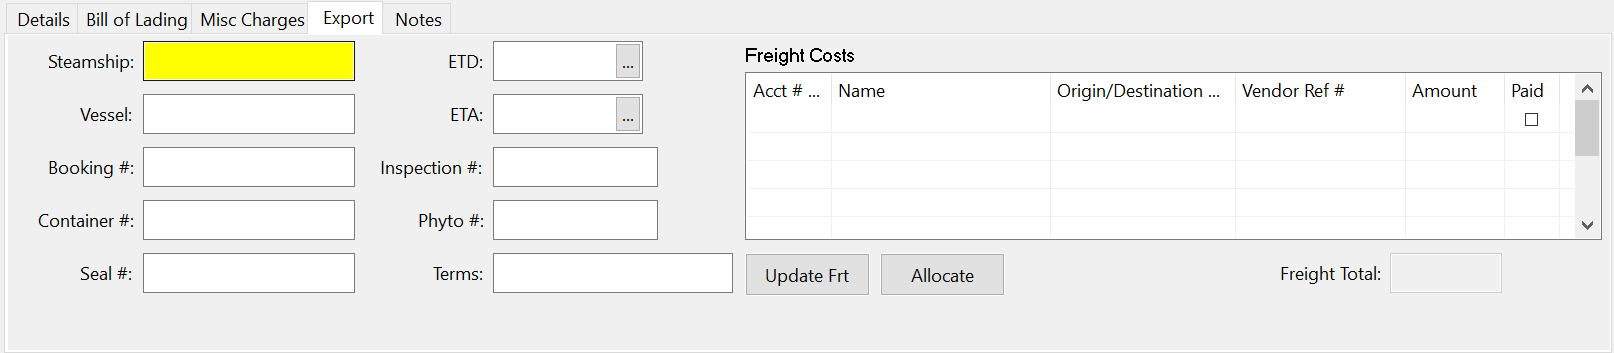
Steamship
Enter the name of the shipping line.
Vessel
Enter the vessel name.
Booking #
Enter the booking number.
Container #
Enter the container #.
Seal #
Enter the seal #.
ETD
Enter the estimated date of departure.
ETA
Enter the estimated date of arrival.
Inspection #
Enter the inspection number.
Terms
Enter the Export terms.
Freight Costs
Freight for produce that is exported may include several freight bills, to different companies. For instance, there may be freight to the port, ocean freight, and freight forwarding charges. For this reason, when the Export tab is enabled in the order entry and invoicing screens, another freight option is enabled. The freight information can be entered in a table, so that multiple entries can be made.
Warning Although this freight entry method was designed for export, it may be used for the entry of multiple freight bills for domestic shipments. However, a word of caution: If you turn on the Export tab to use the freight entry table, you must use this entry method for all freight bills.
To enter freight bills using the table on the Export Tab, navigate into the entry table, then make the following entries:
Account #
Enter the vendor account # for the truck broker or other vendor that will be paid.
Origin/Destination
This entry is used to enter the destination of the load, and is used to get a freight rate from the freight rate table. If you are not using the freight rate table (see instructions that follow), just skip the entry.
Vendor Reference #
Enter the vendor’s reference # for this load.
Amount
Enter the total amount of the freight bill payable to this vendor. When you depress [Enter], the freight bill entry will be saved.
After you have entered all freight bills, and the quantities shipped are finalized, you can click on the Allocate button to apply the total freight to the line items on the order. This can be done from the Export tab on the Order Entry screen, or the same tab on the Invoice Entry screen, but must be done before the invoice is finalized.
Freight bills that are entered from the export tab can be processed in accounts payable using either the Freight Invoice Entry screen or the batch update option on the Freight Reports window.
Printing
When you click Print, a popup menu will appear with the available printing options. The Print Setup button can be used to select which printer Load Sheets and Passings will print on. Bills of Lading will automatically print to the printer assigned in the Shipper Setup option.
Print Pop-up Menu:
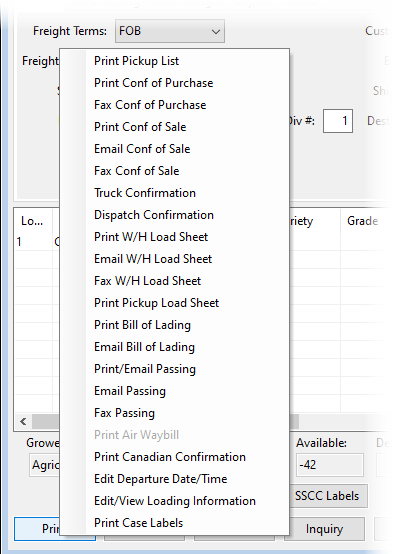
Load Sheet
The load sheet can be printed, emailed for faxed for your loading department to fill an order.
Bill of Lading
The bill of lading can be emailed or printed on either blank paper or on pre-printed forms on a laser printer. On the Shipper Program Setup window, you can specify what type of bill of lading you are using.
Tip If you need to add the California TRU compliance message to your bill of lading, see topic: Messages.
Passing (Notification of Shipment), Conf of Sale
Both the passing and confirmation of sale can be printed, emailed or faxed to your customer. The passing will show what was shipped, where it was shipped, and when it shipped.
Note When emailing the passing or confirmation of sale, the customer's purchase order number will be included in the subject line.
Canadian Confirmation
For exports to , the standard Canadian Confirmation form may be printed. This is currently only printed on dot matrix printers.
Canceling an Order
An order which has not been shipped can be deleted. With the order displayed on the Order Entry window, click on the Delete button in the bottom right corner of the window.
Once an order has been shipped, it cannot be deleted through the Order Entry window. Instead, bring the shipped order up in the Invoice Entry window and delete it from there.
Correcting the Customer Account
If you have entered the wrong customer account for an order, bring the order up on the Order Entry window and select a different customer account, then save the order.
Clone Order
If you often have repeat orders or invoices, you can enable the Clone Order custom option to duplicate an order or invoice you have entered. You must enable this feature in any user account that will be using it. See Topic: Clone Order.